![]()
Apparel Design
by Phyllis Mollet Carlyle
using Pattern Master Software
![]()
Apparel Design
by Phyllis Mollet Carlyle
using Pattern Master Software
Why this website?
Phyllis Carlyle has been sewing since about third grade, learning from her mom and other adults in the neighborhood, 4-H, and various sewing classes. She followed her love in college, earning a B.S. and M.S. in Textiles and Apparel with a minor in design and adult education from the University of Missouri. For the next decade, she worked in fabrics and notions wholesaling, then part time as an adult and college instructor, and part time at a fabric store where she helped brides with their gowns and veils or custom made them in her own bridal sewing business. Returning to full time employment, she worked as a designer for an animated display company. Picture clowns, Santas and Easter bunnies waving at you! She also worked as a patternmaker for a children's dress manufacturer, and product manager/designer for a lamp manufacturer.
A declining garment industry in Kansas City and the experience of being laid off from three ailing manufacturers in four years led Phyllis to a career change path. Back to college in the mid 90's to earn degrees in data processing and marketing, she currently works in marketing communication, where she uses her sense of design creating ads, signs, flyers, and catalogs.
So now her vocation is project management, copywriting and graphic design, and her avocation is designing and sewing for self and others. This website combines both. Phyllis discovered Pattern Master Boutique at the American Sewing Guild convention in 2002, and has barely used a commercial pattern since. The intention of this web site is to share experiences and help others in their path of discovery, to show that even a trained patternmaker and experienced sewist has challenges to overcome. Some description of the pattern drafting is included, along with comments about the sewing process. Enjoy!
© 2002-2010 by Phyllis Carlyle
|
Ever since I mentioned I knew an efficient way to make welt pockets and bound buttonholes using graph paper, my sewing friends have been asking me for the directions. Here, with some help from my son with the fancy cameras, I have created an illustrated guide to making Precision Bound Buttonholes and Welt Pockets Using Graph Paper. (Three page PDF file, 1.3MB) If you find this useful or share it with others, please PayPal a few dollars to dpkrc@kc.rr.com or mail to Phyllis Carlyle, 1326 Amesbury, Liberty, MO 64068. Thanks! |
||
My Notes
Tweaking the Shoulders- Spring 2005
What is a Sloper- 2004
Dress Form Comments- 2004
Beta Pants Experiences- January 2005
Advice when transitioning from PMB Version 3 to Version 4- Winter 2008
Other
American Sewing Expo, Novi, Michigan- October 2006
Sewing & Stitchery Expo, Puyallup, WA, Feb 25-March 1, 2009 (Seattle area)
|
|
I took many clothes over to my son's studio so he can test his lighting and technique. Shameless plug: if you need photographs taken in the Kansas City area, visit his website at www.blazingcirclephotography.com. |
|||
|
|
||||
| Raspberry knit top with pearl neckline, PMB 5, 10-10 | ||||
|
A friend of mine has a very cute top with a scoop-neck band shirred with large pearls. I decided to combine this idea with the version 5 new pleated neckline draft, using some 12mm pearls I don't remember buying. For the neckline, I cut and sewed a facing to match the pleated front instead of the unpleated facing. To sew in the pearls, I marked on the back dots 3/4" apart (half the diameter of the pearls) with a 1/2" gap between each. After sewing the pearls once I adjusted the neckline to match the unpleated front facing. Having some difficulty holding the pleats uniform even after I knotted each on the second pass through, I came up with the idea of sewing smaller beads between each pleat on the back, making them more rounded and uniform. For variety, the gored flared sleeve was my choice. The seams told me they needed some enhancement so I stitched a decorative stitch over the seamline. |
|||
|
|
||||
| Striped knit top with hook and eye tape, PMB 5, 9-10 | ||||
|
|
Lisa asked me if I would help beta test Pattern Master Boutique 5. As part of my testing, I made this top to test various steps in using the software. The decision to use the hook and eye tape purchased from Vogue Fabrics influenced the design choices. Because I didn't have a very long piece of tape, I decided an empire draft would allow me to anchor the bottom of the tape in a seamline. The new Jewel V neckline became a must have design detail, and I completed it with long tapered set in sleeves. I thought about putting a bit of hook and eye tape into a wrist opening, but decided to just topstitch it onto the bottom of the sleeves. The latest edition of PMB has straighter waistlines. I used this to advantage and matched the front so you canít really see the underbust seamline. To keep the bottom edge straight and the stripes as uninterrupted as possible, I used an armhole dart instead of putting the bust fullness into the underbust seam like I originally intended. I'm wearing this over a red tank top. This first garment in version 5 drafted and sewed up fine. Well, I did have some challenges in creating and printing, but that's because I was working ahead of Lisa, who graciously accepted and fixed all the issues I noticed. Oh yes, after I made this top I used the scraps to make a long-sleeved onesie for my new grandson!!!! (This is the same fabric that my mom wears below. We should get a cute photo when the grandson grows into his top.) |
||
|
|
||||
| Blue knit top with handknit yoke, PMB 4, 8-10 | ||||
|
|
My son joined the art fair circuit this summer, where I ran into a friend from my weaving days. She was selling hand-dyed yarn, and after I fondled this dip-dyed rayon the whole time I chatted with her, I decided I should purchase it. First I knitted a triangular scarf. I liked the scarf, but decided it wasnít a shape I would wear much. In the meantime, I discovered I had some double knit stretch fabric that matched the yarn perfectly! So I decided to knit a circular yoke for a top. I designed the knitted yoke after knitting a gauge swatch and using math to determine that increasing 12 times every other row would give me the circumferences needed. For the top, I drafted a raglan sleeved blouse with three-quarter sleeves. Then I combined it with a neckline princess torso because I wanted all the seams to converge at the neck. However, you can't really tell this design because most of it got cut away after I sewed on the yoke. For a finishing touch, I crocheted and edging for the sleeves to match the edging on the yoke. The yoke and sleeve edging were sewn by hand to the fabric, and I the case of the yoke, the excess cut away from behind. |
||
|
|
||||
| Aqua knit duo with neck ruffle, PMB 4, 8-10 | ||||
|
Wichita, Kansas is the home of one of the best knit fabric stores in the country, Needle Nook. Wichita is also a four hour drive from Kansas City. So occasionally, some sewing friends join together for a day trip to visit Anne St. Clair's store for dressy and sporty knit fabric plus anything you would ever need to make bras and lingerie. Five of us took the trek in early August where I bought many yards for myself and future grandson. I took a liking to this minty knit with metallic stripes. To make it as a sweater set, I selected the solid aqua knit to wear under. I drafted a simple V-neck cardigan for the striped fabric. Realizing the under fabric selected for color for the sleeveless top was too thin, I decided to double it. By using the figure-flattering empire draft I was able to put a fold along the hem, finish the top neckline and armholes with self lining, then sew both sections together at the underbust seam. I also modified the underbust seam in Pattern Editor to bring the seam up to a point at the center front. I knew I wanted to put ruffles on this outfit because every other top has ruffles or neckline interest these days. After testing several ideas, I cut vertical strips of the knit, overlapped the edges a bit at center back, pressed, then sewed two rows of gathering thread to hold the cut edges in place. After stitching this to the neckline, I added a self fabric tie for a closure. |
|||
|
|
||||
| Ruffle front blouse, PMB 4, 6-10 | ||||
|
|
Rayon batiks are a favorite of mine, and this print from the former Eunice Farmer Fabrics store in St. Louis is no exception. For design ideas, I looked at ruffled blouses on the Internet. I found the effect I desired on a sleeveless blouse from Nordstrom. For this style, I drafted a blouse with an armhole princess front and darted back, plus set in sleeves. The neckline is the surplice, buttoned as a double-breasted style. For the ruffle, I cut an approximate shape of a tapered spiral in pattern tracing nonwoven. After holding it up and pinning in some tucks, I refined the snail shape and redrew onto the nonwoven. I held it up, then cut the pattern in a longer length, to make sure it would match or be longer than the diagonal front sleeve. The straight edge at the top is the selvedge, and I serged a rolled edge the outer edge so the ruffle shows the same on both sides. The ruffle is sewn into the front right neckline seam only, and buttons and buttonholes underneath the ruffle and along the front edges make this a very securely closing surplice blouse. |
||
|
|
||||
| Starburst print top with inset neckline, PMB 4, 5-10 | ||||
|
This printed cotton interlock inspired me to create a top with an inset white band at the scooped neckline. I wanted fullness gathered into a neck band, but instead of gathering I used double needle pin tucks to take in most of the fullness. I also stitched some pin tucks in the waist-dart area to add more shaping. I added the pin tuck markings by hand after the pattern was printed. The neckband is a Pattern Editor project. Draw a line for the inset seam by the neckline, then cut where the line intersects the CF and shoulder. Move the inset away, and copy the curved line and move to the blouse. I made 1/4" seam allowances here, after rotating the side dart to the neckline of the torso pieces to get the fullness for the pin tucks. The inset features appliqued motifs, free motion embroidery and a few built in stitches. |
|||
|
|
||||
| Bias gingham plaid shirt, PMB 4, 4-10 | ||||
|
We were invited to go to the Missouri-Colorado football game in Boulder, Colorado last fall. Not being particularly fond of football or cold weather, I opted to shop. I spent a pleasant few hours in Elfreides's Fine Fabrics and this is one of the lovely fabrics I purchased there, a very nice pima cotton yarn-dyed shirting. (I also got involved with another customer who was making her daughter's wedding dress, and the owner asked me if I wanted to work there!) This is a simple blouse with yoke, but I created interest by cutting the body and sleeves on the bias. The sleeves which are finished with a narrow band of self-fabric, have mock flat felled seams so I can roll them to 3/4 length. The front only buttons as far as the body of the shirt, and I trimmed and sewed the yoke and collar to just meet at the center. |
|||
|
|
||||
| Herringbone suit with contrast bands, PMB 4, 3-10 | ||||
|
|
A few years ago I bought some lovely suitings at HR Harris in Minneapolis. This is a navy and gray herringbone of undermined fiber content, perfect for edging with a band of color like a jacket I saw while shopping one day. I had some navy twill that would coordinate perfectly, and someday will make a pantsuit from it for mixing and matching... The draft is an armhole princess with shawl collar and darted sleeves. I created the bands in Pattern Editor, using the offset tool to mark 3/4" in, then cut, copied and refined the cut edge before adding back 1/4" seam allowances. See pattern. I lined this jacket by cutting extra at the back for a center pleat plus using the sleeve, side front and side back pieces for the lining. The pants are basic slim leg slacks with an elastic back waist and slant pockets. The buttonholes are created from slits in the seam between the suit and the contrast band. |
||
|
|
||||
| 1950s costume, not PMB, February 2010 |
|
|
Not a single PMB keystroke was made in constructing this outfit, but I'm including it because a number of sewing list members wanted to see it. We decided to attend a 1950s-themed fundraiser for a community theater. Naturally I was intrigued me by the costume contest, so I set out to make a 50s outfit without spending any money. After looking at 50s styles on the Internet, I started with a 50s-look sweater. I wanted a crinoline and remembered I had a stiff net ruffle from a bridal petticoat in the basement waiting for a project like this. Once I gathered it and sewed it to a slip, it was perfect! Next, I needed a full skirt. A three-yard cut of silk plaid duppioni went great with the sweater, and wouldn't weigh down the crinoline. So I basted the ends together and basted a tucked hem and casing for elastic, because I still want to make a shirt from the fabric someday. The black belt and shoes came from my closet, and I borrowed some family pearls from my daughter-in-law and gloves from my mom. I also made an empty 50s-style watch from vintage parts I found at the watch parts and tools supplier where I work. Then I had to have a 50s cocktail hat. I nearly bought one on ebay, but the bid got too high. Digging through my personal resource center (stash) I found some black net collars with soutache embroidery. Not only did one become the base of my hat, but I decided two added to the sweater was a nice touch! To make the hat, I attached the collar lace to two shortened headbands, and added a flat grosgrain bow on top of some navy hat netting I took off an old hat. The final accessory is the vintage glasses frames I borrowed from my eye doctor. For my husband, I thought about doing a suit and narrow tie, but couldn't find the fedora-type hat he bought one time. I did find my dad's Air Force hat from World War II, and knew I had some of his pins. So I sewed epaulettes to a white shirt and added the pins, plus made a tie narrower. Photo from event We did not win the contest, but we enjoyed dressing the part, and I had a blast challenging myself to make our costumes at no cost plus resurrecting some of my bridal sewing skills.
|
|
|
|
||||
| Navy velour top, PMB, January 2010 | ||||
|
|
Needing a quick sewing project, I pulled out this navy sculptured velour from a trip a few years ago to SR Harris in Minneapolis. The tab at the front neckline was inspired by a catalog photo, but decided to use some metallic/navy grosgrain ribbon there and at the side vents. I also used the shirred sleeve, which doesn't show up very well in the photograph, but is a cute choice when you have about a quarter yard extra drapey knit fabric. For shaping, I used an armhole dart in the basic blouse. |
||
|
|
||||
| Striped cardigan top for my Mom, PMB, January 2010 | ||||
|
|
Having measured my mom for a Christmas gift, it was an easy decision to make her a birthday top out of some fabric she admired in my studio. I only had a yard, so I designed a cardigan with deep V-neckline to show the embroidery on the purchased sweater, and turned the sleeve pattern upside down on the fortunately even stripe. I finished the folded edges with twin-needle topstitching. (About that time, I found more of this fabric at a different store, so I'll make a top for myself later.) Mom is fairly straight up and down, so I drafted the cardigan in a dartless blouse with set-in sleeves. |
||
|
|
||||
| Gray striped vest and slacks, PMB, November 2009 | ||||
|
|
During a week in Maine last summer, we took a side trip to Fredericton, New Brunswick. There I found a fabulous Canadian fabric chain called Fabricville. They were having a sale where you received two meters free when you bought one. So I ended up with 3.25 yards of this striped fabric--enough to make a vest and slacks. At the time I was drafting contour waist pants for my daughter-in-law, and I decided to try some myself. The first effort was not what I intended, looking too much like a straight waistband. After a query to the Wild Ginger forum, I followed the advice to cut out the top of the pants pattern, fold in the darts, and use a 1.5" strip of that for my waistband. Here is a photo of the first and revised waistband plus the pattern that looks very curved but does fit! Waistband examples One mistake I made with these pants was I selected a slim leg setting that is too small. I used a .5 knee setting and that "shows off" my pear shape too much. I drafted the weskit vest with princess lines and a lapel collar. Because it's challenging to figure out the settings for the lapel collar the first time you make it, here are the settings for this collar. Instead of hemming the back with a 2" hem allowance, I lined it and left it longer than the front. I also drafted a cap sleeve but decided to finish the armhole sleeveless with the lining. |
||
|
|
||||
| Red print blouse with soft fit and lapel collar, PMB 11-09 | ||||
|
After I made the gray striped slacks and vest, I found a red print poly blouse weight from Joann in my resource center (stash) that had very compatible colors. I drafted a long sleeved blouse with cuffs and a lapel collar to match the vest. For the front shaping, I selected a waist dart. Then I used Pattern Editor to drop the front shoulder, and rotated about half of the waist dart to the dropped shoulder. This semi-fitted soft blouse look is very flattering to my curvy shape. |
|||
|
|
||||
| Batik Swing jacket with bead detail PMB 10-09 | ||||
|
This fabric from Fabric.com was originally going to be a basic blouse, but I kept coming back to this catalog photo. I purchased a pattern from Safe-t-Pockets I thought would work, but it required more fabric than I had. I found more of the print online, but when it arrived it was obvious that it was too different in colors and dye splotches to work together. So I ended up drafting a blouse with waist darts, but extended the front edges with straight lines to form the draping triangular edges. However, that was too much fullness for me, so I pinned and sewed in part of the waist darts and smoothed the bottom edge. The sleeves and bottom edges are serged with a rolled edge. Instead of random beads and sequins on the band, I ended up creating my own trim by crocheting the size 6 dichroic glass beads onto pearl cotton. This gave the beads depth and wonderful spacing as shown in this photo. I hand sewed the resulting trim in place, leaving a few simply strung beads loose to swing at the ends. |
|||
|
|
||||
| Hand knit sweater from three space dyed yarns, Wild Stitches, 2008 | ||||
|
|
Lisa Shanley, designer of Wild Ginger software, put out a request for PMB users to test a new knitting pattern program. Since I know patternmaking, PMB, and do some knitting, I volunteered. The software later helped me create this sweater. I admired a sweater on the wall at a yarn store, but the pattern for it was short and boxy. I"ve NEVER been short and boxy, but I loved the corners knitted into the style. So I drafted knitting instructions from both the bottom and side, and combined those with the pattern directions to get the effect to fit ME! Wild Stitches uses a similar method to make patterns as PMB, but then it creates a "report" that gives row-by-row knitting instructions. It's pretty cool. The yarn came in large loose skeins, and I bought three versions of an eggplant colorway: one yarn was very soft rayon with a thread of gold, one was soft rayon twisted, and a thicker one was slubbed cotton/rayon. To make the yarn weights match better (and knit with larger needles) I knit 5/2 pearl cotton along with the thinner yarns only, using teal, burgundy or navy at random. At the back, I started knitting the outer edges toward the center, joined with hand stitching up the middle. Then I knit simultaneously knit the fronts from the outer edges in, and then the raglan sleeves simultaneously. I wanted the fronts and sleeves to be similar, but made no effort to match the stripes at the armhole. The knitting pattern is stockinet with random color changes and random rows of knit for texture. I finished the sweater with a knit and crocheted band and collar, and used grape bundles made from beads for the buttons and matching earrings. The yarn and beaded grapes came from a store in Parkville, Missouri called Florilegium. This is a MUST VISIT store for knitters, sewists and fiber artists. Gretchen stocks the most wonderful yarns, trims, and textile-related antiques in many fabulous antique fixtures. |
||
|
|
||||
| "Maple-leaf Batik Top and Tie Bolero, PMB & Curves 10-09 | ||||
|
|
One nice thing about hitting a sale at a fabric store is you end up with enough fabric to get creative. I purchased 3 meters for the price of one of this cotton jersey knit at Fabricville in New Brunswick, Canada, which allowed me to make more than a typical knit top. First, I made a short sleeved top with an empire waist that I drafted in Curves. The bust darts are shirred to the skirt. Next, I designed a long-sleeved bolero top to tie over it for more year-round wearing. I drafted the Wild Ginger tie front top, and made it in half size to test because I wanted the ties to be more horizontal. Here is the starting and the final pattern. To finish the edges, I turned them under about a quarter inch and used clear thread to stitch a hem stitch of one zig zag and several straights along the edge to create small scallops. Being thin cotton jersey, it needs to be ironed before wearing to get the wrinkles out and flatten the rolling edges, but otherwise this combo is a success. |
||
|
|
||||
| Royal blue gabardine pantsuit, PMB 8-09 | ||||
|
Royal blue is one of my basic colors, so when I saw this nice rayon/poly blend gabardine at Hancock's, I bought some. I drafted a shoulder princess jacket with set in sleeves. The band of white down the front is a lovely narrow embroidered ribbon from Florilegium in Parkville, Mo. The slacks are my basic slim leg, elastic back pants. |
|||
|
|
||||
| Batik blue blouse with lapel collar, PMB 9-09 | ||||
|
|
This fabric grabbed me from the quilting fabric section of Hancock's one day. However, there's not a whole lot you can make to wear with quilting cotton, except casual slacks or a basic tailored blouse. I reused the notched collar pattern with front waist dart and shoulder pleat that I used in the red bandana print blouse made May 2009, but cut the sleeves three-quarter length. The selvedge was so nice I did not hem the sleeves, and I sewed the sleeve underarm with a flat felled seam so I could roll them up. |
||
|
|
||||
| Rose Knit lace cardigan set for my Mom, PMB 12-09 | ||||
|
|
My mother and I have similar coloring and like many of the same fabrics. She really liked the rose lace top I made this fall, and I had enough fabric to make her a top, too. It helps that a couple of years ago she moved to a retirement center in the town I where I live, so we see her more than when she was 170 miles away. So I measured her and made the sample garments, having pretty good success with just a little help from Karen at support@wildginger.com. The back pattern bodice looked "different" to me, because Mom has the typical "older shape", but it worked great. Mom wanted a cardigan, so I drafted a basic V-neck with front opening and long sleeves, and finished the edges with the lace folded into crosswise strips. For the under layer, I made a crew-neck top of the solid knit, also finished with strips of the knit lace and a rose appliqued at the top front to peek out from the V-Neck. She tried it on once while I was making it, but didn't see the final outfit until she opened her Christmas gifts. In this photo, I'm wearing a purchased long sleeved pink top under my version, instead of the sleeveless tank shown below. |
||
|
|
||||
| Rose knit "lace" top, PMB, 6/09 | ||||
|
|
A couple of summers ago, we routed a trip to Minnesota through northwest Minneapolis so I could visit SR Harris between the lakes and the cousins. That is some store! It was more like a warehouse than I expected, but there were lots of rewards for fabric treasure hunters. One of my finds was this rose colored knit lace, and I bought the pink lycra for the under-layer at the same time. I used the classic blouse draft with the dart at the shoulder. In Pattern Editor, I transferred an inch of front bodice to the back at the shoulder seams, and smoothed out the dart to be pleated. I designed the pleats as I pinned them into place. The sleeves are the fit and flare but I put the two pattern pieces together and drew smooth curves to connect them, because I didn't want a seam in the lace. To finish the neck and sleeve hems, I cut strips of fabric and sewed them on like ribbing, except I didn't stretch or ease the sleeve bands. The tank underneath is the same as below. I may make or buy a long sleeved top later to wear under this in colder weather. |
||
|
|
||||
| Pink print blouse with shirred waist, PMB, 6/09 | ||||
|
|
The print fabric was purchased this spring in Seattle, the knit underneath two years ago in Minneapolis. Sometimes one gets lucky! I really liked the top in this photo, but not the colors. I drafted an empire top with bell sleeves in Boutique, but converted the waist darts into pleats and added a few more inches of fullness to the "skirt". For the bodice, I sliced off the center front edges and adjusted the mandarin collar to fit the open V neckline, plus made a front band. I also made sleeve bands. To shirr the midriff, I marked lines an inch apart on the inside, then zigzagged over 1/8" flat elastic measured to match my waist. I knew this fabric was crisper than the RTW blouse, so did not add much fullness to the body and sleeves. I think it would look even better with a little more fullness in a softer fabric. For the pink lycra tank underneath, I drafted an empire top in Boutique, because I wanted a nice close fit. Before I sewed the top, I basted the front bodice to some computer paper and stenciled some flowers on it. (Pattern) However, they barely show. The edges are finished with clear elastic zigzagged to the wrong side, pressed, and topstitched with a double needle. The stitching channeled a bit, but it doesn't matter as this tank top will always be worn under an overblouse. |
||
|
|
||||
| Rayon knit top "copied" from bought top, Curves, 6/09 | ||||
|
|
One thing about losing weight is that you sometimes need smaller clothes faster than you can make them. This spring I spent some time in the local department stores looking for jeans and basic slacks plus some tops. My favorite top purchased was this Liz & Me soft knit top with a draped front and three-quarter length sleeves. I like it so much, I decided to copy it. The design is an empire top with a separate, doubled piece creating the front edge and gathered fronts. I drafted a polo shirt with empire lines and set in sleeves. In Pattern Editor, I combined the two back pieces into one, as I didn't need the back seamline. I merged in the bodice front pattern from the Pajamas Trial Crossover top from 8/05, and rotated part of the dart on the front bodice to the shoulder, and most of the rest towards the center front. Then I cut and moved the front inset apart, and smoothed the lines. The next step was to slash and spread the front inset, and mirror it for the facing of the pleated inset. (Pattern) After I printed and cut out the pattern, I held it up to me and decided it needed to be shorter, so I folded about an inch of length out. To sew the top, I folded the insets wrong sides together, and sewed them to the fronts. Then I pinned in the pleats and sewed the shoulder seams, plus overlapped and sewed the bodices to the front skirt. The back neckline is finished with a facing that was folded wrong side over the inset before sewing, then folded to the inside to encase the edges. For the sleeves, I stretched and stitched over a piece of clear elastic that was about 3/4 of the length to create shirring on the top and underneath the arm. |
||
|
|
||||
| Batik blouse with empire front and piping and slim leg slacks, PMB, 6/09 | ||||
|
|
The batik fabric was bought online, and the solid blue embroidered rayon blend at a Singer sewing store in Houma, Louisiana. (I had never heard of Houma until my younger son moved there last summer.) The amazing thing about this fabric store was most of the fabrics were polyester. In humid Houma. I was dismayed but kept looking, and found this embroidered rayon blend on sale. It was going to be a top, but when I saw how perfect the color went with the batik, I decided it would be cute as slacks. And it is. I selected the empire draft for the blouse because I'm bored with plain blouses and I've discovered the empire is flattering on me. The pants fabric made great piping for the neckline and front, but stiffened up the bell sleeve more that I would have preferred. But it is not too full to look silly, so I decided not to change it. |
||
|
|
||||
| Top shirred to neck yoke and cropped pants plus coordinating blouse and pants, PMB, 6/09 | ||||
|
|
I seem to be into scooped necks these days. They are in style right now, and gathering onto a band takes over for those "pesky" darts. These two fabrics came from my shopping trip to SR Harris in Minneapolis in 2007. Interestingly enough, the check is the same fabric as the tunic fabric ordered online and made in May of 2008 but a different color. (And I didn't melt it this time.) My challenge in making these outfits was I only had 2 yards of the check and 2.5 yards of the solid, but I wanted to make pants and a top out of both. I eventually succeeded by cropping the checked pants and using lots of creative layout including back princess seams on the solid blue top. The checked blouse is a classic blouse with the dart rotated to the neckline plus I added a little fullness. I added a band of solid color to the sleeves to match the cropped pants which were made from the same elastic back pants pattern I've been using since I lost weight. They are basic slacks with slim legs and slant pockets. For the solid blouse, I copied an that had tucks and a ruffled neckline. I rotated the dart to the neckline and shoulder, and then used that amount of fullness for the tuck take-up. I decided to make 3/4 length sleeves and add a ruffle to them to match the neck ruffle. The pants are a bit of a problem, as the crinkles in the rayon fabric flatten out as I wear them. (I just made these pants- why are they too big?) The fabric shrinks back in when misted or washed, but I don't think I'll be wearing them as much as I might if they didn't stretch... I might have lined them or fused them to tricot if I had realized this before sewing, but that might have diminished the coolness and comfort of them. |
||
|
|
||||
| Raglan blouse with scoop neck and contrast bands, PMB, 5/09 | ||||
|
|
While in the Seattle area for the Sewing Expo, we visited some area fabric stores. Pacific Fabrics in Puyallup held an open house for attendees with discounts, make-its, and refreshments. I wish we had this store in the Kansas City area! One of the fabrics I bought there was a black white print knit, and I found a perfect look to duplicate in a Catherine's ad. This top is made from the raglan draft, with the darts rotated to the neck and the shoulder darts converted to gathers, too. Unfortunately, I didn't notice the PMB peasant draft until a month after I made the blouse! I used the scoop neck inset pattern from the red top made in April 2009, but cut it narrower. The doubled ruffle was sewn into the top of the scoop and facing, then the band and facing bottom edge were sewn to the gathered top. A narrow band finishes the gathered sleeve bottoms. This is a different, unstructured look for me, but the poly knit is soft enough that it works. |
||
|
|
||||
| Notched collar short sleeved blouse, PMB, 5/09 | ||||
|
|
This piece of red bandana print rayon was calling to me. It was a remnant I'd purchased at the Vogue Fabrics sewing booth at a sewing expo a year ago, so I only had two yards. Thinking that wouldn't be enough, I had some black rayon to combine with it. I spent quite a while thinking about doing a layered shirt effect and even laid one out. But since I don't need to draw attention to my hips, I decided against that. After also eliminating color blocking ideas plus discovering I COULD get a blouse from the two yards, I drafted a lapel blouse. I found all the lapel choices in the version 4 settings to be confusing. I finally kind of copied the looks of a jacket I'd made from PMB version 3 and asked Karen to create some lapel samples for the wiki showing the different settings. I used the classic blouse with a waist dart, and rotated some of the fullness to the shoulder after moving the shoulder seam forward to create a yoke effect. Then I started sewing the blouse with a black collar and lapels. Upon putting it on the dress form, I decided that was too much black, so I cut a collar and lapel facing from the print and created the bordered effect you see here. The print is seamed on top of the black so the collar and lapels have three layers, and then I zigzagged the trim from Florilegium in Parkville, MO along the seam line before sewing the facing. Finally, I added a band of black to the sleeves, too. I think this blouse ended up very sharp and have received compliments on it. |
||
|
|
||||
| Empire knit top with contrast under layer PMB, and Curves, 5/09 | ||||
|
|
It took me awhile to decide how to make up this delicious rayon knit tie dye with its embroidery and clear sequin sparkle from fabric.com. I finally decided to use the same pattern I'd used on a similar knit in May 2008, but I straightened out the yoke and removed some of the fullness from the front bodice. Once again, I used the sports bra pattern for the under layer, but I sewed a straight top edge, reverse facing it with a piece of Swiss lace. I real-l-l-l-ly like this top. |
||
|
|
||||
| Blue floral jacket and slacks with inset trim PMB, 5/09 | ||||
|
|
Needing some slacks to go with a navy top, I pulled this print from SR Harris out of the closet. I used my newly redrafted slacks pattern for this pair and the next several, adding a bit of--get this--jumbo rick rack as a decorative inset. Next I decided to make a shirt jacket out of what was left. I messed around with a panel jacket pattern for awhile, but decided to get out my jean jacket inspired pattern. Since it was about two sizes too large but had a LOT of editing work in it, I drafted a shoulder princess pattern, compared the two, and trimmed the seams on the paper pattern to "match" the computer screen. Then I took in the seams some more while sewing. The inset rick rack idea came from a catalog photo of a top with a rounded neckline. I think it is a bit funky, but it was nice to find a use for some of the dozens of yards of navy rick rack I bought in 2002 for $3.00 at the Fabric Row in Philadelphia. The only downside is the top and pants are a little busy to wear together. But I had made a light blue top a few years ago and have navy pants and tops so I'm good to go with separates. |
||
|
|
||||
| Reversible Raincoat with contrast panels, piping and hood, PMB, 4/09 | ||||
|
|
I really didn't plan to make a raincoat this year until after my trip to Seattle. While at the sewing show, I lost my brand new all-weather coat. Rather than leave the show to buy another, I bought some fabric and.... Read the story here After arriving home, I became obsessed with making the poncho into a raincoat, and I wanted it reversible, with lots of pockets and a hood. My design inspiration was the Flight Jacket from Saf-T-Pockets, but I wanted it longer and more fitted with set in sleeves. So I drafted a mid-calf length panel coat but otherwise followed the design of the pattern. I did move the shoulder seams out in Pattern Editor, and made a pocket with more fullness, because underneath the outer pockets I sewed a zipper security pocket on one side and a divided pocket on the other side. On both sides of the coat. For a total of 12 pockets! I ordered swatches and then fabric from The Rain Shed in Oregon plus ordered more microfiber and reflective piping from Seattle Fabrics since I decided to make the coat longer. One side is made of black microfiber with silver reflective piping. I think it looks rather elegant aside from the piping being kind of sporty. The other side is color-blocked Versatech from The Rain Shed (who gave me marvelous customer service when I discovered a flaw) piped with a folded strip of the black microfiber. The reversible separating zipper is tucked behind the front flap on both sides, and I'm very pleased with the coat except for the puckering of the Versatech sewn next to the black microfiber. I've decided not to dwell on it, as most people will never notice. |
||
|
|
||||
| Scoop neck top with princess seams and embellished neck band, PMB, 4/09 | ||||
|
|
After taking a break for my dream trip to the Sewing Expo in Puyallup, I got back to sewing. By now, I had lost over 25 pounds so I needed to alter existing clothes AND redo my basic patterns. Once I got over THAT two month hump, I decided to make up some pretty red rayon/poly knit I'd owned for awhile. I drafted an armhole princess with scooped neck, and adjusted the pattern in the editor to make a set in scoop following approximately the facing. Next, I wanted to embellish it. I cut a copy of entire facing from paper, and drew and cut my scallop patterns into it. After tracing on and machine stitching the scallops, I applied set rhinestones and hand sewn beads to finish the design. I faced and sewed the band to the rest of the top after it was embellished, so my skin is not touched by the stitching or the metal rhinestone settings. (Example A, Example B, Example C, Example D) |
||
|
|
||||
| Velour top with inset panel and fancy zipper, PMB, 2/09 | ||||
|
Typically I sew something easy after creating a challenging project. So after the Ricky Timm inspired shirt, I grabbed a piece of knit velour purchased in Minnesota in 2007. Once I noticed that it went well with a Riri zipper. that I picked up at a sewing show in 2006, my design idea was born. I drafted a basic top with bust darts. In PE, I separated the upper part of the front from the bottom along the darts, and then created a center front self-faced inset panel. I inserted the zipper into the side front for something that's different from a centered zipper. |
|||
|
|
||||
| Big shirt with Ricky Timm's Convergence piecing, PMB, 1/09 | ||||
|
While in Lawrence, Kansas with my Sewing Guild, I picked up a book on Convergence quilting by Ricky Timms. I do way more apparel sewing than quilts, but the idea of cutting strips of different sizes and rearranging them appealed to me. So I decided to use this technique in a big shirt of two coordinating rayon batik prints and a solid from Sarah's in Lawrence, KS. (Example A, Example B) Since the patch work was asymmetrical, I decided to offset the insets. I created my patchwork, then decided it needed a bit more pattern. I've been reading a lot about free motion quilting on my Janome 6600 sewing machine list. (Janome6500@yahoogroups.com) So I scanned the sun motif, enlarged and printed it, then placed it on the back of some of the patches, and from the wrong side machine stitched an outline and some fill. (Example C, Example D) After the piecing and free motion stitching was completed, I cut out the insets and sewed them into the blouse. |
|||
|
|
||||
| Navy plaid duppioni blouse, PMB, 11/08 | ||||
|
|
I must have purchased this silk plaid duppioni online, because I usually remember where I bought most of my fabric. Inspired by a Coldwater Creek style, I created this big shirt using the panel style blouse, and turned the plaid on the bias for the center front. I used buttons with elastic loops but they tended to gap, so I added a hidden front zipper later. |
||
|
|
||||
| Scoop Neck top with contrast band and sleeves plus overblouse, PMB, 10/08 | ||||
|
|
Zoelee of Zoelee's Fabrics in Lee's Summit gave the program at a Kansas City Chapter Sewing Guild meeting October 2008. I really liked one of her tops, and bought the semi-sheer, crinkled fabric from her to make my version. I used the shoulder princess draft and lowered the neckline to allow for a strip of self fabric at the neckline. A length of round elastic inside the band holds the fabric against the neck. (Zoelee had threaded through a ribbon to hold hers .) The sleeves are gathered onto a lightweight knit under sleeve, kind of like a bubble skirt. Zoelee wore her top with a skirt from the striped fabric. I paired mine with an overblouse made from the classic blouse shape. The sleeve ruffle and the shirring at the waist are created by zigzagging over round elastic and tying it to fit. |
||
|
|
||||
| Scooped-neck knit top with layered look, Curves, 8/08 | ||||
|
|
My Sewing Guild Neighborhood group took a road trip to Lawrence, Kansas to visit the Yarn Barn and Sarah's Fabrics. I found this wonderful reversible cotton blend knit at Sarah's. I wanted to use both sides, and finally decided to copy a catalog photo I'd been saving a few years. The top was drafted in Curves, but I added an armhole dart during the sewing/fitting process. I drew a lower scoop in Pattern Editor, and added seam allowances after separating. To sew the layers, I made a 5/8" basted seam, then serged the seam allowance edges. Next, I used a double needle to topstitch the necklines, and removed the basting thread at the lower neck edge. The narrow gathering tabs were added before sewing on the sleeves. The sleeves are hemmed by turning the solid side out and topstitching with the double needle. |
||
|
|
||||
| Pantsuit and blouse from two crinkle fabrics, PMB, 7/08 | ||||
|
|
On a visit to the Sewing Basket in Nebraska City, I bought two coordinating rayon crinkle fabrics on sale. I decided to combine these with some ivory lace trims I had. The starting draft was the Princess Panel that has two nearly parallel seamlines. I did some Pattern Editing to add a yoke to the jacket and make the panels parallel, plus added a similar narrow panel to the pants side seam and blouse. The challenge of these fabrics is that they stretch AND grow widthwise, particularly when you press them. I discovered I had to spritz them with water to get the crinkles back as I sewed. Furthermore, I've taken in the pants about 3 times besides altering them for my weight loss, as they grow when I wear them! I like the way this pantsuit turned out, but have to admit I agree with a couple of people who thought I was wearing pajamas! For those of you who don't know, there is a Pendleton outlet in Nebraska City, and they have some yardage and notions in the basement. It's just across the Missouri River from I-29, so we stop there whenever we head north up the west side of Missouri and Iowa. |
||
|
|
||||
| Thea's Wedding ensemble, PMB, 6/08 | ||||
|
|
My son's wedding was one of the reason's I didn't sew as much in 2008. Even though Thea sews, I used to make wedding gowns professionally, so she asked me to make her wedding gown. She wanted a simple dress and jacket and had a pattern in mind for the dress. After trying on a few gowns to confirm her style choices, we went fabric and trim shopping. The dress pattern was easy to alter to fit Thea, but since I was on a tight time frame and wanted to make sure the jacket would fit well I turned to PMB. After making and tweaking the fitting dress, I drafted a classic jacket with side bust dart and fitted sleeves. We refined the length and shape in the fitting process. The fabric is polyester double georgette which has a bit of sheerness and beautiful drape, lined with acetate taffeta. The georgette overskirt splits in front. The bodice and jacket edges are trimmed with a pearled venise lace trim that I sewed on by hand. The back is finished with satin buttons and loops, as I dislike putting in and seeing zippers in wedding gowns. |
||
|
|
||||
| Empire knit top with inset under layer, PMB, 5/08 | ||||
|
|
The current fashion trend is empire tops and layered looks. This top was created in Curves using an empire draft with a low V neckline. I added some of the back shoulder area to the front to create a curved yoke. The under bodice piece is an entire front cut using the sports bra pattern. I used strip of self fabric like ribbing to finish the neck edge, then sewed the inner front along the shoulder, sleeve and midriff seam. This rayon knit from Fabric.com is very soft and drapey and comfortable. |
||
|
|
||||
| Check tunic with back pleat PMB, 5/08 | ||||
|
|
This top is made from a lovely rayon check that I purchased from Fabric.com. I copied the design from a catalog photo. It is a basic yoked tunic blouse with a front placket and fake back placket. Yes, the plackets are off center. The appliques at the back are camouflaging a major "oops". I was giving the blouse a final press, and I melted the fabric a bit on the top of the pleat, right over my tailbone. Since I really liked this fabric and how it turned out, I was pretty upset. One of my sewing friends suggested this design detail to salvage the garment. I appliqued squares turned on the bias. The upper square covers the melted part, and the lower square was added to make it a design detail instead of a PATCH! |
||
|
|
||||
| Gray Silk/wool Pantsuit a la Anne Klein, PMB, 3/08 | ||||
|
|
|
I bought this Anne Klein Vogue 2759 patterns some time ago: I really like the neckline on it, but it is easier to copy in PMB than alter a tissue pattern to get my fit. I started by drafting a panel style jacket with two piece sleeve. Then I rotated the bust dart to the waist and incorporated it with the slashed welt pocket like on the pattern. I traced the front edge of the printed pattern and used the collar pattern piece and facing from the Vogue pattern. The fabric is a luscious silk/wool twill from S.R. Harris in Minneapolis. It feels divine. I've lost weight since I made this suit, and need to alter it. I may cop out on the jacket and just move the button to wrap it some more. I also left the slacks at home so I'm wearing navy RTW pants in the photo. The second and third photo were taken later, after I took in the jacket and pants to fit my revised shape. While it still is less fitted than I usually like, the looser fit works with this style and saves the work put into it. |
|
|
|
Since the last time I updated this web page, my son and his wife bought a house and he set up a photography studio. I took my clothes over there so he could test his lighting and technique. Shameless plug: if you need photographs taken in the Kansas City area, visit his website at www.blazingcircle.com. |
|||
|
|
||||
| Heather blue & Navy Double Knit Top PMB V4, 2/08 | ||||
|
This top is the first garment I made in PMB version 4. After comparing my basic blouse and pants drafts between version 3 and 4 and tweaking until I had the defaults correct, I decided to make a quick-to-sew knit top out of my favorite double knit stretch. The inspiration came from a catalog photo I had saved. I drafted an empire dress with a curved V neckline, and took it into PMB. After shortening the length, I changed the empire waist to rise up in the front, and rotated the underbust dart to the center. Once I had the torso shape that I wanted, I deepened the V-neck, then made a duplicate front yoke with a higher curved V neck. When I sewed this, I sewed the side darts and center front darts into the navy underlayer. I hemmed both necklines and added the center front "scrunchie" to the top layer before pinning the layers together and sewing the shoulder and side seams. I decided to tuck the take up of the side dart on the outer bodice, and I'm not sure I like this. The cuffs were added as an afterthought when I cut out the top. This top looks great with the matching navy pants, so I decided to make the rest of the fabric into a jacket. |
|||
|
|
||||
| Heather blue & Navy Double Knit Jacket PMB V3, 2/08 | ||||
|
Wanting to utilize the navy knit with the heather blue again, I finally decided on a pattern that I made before. Scroll down to the Ensemble of black and white check in two textures, PMB V3, 3/04. I made a few adjustments to the pattern, primarily to reduce the navy yoke section, then cut it out. The jacket went together very nicely, except for the front zipper. I hate putting in double lap zippers! Even with careful basting and scotch tape for a topstitching guide, I still did quite a bit of ripping before I gave up in disgust. While I wouldn't call this jacket a wadder, I'm not terribly pleased with it either. | `
|||
|
|
||||
| Navy Double Knit with Neckline Princess Seams PMB V4, 2/08 | ||||
|
The neckline princess top is a new style in PMB V4. I decided to make a long sleeved top, but could only get a short sleeved top cut out IF I turned the sleeves sideways. So I did. The jewel neckline is the only choice on this draft. I cut it about a seam allowance lower. The top fits beautifully in the double knit stretch after I took the bust ease down to 1 inch and the waist ease down to 1/2 inch, AND sewed the side seams in because of the knit. The neckline is created by leaving the top 4 inches of the princess seams not sewn. I serged clear elastic to the neck edges, mitered the corners, and folded the raw edges down a half inch and topstitched them plus the entire front princess seams. Then I alternated 3mm hot fix crystals and studs around the neckline, and sewed a 4mm sterling bead to join each side of the neckline. This top makes up for the mediocre jacket! |
|||
|
|
||||
| Favorite Tartan Plaid Tunic, PMB V3, 1/08 | ||||
|
When I was in sixth grade, I had a pleated wool plaid skirt that I just loved. About ten years later, I made an acrylic jumper out of the same tartan, and two years ago I found it in an acrylic flannel at Helen Enox Fabrics in Oklahoma City! I cut this out from the same pattern for the Silk Black Watch Plaid Big Shirt, PMB, 12/06. This time I left off the collar, and sewed the bias front band to the inside. The pocket was meant for the chest, but came out too large, especially with my largish side dart there. It's interesting to see the difference between the drapes of the acrylic flannel and the silk duppioni in the same pattern on the same body. The other thing of note on this shirt is it is the first garment I've made on my new Janome 6600P. My plaids matched on the first attempt sewing with the Accufeed foot! I'm very happy with my new machine--especially the knee lift for the pressure foot and the push-button thread cutter. |
|||
|
|
||||
| Rayon Batik Yoked Blouse PMB 3, 10/07 | ||||
|
Between the print and the dark color, it is difficult to see the lines of this blouse. I drafted a classic blouse with a shoulder dart, lapel collar and darted cap sleeve. In Pattern Editor, I made a front and back yoke combined, and changed the remainder of the shoulder dart to pleats. This style is very nice in the soft rayon batik fabric. |
|||
|
|
||||
| Navy Pantsuit with Sparkles PMB 3, 9/07 | ||||
|
|
My boss has the cutest jacket. It is black with a mixture of hot fix crystals and studs of various sizes, at random on the collar and front hem. I really wanted to use this design inspiration, and it came together in this navy pantsuit. The jacket pattern is the travel jacket I made three times already. See Three-season Travel Pantsuit, PMB, 7/06, Travel Shirt, PMB, 6/05, and Plaid Travel Shirt Jacket and Sateen Slacks, PMB, 7/05. The jacket is adapted from Saf-T-Pockets "Two for the Road" and has two inset pockets in the lower panel, and several pockets on the inside of the middle panel. I assembled the jacket with metallic silver topstitching, and then applied the crystals. Along with the crystals and studs ordered from Sue's Sparklers, I also ordered the plastic you can place the crystals on upside down and then iron the on entire grouping. I still needed to touch them up with the wand to get them to stay stuck. I also added crystals to the buttons so they would match. The pants are elastic back slacks with trouser pockets, from a pattern I drafted a while ago. |
||
|
|
||||
| Floral Denim Pantsuit PMB 3, Summer 2007 | ||||
|
|
The inspiration for this design came from a newspaper ad. The fabric is embossed stretch denim from fabric.com. I started the jacket draft with an empire body and two-piece sleeve. To get the cute seaming on the lower part, I cut the patterns apart where the darts were, and added seams to create three panels in the front and two in the back. Inset pockets were added at the side front. Gray topstitching thread in a wide double needle accentuates the lines of the garment. I had difficulty finding cool large hooks and eyes, so I finally used some sterling clasps from my jewelry making sources--a benefit of working at a jewelry and watch making parts and tools supplier! For the pants, I drafted elastic back slim slacks. Then I used PE to offset the side seam and cut off a side panel at that point. I straightened out the top of the panel a little. Cutting the pants after the jacket, I was a little short on length, darn it! So I drafted a curved yoke, trimmed down the top of the slacks, and sewed it with a waist high yoke. In this jean style, this works much better than the elastic back would have, so this save was a good one. |
||
|
|
||||
| Notched Jacket Pantsuit and Coordinating Blouse, PMB 3, Summer 2007 | ||||
|
|
For awhile, I was shopping for a certain royal blue with violet tones, to go with my rayon batik wrap top. After searching most of the fabric stores in my Kansas City area, I found TWO fabrics during a trip to Chicago, at Vogue Fabrics, of course. This one is a firmly woven but thin and drapey slubbed plain weave, in acetate, I think. I don't remember where I got the idea, but I decided I wanted to put horizontal tucks on the sleeves and hip area. To keep the tucks away from the center front, I designed this jacket with a center front panel that is about 3 inches wide. Other than that, it is a basic classic jacket with a shoulder dart and notched collar. I added a yoke and gathered the front to it, plus added 2 inches to the torso and sleeves for the tucks. The tucks were sewn after seaming the sides, then the pieces trued to the pattern. The tucks have a bit of irregularity. I decided to let them be rather than redoing over and over, as they blend well with the irregular slubs in the fabric. The slacks are my basic elastic back favorites, made a little on the long side. The bottoms have a slit and a buttoned tab. (P Blue acetate suit pants hem). The pants hems are faced with 9 inches of silk to match the shirt, and they roll up to copy a photo from a catalog. The blue silk shirt is one of my basic shirt patterns with two-piece collar. This silk duppioni is crisp, so I sewed the darts front and back. The matching sash is only sewn from the side front belt loops, because I was running out of fabric. |
||
|
|
||||
| Beaded Sweater, Sort of Curves V3, 2006-2007 | ||||
|
|
With the advent of all the yummy yarns out there and the aging of the eyes, I've come back to knitting as an active hobby. Well, you can only wear so many scarves and hats, so I'm knitting my third sweater in four years, having only knit two my entire life before. How does this tie to Wild Ginger software? Well, I printed out a basic top in Curves to match my desired results, then knitted to fit to that. This means I decreased along the sides to get my very own pear shape, and had something to tell me I should start the sleeves over (twice) and helped me shape the cap. By laying the knitting on the pattern occasionally, I was able to achieve the same great fit I'm getting with my sewn clothes. The design idea came from "Knitting with Beads" by Jane Davis. Her sleeveless shell, however, wouldn't have been good on my middle-aged body. So having my own pattern helped me get a size and shape that worked for me, and figuring out the cast-on was basically math! The following fall, I was a beta tester for Wild Stitches, so the next sweater I'm knitting uses that software. I hope to have it finished by fall 2008. |
||
|
|
||||
| Empire top with shirred neckline, PMB 3, Summer 2007 | ||||
|
This delightfully soft rayon jersey knit came from fabric.com. Since it is so drapey, I decided to make a top with bustline shirring, and use some black double knit stretch as an accent. I drafted an empire top, then rotated the side dart to the neckline. This area is gathered as is the area under the bust, where you see darts on the pattern. (Empire top with shirred neckline..) The neck band was separated from the front then combined, and two were cut out to give me a facing. The midriff band is a 2 inch wide strip of knit, folded and inserted into the seamline to finish about 3/4 inches wide. It overlaps at the front and lays over the skirt part of the top. (Z empire top with shirred) |
|||
|
|
||||
| A Tale of Two Tops, or How I Salvaged a Disaster, PMB 3, Spring/Summer 2007 | ||||
|
|
|
My favorite black tunic, the Black Interlock Top with Lace Yoke that I made in March 2003 was finally faded out. So when I found a battenburg lace yoke in black, I decided to recreate it. I had some trouble with the lace raveling out a bit, but completed it and was very pleased with my new tunic top made from my favorite double knit stretch. Unfortunately, when I washed the top, the lace yoke disintegrated! I mean, that thread was rotten, girlfriend! The store cheerfully sent me another beautiful yoke, in white this time, because they were out of black. They thanked me for letting them know, as some others were bad, too. Here is the only photo I have of this top That's my husband standing next to me, and it is purely coincidental that the new car coordinates with my PMB based elastic-back slacks! So I remade the tunic in white. Both these were made by cutting a nd sewing all but the side seams from a basic tunic drafted with a side arm dart and jewel neckline. Then I pinned the lace yoke into place, using my dress form and trying it on before sewing. I stitched around the outer edges twice, then trimmed away the fabric under the lace. I hated to throw away the black double knit stretch tunic, recently made from lovely, $11/yard fabric. Hmm, I could fill in the shredded lace area with some matching fabric, but I needed to do something with the yoke seam. Once I discovered the blue beaded fringe in my personal resource center (stash) I knew what I wanted to do. I cut out a new top yoke, adding a neck band. Then I put it over the trashed tunic on my dress form, and traced the edge. Or did I cut the curved shape into the existing top and then cut the yoke? I did this many months ago and don't remember, but I sewed them back together with the beaded fringe as piping along the yoke and neck seams. This top looks great with the print linen/blend slacks in the car photo, and with jeans. Oh the things you can do when you have fabric left over! |
||
|
|
||||
| Painted Jean Jacket "Channeling Great Aunt Tillie," PMB, 2/07 | ||||
|
For awhile, I have been admiring the tapestry and embellished jean-style jackets that I see around. So I decided to make one. I started with the shoulder princess jacket draft and the jean jacket draft. After merging the two patterns, I selected the yoke, collar and sleeves from the jean jacket, and then aligned the yoke with the princess jacket and used the bottom part of it for the torso, since I am too bottom-heavy to wear a waist length jacket. I drafted and added the pocket flaps and front band to get the look I wanted. The cuffs are not flared--I forgot to button them for the photo. The fabric is an original design using paintstiks rubbed on a family heirloom tablecloth. My mother returned from helping her twin move into a nursing home and asked me to restore a tablecloth that their aunt crocheted in the 1930's or 40's. I washed and bleached it, but there were too many holes and stains still in it, so I took it apart at one end and ripped out the bad spots. After removing a row of medallions to replace the bad ones, I sewed them in and added the end border back on. Yes, it took me over 20 hours, but my mom was thrilled, as she loved the table cloth and the aunt who raised her and her sisters part of the time. As I worked on it, I thought about my Great Aunt Tillie and my connection to her, as obviously I inherited my sewing talents from her and her father who was a tailor. I also thought that the pattern would be fabulous as a paintstik design. So after the tablecloth was finished, I did a rubbing of it on 2.5 yards of navy poplin using three colors of green and a dab of gold in the medallion centers. Then I cut and sewed the jacket from the painted fabric and the slacks from the solid fabric. The topstitching is gold metallic thread sewn with a double needle except for the collar and pocket flaps where I stitched twice with a single needle to get around the corners. |
|||
|
|
||||
| Navy Linen with Pink Embroidery Pantsuit, PMB, 2/07 | ||||
|
The jean jacket was so flattering, I used the pattern again for a short-sleeved shirt jacket made from an embroidered linen blend off Hancock's sale tables. The solid contrast fabric came from the selvedge with a little help from my seam ripper on wider pieces. This jacket has the same pattern pieces as the painted jacket, but with shortened sleeves and a solid band added at the hip. I also topstitched with a single row of navy to give a different look. The pants are the elastic-back slacks draft with the slim leg. The hems are at 17" and the knee at 1". I put welt pockets into these, but have also been making them with slant pockets. I'm so pleased with my pants pattern at last, that I'm using the same patterns over and over now. |
|||
|
|
||||
| Princess-Raglan Combo Jacket, PMB, 3/07 | ||||
|
Somewhere, I got the idea that I wanted to make a jacket where the princess lines flared out to the shoulders. This pattern took much effort in Pattern Editor, so please don't ask me for more details as I didn't keep track. The image of the pattern pieces is here, if that will help. Essentially, I moved the princess lines over to the position of the outer waist darts, merging the seam line towards the upper part of the armhole. I added a small dart at the bust like the panel jacket. Then I took a raglan draft and tried to figure out which parts of the raglan sleeve, inset sleeve, and upper torso to keep. I sewed up a quarter scale trial, and decided I needed more height to the sleeve cap. Later, I ended up removing the extra height I had added. When I sewed this, I had to take an extra dart in the sleeve cap lining, which I sewed first as kind of a muslin. This stable knit fabric eased in better on than the lining, and on the next jacket I made I trimmed off most of the extra sleeve cap height. The black strip is created using upholstery braid. The blue stripe on the sleeve hems is a strip of fabric hand stitched into place. The jacket is closed with a zipper plus a frog at the mandarin collar, and there are pockets sewn into the side front seams. This fabric has been aging in my personal resource center for about seven years, having come from ZoeLee's when she closed her Blue Springs, MO store. |
|||
|
|
||||
| Princess-Raglan Combo Tweed jacket, 3/07 | ||||
|
For the second time this winter, I repeated a jacket. Since this tweed from Fine Fabrics in Traverse City, Michigan is more formal and tailored than the black and royal knit, I drafted a raised collar and superimposed it on the previous pattern. I'm not too happy with the the raised collar in PMB, so I added height to the back and sewed some back neck darts to shape it. You can see the bust darts a little better in this jacket. The only pockets are sewn to the inside lining. The bottom front edges wanted to be curved to blend with the collar. I used home dec braid and sewed in one edge like piping on the neckline, princess seams, and sleeve hems. That turned out to be a very nice look. I usually wear this jacket with jeans or spruce green slacks, and I'm very pleased in how it turned out. |
|||
|
|
||||
| Sailboat Print Sailor Pantsuit, PMB, 3/07 | ||||
|
One of the fabrics I purchased at Fine Fabrics in Michigan was this cute rayon print. As I designed it, I realized that a sailor collar would be a nice style with the sailboat print. The torso is the Panel style blouse, with set-in sleeve and V-neckline. I always take a dart from the underarm to the hip at the side seam of this draft for better fit. It doesn't seem to need any changes to the sleeve, your results may vary. I need to remember to lengthen the back of the sailor collar the next time I make it. I think it would look better a couple of inches longer than it drafts. The inset is buttoned in at the sides of the necklines, and the tie is a 4" wide strip of knit sewn with diagonal ends. The pants are slacks draft with slim legs and a knee width of 1". |
|||
|
|
||||
| Striped Royal/Mint Knit Top, Curve, 4/07 | ||||
|
I usually don't care to sew jersey knits, but I just loved the colors in this striped fabric and it was a particularly nice quality from Fine Fabrics in Michigan. It took me awhile to decide how to sew it, and I'm not totally satisifid how it came out. I used the Curves Polo draft, and cut the V-neckline pretty low so I could fill it in with an inset. I think I had a wider neckline with a curved top inset in mind--oh well.
I made the top tunic length, but it was too snug to look good, so I cut it off, then cut it off again and added the contrast stripe band. |
|||
|
|
||||
| Twist Knit Tops, Curves, 4/07 | ||||
|
I've been intrigued by the twisted knit tops that others have been making. After seeing Pattie Otto from Great Copy Patterns show a tie variation for Kwik Sew 3378, and then seeing the same top on ZoeLee at her fabric store in Lee's Summit, MO, I purchased the pattern. To get my custom fit, I laid the pattern pieces on top of my Polo top pattern drafted in Curves. I traced the sizing, armholes and sleeves off my personal pattern, and used the style lines of the Kwik sew pattern to get the twisted front. (see pictures one, two and three) After I tried the pattern in some Walmart $1 per yard knit, I decided the fit was fine, but the twist which needs to be at the bustline where the fullness is makes the neckline a little low. So when I sewed up the royal poly jersey from Hancock, I hand gathered the twist and covered it with a strip of fabric. Hmm, it's only a teeny bit higher this way. I've worn it and nobody has acted shocked, so I guess it seems lower to me than to others. |
|||
|
|
||||
| Pink Knit Tops, Curves and PMB, 4/07 | ||||
|  |
Wanting a pink t-shirt to wear with the navy/pink pantsuit, I ordered some interlock knit online from Sewzannes. It arrived heavier and darker than I wanted, but looked great with some striped foldover I bought at the same time, so I repurposed it into a cool weather top. This top started as a double breasted blouse in PMB with an armhole dart and set-in sleeve. I extended the fronts to the side seams then merged it with my polo draft in Curves. The underlayer is a boat neck polo from Curves, but I cut it off right under the bust to eliminate bulk and finished the bottom edge with elastic to hold it under the bust. As I stitched and tried on, I cut the front neckline lower, and then decided to cut the bottom overlayer at an angle, too, The overlayer stitches into the side seam for about 3 inches. I also decided to topstitch the overlayer in place at the bottom edge. To apply the foldover elastic, I zigzagged it to the back side, then folded it to the front and topstitched using clear thread and a very narrow zigzag. Meanwhile, I found some lighter weight, lighter colored pink interlock at Hancocks. My inspiration was a t-shirt in an ad. This is the Curves Polo with scooped neck and set in sleeves. I added a fake tab front and the lace inset, and hand hemmed bottom edges. |
||
|
|
||||
| Paintstik-rubbed Top, PMB, 10/06 | ||||
|
At the American Sewing Expo in Novi, Michigan, I took a class on decorating fabric with paintstiks from Laura Murray. She tends to use the iridescent paintstiks on dark fabrics using rubbings and stencils, and the results can be stunning. The pattern is the same as the Wrap top of Rayon 3/05, but with long sleeves. I cut out the fabric, then applied the paintstiks in the upper areas and along the front edge by rubbing over two different rubbing plates in green and purple, and a lace collar in blue. Unfortunately, this top of ready-to-dye rayon from Dharma has shrunk quite a bit so that's why it is shown on my dress form. |
|||
|
|
||||
| Black Reversible Vest, PMB, 10/06 | ||||
|
After making the wool-blend three season travel pantsuit, I had enough fabric left over to sew a vest. For the reversible side, I used the leftover rayon broadcloth from Dharma and stenciled the front using paintstiks and cardboard scrapbooking borders. The pattern is the vest draft with a waist dart. I inset the pocket into the side seams and waist dart, plus added a breast pocket and topstitching to match the travel shirt. The painted side has no pockets. After curing the paint, I added rows of decorative stitching using metallic threads and some hot-fix crystals. |
|||
|
|
||||
| Green Chenille Jacket, Boutique, 01/07 | ||||
|
One of the fabrics I purchased at the American Sewing Expo in Novi is this soft green chenille from Fine Fabrics of Traverse City, Michigan. Inspired by a class from Marsha McClintock about sewing reversible garments, I knew I wanted to use both sides of this fabric. I was thinking of something rather unstructured and reversible, but the fabric grew up to be a softly-tailored jacket. The back side of the fabric is used on one side of the convertible collar and at the sleeve hem. I drafted this with the shoulder princess and set-in sleeve. Using Pattern Editor, I moved the side front seam about an inch towards the side, the shoulder seam an inch t towards the front, and created a pocket with a swooshy top. The collar is from the Saf-T-Pocket City Safari vest. After cutting out the PMB pattern, I traced the neckline of the vest pattern onto my pattern, and used the vest collar pattern piece. I wanted to use some chenille piping, but when it didn't come within a couple of weeks, I ended up cutting piping from the black double knit in these pants and top. The piping edges the collar, shoulder seam, and princess seam merging into the pocket. I sewed the piping into the top edge of the pocket and lining, then pinned the pocket unit along the bottom and side edges of the side fronts. By clipping the pocket at the top corner edges, I was able to get a continuous merge of piping from the hip to the bust. I love the way this jacket turned out. |
|||
|
|
||||
| Silk Black Watch Plaid Big Shirt, PMB, 12/06 | ||||
|
This is a particular gorgeous piece of silk from Gail's Fabrics in Atlanta. I loved both the black watch-type plaid and the woven in scrolled damask design. Drafted as a big shirt with traditional cuffs and a collar on stand, I turned the collar, cuffs and front on the bias. I interfaced this with silk organza. While this fabric cost more per yard than I usually spend, I'm very pleased with the results! |
|||
|
|
||||
| Burgundy/Black Burnout Big Shirt, PMB, 12/06 | ||||
|
One of the last pieces of fabric I purchased from Cy Rudnick's, I wore this to his farewell party (where naturally I bought a couple of more pieces of fabric!) The flowers are sheer black burnouts, so the pattern needed to be simple. I thought I would wear this over burgundy, but it looks better over black. This is a classic blouse with cuffed, set-in sleeves, a V-neck and the V-neck collar. |
|||
|
|
||||
| Crossover knit summer top, Boutique, Summer 2007 | ||||
|
Sometime in 2007 I decided to make up a firm interlock knit print I bought online. I reused the crossover top pattern made in early 2006 and even earlier than that as pajamas. I made it with elbow length sleeves and finished the neckline and sleeve edges with foldover elastic. |
|||
|
|
||||
| Knit Jacket with Color slicing and Sailor Collar, Top and Slacks, PMB and Curves, 11/06 | ||||
|
My favorite fabric right now is a double knit made from polyester, rayon and spandex. It is a great weight for soft jackets, tops and pants, and extremely comfortable. This outfit is made from black and burgundy knit stitched together in stripes with a flat lock on the wrong side. See the stitches in the close-up photo. The inspiration for this jacket style came from a catalog photo. The draft is the casual jacket with zipper closing and V-neck shape, set in sleeves and sailor collar. I did not add seam allowances to the top and bottom edges of the color sliced pieces because I seamed them with flatlocking. I DID label the pieces with the color and a number so I could assemble them in the correct order. This jacket is reversible! I used a three thread serge to finish the collar and hem edges, since the fabric doesn't ravel AND is a little thick. This burgundy side has a welt pockets, made using my favorite graph paper method. The top is made from Curves Polo torso with set in sleeves. I trimmed off the neckline and sleeve hems, then flatlocked on a folded black band like ribbing. Both slacks are made like from the same pattern--see details of the black slacks below. |
|||
|
|
||||
| Black Knit Ensemble: Jacket, Crossover top and Slacks, PMB and Curves, 11/06 | ||||
|
The other side of the burgundy/black jacket is plain black, with patch pockets and a beaded trim sewn to the collar edge. It's the same trim I used on the Striped Top with Shirred Front, below. The black knit is Double Knit Stretch from Nancy's Notions, and the burgundy is Sophia from fabric.com. I'm pretty sure they are the same fabric. I made the pants like the navy ones with the lattice embellished ensemble, but I didn't put in a zipper. I drafted these as slacks with slim leg plus 1.25" and a high waist. Instead of facing the waist, after sewing the darts I put in some 1" wide elastic along the cut edge and then folded that down. There is just enough stretch I don't need a zipper, yet these pants look fitted and feel great. I just saw some like these in a favorite catalog for $59.00. Mine cost less than half that, fit better and have welt pockets! |
|||
|
|
||||
| Crossover Top with Foldover Elastic, Curves, 10/06 | ||||
|
Has it really been a year and a half since I made a Trial Crossover top? See the Pajamas Trial Crossover Top. I opened the pattern file I made for the pajamas in Boutique, using suggestions from Belinda Davies of Melbourne, and superimposed it over a polo top in Curves to get a closer fit. This is the same fabric as the reversible jacket and matching pants. The neckline and sleeves are finished with a foldover elastic that's embellished with hot-fix crystals. I bought this on a Sewing Guild road trip to Anne's Needle Nook in Wichita. I was short 12", but remembered that our fearless driver, Anita Holt, had bought some too, and she rescued me so I could trim the sleeves. You gotta love your sewing friends! |
|||
|
|
||||
| Navy Leaf Print + Navy Polka Dot Print = Reversible Pantsuit, PMB, 8/06 | ||||
|
Some of my favorite ready-to-wear garments are reversible, usually made from coordinating printed polyester georgettes. So when I found a couple of navy print georgette fabrics that seemed to go together last fall, I bought them. I was shopping at Gail K's during a trip to the Atlanta area, and found some cute sparkly buttons there, too. A simple design was called for, both because the fabrics are sheer and because I wanted the outfit to be truly reversible. The colors in the leaf print and polka dot are similar, but the backgrounds are a bit off, so I decided against having layers of the same fabrics show on the same side. I drafted a pair of pull-on slacks first, with a fold-over elasticized waistband and straight legs. I could of/should of made these without side seams, but didn't for future alterability. The pants were constructed in two layers, then placed wrong sides together. I basted the waistline area along the top edge and a few inches down, then applied elastic that is inserted into the polka dot layer folded over the print layer. (I very rarely tuck in so the appearance of the waistband it not important. Not that it doesn't look nice!) Next, I drafted a simple blouse. From a cute top I saw on the street, I decided to have a curved front hem, although mine is double-breasted so no midriff shows! I selected a V-neckline and 11" long set-in sleeves. For bust shaping, I drafted a shoulder dart. Using Pattern Editor, I moved a few inches of the front shoulder to the back (after closing the dart) to create a front yoke effect, and converted the rest of the dart to gathers above the bust. I moved one side dart to the side seams front and back for additional shaping, and sewed the rest of the shaping into the back by topstitching a casing and pulling through a lenght of black elastic between the layers. To stabilize the neckline I added a narrow interfacing of black silk organza. This was held in place by the staystitching. I thought about piping the neckline, front edge and hem, but wanted to keep the construction simple. So after sewing each blouse layer, I put them wrong sides together and finished all raw edges with a serged narrow rolled edge. Several concepts for closing the front went through my head, including loops on the edge and one row of buttonholes. I finally decided to sew six buttonholes and button through all of them. The buttonholes are reinforced with a small patch of silk organza held by stitching with dissolvable thread in the bobbin so it would disappear after washing. The buttons are sewn back to back, thus acting as reinforcement for each other. Who is going to notice that the polka dot side laps left over right? The leaf print georgette is more sheer than the polka dot double georgette, so the polka dots show through on that side. If I wish, I can unbutton the top button or two and wear this with contrasting pants and lapel. |
|||
|
|
||||
| Black/Periwinkle Print Blouse with Embellishment, PMB, 7/06 | ||||
|
|
I bought this silky polyester print at Vogue Fabrics in Evanston, Illinois, but once again didn't have enough fabric to do anything very complicated. So I cut a camp shirt blouse off the same pattern as the Blue Mini Print blouse below. I had some black flat yarn from Florilegium that had little violet sparkles in it, but not enough to show much. So I topstitched it onto the yoke and collar at random using a lilac holographic thread. I also threaded some beads onto the yarn and added them to the yoke edges. It is fun to compare this blouse to the blue mini print blouse below. They are the same pattern, but I sewed more darts into the crisper mini print cotton fabric, and left them out of the drapey black/periwinkle print poly fabric, plus it is longer and has a little gathered fullness added at the center back. |
||
|
|
||||
| Three-season Travel Pantsuit, PMB, 7/06 | ||||
|
|
I just loved the black travel pocket shirt I made in June 2005, but was unhappy with the way it looked after washing a few times--all faded out and too soft. I decided to make another, and to use a poly/wool blend poplin this time. For style choices, see the Travel Shirt, PMB, 6/05. Because this is a wool blend, I drafted new long sleeves. While sewing, I thought I might like to roll the sleeves up, so I pulled a traditional men's sleeve packet out of a really old commercial shirt pattern and added it and a 1" wide cuff. Everything else is the same--white buttons and topstitching, and pockets sewn on the outside and behind the mid-torso panel. The slacks were drafted with a waistband and integrated trouser pockets. I selected a slim leg with 1" knee setting, and used the drops determined from my previous trials. When I sewed these, I only sewed one of the two darts front and back, then added elastic into the waist. I'm very pleased with the fit of these slacks. |
||
|
|
||||
| A Most Fabulous Lattice Embellished Jacket Ensemble, PMB and Curves, 6/06 |
|
This jacket design percolated in my brain for several months, ever since I saw a speaker wear something similar. Yes, I did hear her presentation, but spent a good bit of the time admiring her jacket which appeared to have space-dyed ribbons sewn onto a black cardigan jacket in an allover lattice design. Navy blue is one of my basic colors, and I found a navy poly/rayon double-knit I thought would work. Next, I went shopping for ribbon or trim for the lattice. We have a wonderful new store in the Kansas City area called Florilegium. They specialize in yarns and trims for embellishment and have antiques. If you are ever near Parkville, Missouri visit them. The owner has a talent for display as well as stocking the most delicious yarns, ribbons, beads, and trims and you can spend hours looking at it all.I found several things that would work for this project, but settled on a space-dyed ribbon yarn called Raggedy by Crystal Palace yarns because I could get an entire ball for $6.00. Later, I had to buy more, so I'm glad I kept THAT cost down! I drafted a simple cardigan jacket with armhole darts because I look best with some bust shaping, but I wanted the lattice broken as little as possible. To create the lattice, I printed out a 2" diamond grid from a web site where you can print out your own graph paper. You can pick different sizes and shapes and print out a PDF. After gluing those together, I traced the grid onto clear washable stabilizer using a marker. From the fabric and the grid-marked stabilizer, I cut shapes about an inch larger around than the finished pattern pieces. With another layer of washable stabilizer underneath, I stitched the yarn onto the fabric sandwich using clear thread, starting at the bottom and working my way up. It became evident that I was going to run out of the ribbon yarn, So I filled in the yoke areas with some velvet burnout chiffon that had the same colors as the ribbon. This remnant was only yard long but said "draped front" to me, so I decided to make a triangular scarf and use the scraps on the jacket. But I did want to complete the lattice, so returned to Florilegium and after a search, found part of a ball left of the yarn. After completing the lattice and adding a few more velvet leaves, I washed out the stabilizers and recut the pattern pieced accurately. Here are a few photos of the garment sections in progress. Since I wanted to retain the softness of the knit, I lined the jacket with nylon tricot. The inch wide front band allows for a slightly raised neckline and slit buttonholes.
The slacks are fairly tailored, drafted using the high-waist slacks draft and slim legs plus 1/2 inch at the knees. I put in my favorite welt pockets, and finished the fold down facings with 1" elastic before completing the back and side seams, as I'm hoping to take these in later. The elastic does not gather in the waistband, rather provides comfortable waistline fitting.
Next were the evolution of two tops about which I'm also very pleased. Using Curves, I drafted a polo top with boat neckline and long set-in sleeves, and once I realized I had enough fabric, also cut a short-sleeved top after drafting another sleeve. This Lattice Inset top features a deep V-neck hand cut from a boat-neckline polo draft in Curves. Front and back facings were cut to match. To make the lattice inset, I first outlined the bottom of the neckline on a piece of paper, then added an inch-plus for seam allowance. After pinning a piece of clear stabilizer over the drawing, I drew my weaving lines on the stabilizer. Organza goes behind the stabilizer after the lines are drawn. I used two coordinating space-dyed trims that I purchased at a sewing expo years ago, and alternated weaving them from the bottom up, pinning them in place to the stabilizer and organza. The weaving was finished when I ran out of the rick-rack shaped trim! (I had already set aside what I needed to finish the neckline.) Once I had everything pinned to my satisfaction, I zigzag-stitched the trim to the stabilizer and organza. The raw edges at the top were turned to the right side and stitched under the top rows of trim. The bottom edges were trimmed to create the appropriate seam allowance after the stitching. I then washed out the stabilizer. If you look closely, you can see residue of the light green sharpie with which I drew on the stabilizer--be sure to use something more washable! The inset was stitched into the neckline and facing after both the neckline and facing were staystitched and clipped to the CF corner. After a good pressing, the rickrack was toptstitched around the neck to hold all together.
For the long-sleeved top, I wanted to drape the scarf across the front. I developed the idea of using the ribbon trim and another trim from my personal resource center to create a neckline border with unsewn areas to hold the scarf. I put a row of matching trim on the edges of the scarf after sewing and turning it. For the short-sleeved top, I cut the neckline into a wide, low V, and then filled in with a lattice of two space-dyed trims. While I was pinning the trim to stabilizer, I decided I needed to sew it to a backing, so I pinned a piece of silk organza into place before stitching all together with clear thread. The inset is sewn into the neckline facing. One of the fun things about this ensemble is that I think I bought the fabrics and trims from resources in seven or more states over the past few years, using the Internet, catalogs, traveling and visiting sewing trade shows!
|
||
|
|
||||
| Blue Mini-Print Slacks and Blouse, PMB, 5/06 | ||||
|
|
Desiring to sew another pair of trial fitting pants, I found this cotton broadcloth print in my fabric closet. This is a back elastic waist draft with waist drops plus I tried the slim leg draft with 1" added in the knee measurement. I'm getting closer on the pants fit, but didn't drop the side and front waist quite as much as I should have. The blouse was eked out of the remaining fabric. I got out my very basic casual blouse pattern I drafted for the Mini-print Camp Shirt in June 2004, and it nearly fit. By cutting a shoulder yoke pattern on the cross grain and shortening the blouse, I was able to make a matching top for these slacks. |
||
|
|
||||
| White Print Double-Breasted Blouse, PMB, 4/06 | ||||
|
This print seemed to say "Summer Blouse with Trim", and I found the blue middy braid in my personal resource center (stash). I don't remember where I got the idea to taper the front opening, but the sleeves fold up into a cuff because I had more fabric than needed for a short sleeved shirt. I drafted a basic panel style blouse with a double breasted front. I slanted the front using Pattern Editor, and straightened and lengthened the sleeves for the roll up cuff. See pattern. During the fitting process, I took out excess fabric in the front and added a side dart from the underarm to the hip because I like my blouses to fit closer. I also added a back pleat when I was cutting out the blouse, which I topstitched down a few inches from the neckline and from the waist to the hem. |
|||
|
|
||||
| Periwinkle Sleeveless Shell and Slacks, PMB, 2/06 | ||||
|
|
With the latest Wild Ginger update, drafting for pants offers even more fine tuning choices. I'd been having challenges with my crotch fit, so decided to make this periwinkle stretch cotton poplin as a pair of wearable trial slacks to test the new choices. After a series of emails and photos to Karen Campbell at Wild Ginger support, I was on my way to more successful pants fitting. I needed to adjust the crotch depth to match the new crotch length measurement, then drop the front waist an inch and the side about half an inch. These pants, even after some alterations, still have a crotch that is a bit too long. When I showed these slacks to the Kansas City PMB User group, they suggested I try the slim leg. When I commented I was too hippy for the slim leg, Sonja Greco (our OWN local Wild Ginger Certified Educator!) mentioned I could increase the knee width to compensate. So I decided to try this going forward. The sleeveless shell was the only thing I could get out of the remaining fabric. I drafted a top with an armhole dart, then slashed the paper pattern along the dart to create a shaped yoke. I forgot the patternmaking rule that you need to tighten a lower neckline with a small dart in the pattern paper, so I drew it up with the help of a running stitch enhanced with some beads. The only problem is that this fabric needs SEVERE ironing to wear. I've decided to avoid cottons with a little lycra because they just don't wash nicely. My PMB group suggested that I'm drying these too much, and I replied, "Yes, I know my husband overdries the laundry!" I don't think anyone thought I should ask him to quit doing it, however |
||
|
|
||||
| Pink Velour Top with Draped neckline, PMB and Curves, 2/06 | ||||
|
This top was inspired by a sweater my boss received for Christmas. I loved the way a band of ribbing wrapped around the neck, crossed and went into the sides. Here is what I remember from making this six months ago. I started by drafting a polo top in Curves for sizing and the sleeve, but also drafted a PMB top using a shallow V-neckline and armhole dart. Using Pattern Editor, I superimposed the two patterns and retained only the lines I needed for size. Next, I cut an 8" wide cross-grain strip of the knit, and serged the two long edges together wrong sides together. I pinned the front pattern piece to my dress form and draped the strip around the neck and to the sides. This helped me decide where to slice the top to insert the strip. During the process, I decided the armhole dart wasn't going to work, so I drafted another blouse with French dart for shaping on my curvy midsection. This time, I scaled the pattern in PMB to match the width of the top I'd drafted in Curves. Returning to Pattern Editor, I drew a curved line across the yoke area, then cut the torso at the intersections and created the yoke pattern. I also changed the lines of the French dart and neckline from straight to curved for a little more shaping. I kind of made up the sewing of the neckline as I went along! I sewed the yoke to the torso on one side, inserting the strip. Then I sewed the strip around the neckline. I had to rip a hole for the crossover. Finally I sewed the strip into the yoke and torso on the other side. Upon trying on the top, it looked good but the neck was too small. Fortunately, I had cut the strip full width and still had plenty of length on the sides! After ripping the second yoke and neck off, I cut the neck 1/2" wider and resewed the strip, trimming the excess strip at the sides and pleating the ends into the sleeve seam. Success! The knit strip/collar doesn't shirr down as nicely as I'd like, but otherwise I'm pleased with this top. |
|||
|
|
||||
| Black/Red Plaid Panel Jacket and Vest, PMB, 12/05 | ||||
|
|
In November, we took a trip to Atlanta to visit friends. Of course, I had to visit a fabric store there, and got the name of a good one from an Atlanta resident by using the Wild Ginger forum. This is the first fabric I sewed up from Gail's Fabrics in Atlanta. It is an acrylic/poly blend, of medium weight slubby black yarns with lines of sparkly black and novelty red woven in. I think I might have bought the braided piping in New York a few years ago, but it was the perfect use for it. (I wish I had bought more, I have enough fabric for a vest.) I sewed the chain store buttons on with tiny black beads over the threads. This is the classic panel jacket draft from PMB. I am now almost always using the extended shoulder measurements developed by Australian Belinda Davies and relayed on the Wild Ginger forums. I cut an modified V-neckline after printing the paper pattern, and added slanted welt pockets with the piping replacing the lower lips. When I tried the jacket on, I decided it needed more shaping, so I added darts from the high hip to the underarm at the side seam position. I'm not sure if the fabric shrank or I miscalculated the sleeve hem-once again, they are a bit short. I think I'm going to add 1/2" to my measurements. I used the rest of the plaid acrylic to make a vest. The draft is the vest with armhole princess lines and a straight hem. Since I didn't have red piping left from the jacket, I used black piping on the front and neckline edge, and for decoration hand sewed on a red and black braid that I also found in my "personal resource center". The blouse is one I made years ago from a commercial pattern. |
||
|
|
||||
| Striped Top with Shirred Front, PMB and Curves, 11/05 | ||||
|
T-shirt knits are among my favorites to sew and wear, and I'm always looking for design opportunities with stripes. I thought about making this into the crossover top, but decided that wouldn't look very good. So I decided to make a simple V-neck with shirred front. The fabric was bought on the previously mentioned trip to Needle Nook, and it was already cut out when I came home with the beaded trim purchased at the October Sewing Expo in the Kansas City area. Noticing the beads had similar colors to the fabric, the trim was added as a "near afterthought". The beads are sewn onto a strip of black "velvet", so I decided to stitch to the black stripes in the yoke area and sleeve hem, and perpendicular to the side vent trim. To get the shirring, I drafted a classic blouse in PMB with a center front seam and center front darts. To get the "knit fit" I also drafted a polo shirt with zero ease in Curves. I hand traced the smaller shape of the knit draft onto the PMB draft, keeping the center front shape and blending seams where necessary. Somehow, I managed to sew elastic into a casing around the neckline with just a little stretch, then extended the casing into the bust area where I stretched the elastic to take up the dart allowance. Just don't ask me for directions-this was done a couple of months ago. |
|||
|
|
||||
| "Lemonade" Pants, PMB, 5/05 | ||||
|
These are called "lemonade" pants because I completed the welt pockets BEFORE I realized that I had sewed them into the slacks BACKS. With a shortage of fabric, I decided to add patch pockets to cover the back welts and remade them in the proper positions on the front. Unfortunately, this (not inexpensive) rayon twill is not holding up. One pocket is raveling, the black is fading and they have to be ironed. Therefore, no full length photo! I used the high waist slacks pattern. After fitting, I stitched a second pair of darts at the front for my curvy abdomen. (I don't know why these draft with only one front dart.) I sewed the facing to create a casing from side front to side back and added elastic to snug in the waist yet still be comfortable. I don't think I will make the vest I cut out of this fabric... |
|||
|
|
||||
| Travel Shirt, PMB, 6/05 | ||||
|
As if sewing six pockets into the black lemonade pants wasn't enough, my next project used the "Two for the Road" pattern by Safe T Pockets combined with PMB for fit. This time I sewed 8 pockets, for a total of 14 pockets in two black garments that are not holding up. This was made from a black silk(?) twill I bought off the Internet thinking "trousers" but it was too lightweight. I wanted a shirt jacket for a trip to Chicago (to visit the fabulous Vogue Fabrics, NOT to attend the Rotary Convention, right?) and thought this would fill the bill. The style came out so well I'm thinking of remaking it in a better (I hope) black fabric. I drafted a casual blouse with side darts and a convertible collar. Then I took it into Pattern Editor and created a yoke at the bust level which incorporated the underarm darts. Next, I measured the front middle pattern panel of the purchased Safe T Pockets pattern and sliced the pattern at approximately the waist level. I used the pocket patterns and directions from the commercial pattern. Wanting a touch of white but not finding anything in my stash or having the time to shop, I decided to experiment with stitching over white gimp with black thread. I finally selected a heavy topstitching stitch in regular white thread using one of those fancy 3-step stitches that rarely get sewn. I'm very pleased with how the topstitching and white buttons break up the black. There are two pockets sewn into the middle panel on each side. A lining keeps them from showing through. The pocket at the waist is inset into the seam and the pocket bag hangs to the inside. I also added patch pockets from extending up from the bust seam. I wore this all four days on the Chicago trip, and a few times since. The pockets are extremely handy, but thick items tend to "lump through" this soft fabric. I do like the looks of this travel jacket a lot better than the vests with patch pockets and cargo pockets, and would encourage others to try a similar garment. |
|||
|
|
||||
| Plaid Travel Shirt Jacket and Sateen Slacks, PMB, 7/05 | ||||
|
Here is one time I reused a pattern-right away! I liked the functionality of the black travel shirt-jacket so much that I decided to sew a plaid I bought at Vogue Fabrics out of the same pattern. This shirt has fewer pockets-only four. I sewed the two into the waist seam like before, but only made one pair on the inside middle panel. Having learned from the first shirt jacket, I added some expansion pleats to the inside pockets to prevent my wallet and camera from bulging out. (Think cargo pocket on the inside.) I cut the collar, sleeve bands and center panel on the bias. When I tried it on, I decided I didn't want to overlap the plaid at center front so I sewed hooks and eyes on the edges, next to decorative buttons. The slacks are made from a microfiber bought at Vogue Fabrics on the same trip. Normally I avoid synthetics, but I'd been shopping for the perfect blue-violet slacks or fabric for months. These are another pair of high-waisted slacks, but with pockets along the side seams instead of my usual welts at side fronts. These have some minor fitting issues at the waist, but since I hardly ever tuck in, who cares? |
|||
|
|
||||
| Boot Cut Pants, PMB, 7/05 | ||||
|
So many ladies mentioned how flattering boot cut pants are that I decided to try a pair. These are elastic back slacks with a sewn on front waistband and I tried PMBs slash pockets for the first time. (Notice how I've been avoiding welt pockets in pants lately?) I probably should have made these with less ease because the cotton has some lycra in it. However, getting them too tight is not a good look for me! I like the boot cut legs okay, except they are a pain to iron. |
|||
|
|
||||
| Plaid-plaid Blouse, PMB, 9/05 | ||||
|
Love those trips to Needle Nook in Wichita. Seven of us from my neighborhood Sewing Guild group took a road trip in August. I bought these two coordinating stretch cotton plaids and a Burda magazine there. (No-o-o, that wasn't all...) A month later, one of our members shared a Cynthia Guffey video at a meeting. How is this relevant? I admired a pattern in the Burda magazine and decided to copy it. I wanted to trim the blue plaid with the red, and the bias fabric flat folded insets seen on the Guffey video seemed a better idea than stuffed piping. I changed the seam allowance to 3/8" on all the seams that would have needed to be trimmed, which helped in sewing in the 1.5" wide folded bias strips for a finished trim about 1/4" wide. (I'm not into all the marking and hand basting that Cynthia does. So I had to sew some of the seams a few times and they aren't perfectly even-anyone going to notice?) The draft for this is the classic blouse, shoulder princess darting and wing collar. I created the yokes and extra front seam line using Pattern Editor. After sewing, I found the red buttons in my stash (ahem, personal resource center!) |
|||
|
|
||||
| Pajamas Trial Crossover Top, PMB and Curves, 8/05 | ||||
|
These pajamas are a trial fitting garment for making a crossover top using some special fold over elastic. My inspiration and design guidance came from a Wild Ginger forum posting by Belinda Davies from Melbourne. She suggested starting with the Empire dress and listed her settings. I took the empire dress into Pattern Editor, and did a couple of trials to get the cross right, determined by copying and flipping the bodice piece and overlapping the two. I decided to leave the darts in the "skirt" of the top, because I have a rounded abdomen. I just scooched the two back pieces together and cut as one. When I made the top, I pinned the elastic a bit snug to pull up the front neckline openings. I probably stretched the elastic a bit too much, BUT it does HUG my neckline and I don't have any gaps occurring. The pants are simple pull-on pants from Curves. The fabric and dyed foldover elastic were purchased at Needle Nook in Wichita. |
|||
|
|
||||
| Wrap top of Rayon print, PMB V3, 3/05 | ||||
|
This fabric was originally going to be a standard camp shirt shape, but I was inspired by noticing how lovely the print looked when hung (flung) on the diagonal on my dress form. Once I decided to feature the stripe on the bias, I went "shopping" for style ideas on the Internet. I found just the look with Vogue 7876. Using my extended shoulder measurements, I started with the classic blouse and the surplice opening. The shaping for my curvy bod is provided by armhole darts and waist darts front and back. In Pattern Editor, I extended the line of the front to the side at waist level, and added shape to the hem and a fold back facing to the neck edge. I then printed the bodice in quarter size and sewed it up, tweaked the front and hem shape, and checked in Yardage Calculator to ensure the fabric was wide enough. Well, when I started laying out the pattern the fabric WASN'T wide enough, and I didn't have enough length to cut the top on a single layer. I considered piecing at the side lower edge, and trimmed off a triangular corner to fit the edge of the fabric. Then I had an idea, and taped the cut off wedge to the bottom of the side back where I had the room! I also decided to cut the sleeves on the cross grain as a design feature. So the front is near bias, with the facing laid on the selvedge. The back is straight grain, and the sleeves are cross grain. I like the contrast and flow of the stripes, and I'm happy with the side seam going forward at an angle below the waist. When I constructed this, I mitered the corners of the points, and hand-stitched the hem. Then I tucked and wrapped the outer waist point onto white plastic D-rings, and tucked and stitched the inside waist point to a waist tie. The tie comes out through a hole at the side waist, wraps around the back and is held by the D-rings. The front neckline crosses pretty high when the top wraps "correctly." This means that when it sags open, I'm still covered. I have considered adding a snap, button or Velcro at the neckline since wearing this. |
|||
|
|
||||
| Navy Black Tunic, PMB v3, 1/05 | ||||
|
|
I wanted to make this nice rayon damask as a tunic overblouse, so drafted a shirt-jacket very similar to the Silk Dupionni one from August 2003. I was thinking I did it with a classic silhouette, but they are both start as casual. That one as a jacket with French darts, this one as a blouse with side darts. They both have wing shawl collars, but this neckline is 8" deep and the other is 6" deep. The duppioni garment has cuffs, and this one has a button securing a pleat at the bottom of the 11" hemline. By the way, most of these style changes were based on whim and the fabric. I am very pleased at how quickly this overblouse made up, and at how nice it looks. |
||
|
|
||||
| Blouse with slot seams from two prints, PMB V3, 3/05 | ||||
|
Even though Kona cotton is a bit stiff for my tastes in apparel, sometimes I fall in love with a print at a quilt shop. These two prints were part of a group that I just loved, so I bought a couple of yards of the iris print and a half yard of the purple mini print. I decided to feature the mini print in slot seams extending into pleat underlays and on a two-layer collar like a blouse I had made years ago. The drafting choices were classic blouse with my new "Belinda's Extended Shoulder" measurements, shoulder princess darting and V-neckline with a depth of 6". I selected the Overarm Seam sleeve and the Italian collar, which I extended about 1 1/2" in Pattern Editor to meet at center front. I also drafted a larger collar shape for the contrast fabric, and added extensions to the side front seams for the pleat. After printing and trimming out my pattern, I put the collar pattern around my neck and decided to make the two collars a little smaller, and I took about half an inch off the outer curve of the two pieces of the sleeve. I later trimmed off another 3/4" of sleeve cap height to get a more set-in look for the Overarm Seam sleeve which Lisa told me one time was off a vintage coat. The slot-seam-pleat underlays were cut by measuring the princess seam length by 1 1/2" wide, with more width at the bottom for the pleat underlay. The sleeve underlays were done the same. I didn't have enough fabric to slot the back princess seams, but cut a little belt for the center back. To sew the slot seams, I serge-finished, folded and pressed the hem allowance first. Next, I machine basted the seams and pressed them. I topstitched the creased edges of the pleat area before adding the underlay-about 7 inches up from the hem. After pinning the underlay to the seam allowances, I sewed first one side and then the other on the underside. The next step was to topstitch the rest of the princess seam above the pleat underlay (and resew the side that needed it!) After taking out the basting, I had a cool slot seam extending into the pleats at side front. I assembled the sleeves in a similar fashion, but pulled the slot open a bit at the bottom of the sleeve before topstitching it. The two collars are assembled separately, then basted together at the neck edge and applied into the neck facing seam as one. I finished the blouse with buttons covered in the mini print. |
|||
|
|
||||
| Knit print casual jacket, PMB V3, 2/05 | ||||
|
|
I spent awhile trying to decide how to make this knit print jacket beyond knowing that I wanted to do a zip front. I thought about making a hoody, but decided I didn't have enough fabric, so it ended up being drafted as a classic jacket with knit band collar, set in tapered sleeves and side seam inseam pockets. This garment was my first test of my new extended shoulder measurements, I added an inch and some width to the sleeve and used 1" elastic in the hem to create a shirred cuff. I also cut the collar extra long, and shirred it onto 1" elastic for interfacing and style before sewing it into the facing like a mandarin collar. Back shaping is created by sewing an inside casing at waist level and inserting elastic from side seam to side seam. I sewed the separating zipper between the body and the facing. This zipper ripples a bit, but my friends and PMB pals didn't think it was that noticeable. That's good, because this fabric is not ripper-friendly! |
||
|
|
||||
| Print challis pants with self sash, PMB V3, w Beta Pants update, 1/05 | ||||
|
|
These are the pants that I made right after the major pants drafting update at the beginning of 2005. Since I had recently "nailed" my pants draft, I knew I wanted to duplicate it with the new settings! Attached is my saga of using the Jan. 2005 pants draft update, as I summarized it for the PMB chat list. These pants started out as the pull-on pant draft, but I ended up making a front waistband so I could add my favorite slot pockets, belt loops and a bias self-fabric sash. I'm happy with the fit and styling on these pants. |
||
|
|
||||
| Red/black knit with draped neckline, PMB v3, 1/05 | ||||
|
In November 2003, we traveled to Boston to look at universities. My request to the chat list for Boston area fabric stores gained me an invitation from Diane Franklin to go fabric shopping. What a nice person! She picked me up one morning and we departed for two fabric stores followed by meeting our husbands and my son for a dim sum lunch. It was a fun morning! Diane is the first one who selected this fabric--I decided I liked it while it was being cut for her and bought the rest! It is a very, very drapey fabric with a "brocade" design knit in. I think it is polyester, and the drape and 4-way stretch resemble slinky. Wanting to utilize the characteristics of the fabric, I considered a top which wrapped into side gathers, but came to the conclusion I didn't have enough fabric. I ended up using PMB's draped neckline and shirred sleeves, and am very pleased with the final effect. I drafted in PMB to get the style choices and fit including an armhole dart, but also drafted a top in Curves to figure out how much to reduce the pattern size because of the stretch of the knit. I merged the Curves polo draft on top of the cowl neck PMB draft, and when I cut the garment out, used the side seams of the Curves draft and the style lines of the PMB draft everywhere else. |
|||
|
|
||||
| Blue-gray check wool pantsuit, PMB V3, 11/04 | ||||
|
|
The inspiration for this jacket came from a vest pattern that I bought pre-PMB but never made up. The vest had shoulder princess lines, a zip front with mandarin collar, and a chest pocket. I copied these choices into PMB, adding the epaulets for a bit of a military look. I drafted a classic jacket, tapered set in sleeve, mandarin collar and finished length of 26". I added 1/2" ease to my normal bust and hip ease. I used Pattern Editor to transpose the casual draft shoulder onto this classic jacket draft. The collar ended up with a shape I didn't like, so I turned the corners down and added the buttons. This jacket is lined with Ambiance Bemberg rayon lining, which I nearly always select. It is pricey, but worth it for the feel and breathability. The pants are the slacks draft with waistline facing, tapered legs and a 17" hem circumference. I used millinery grosgrain, also known as French belting, for the waistline facing of these lined pants. This ribbon has saw-tooth edges which allow you to press a curve into it. I sewed my favorite welt pockets from Mary Ellen Flury at the side fronts. They gap less than inseam or slant pockets, and add a nice tailored touch. |
||
|
|
||||
| Floral print organza big shirt, PMB V3, 7/04 | ||||
|
This very interesting fabric is part linen/part silk, and has a crisp sheerness like organza but is a bit thicker. I drafted a 32" long classic blouse with French dart, long set-in sleeve with cuff, and band collar. For some reason, the dart points were kind of low when I tried it on, so I ripped out the points and modified them into a upward-pointing curve. The length was kind of long so I curved the hem from the long back to a shorter front in an attempt to make this look different. I'm not sure if I like it, but the people I've asked do, so it has stayed! I do plan to change the cuffs-I must have forgotten to prewash this fabric, and the sleeves have shrunk. |
|||
|
|
||||
| Casual/Workout pants and Shells, Curves V3, 5/04 | ||||
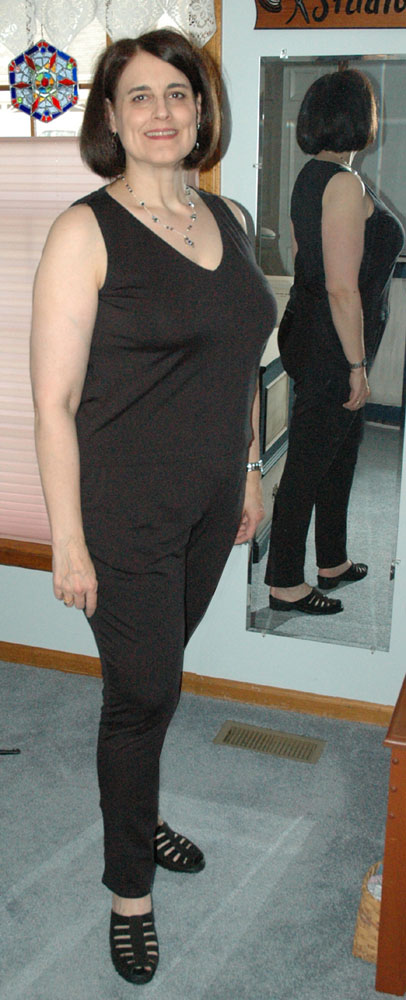 |
Let's see, I went to the Philadelphia American Sewing Guild convention in 2002 so I could go fabric shopping in New York, will go to the Rotary convention in Chicago this summer (2005) so I can visit THE Vogue Fabrics in Evanston, and told my mom last summer I'd be happy to drive with her to western Kansas as long as we stopped at Needle Nook in Wichita to shop for knits. Then there was the previously mentioned fabric shopping trip with Diane Franklin in Boston, and the side trip to La Jolla when we took a family trip to San Diego a few years ago. Do we see a trend here? Anyway, on the trip through Wichita I bought three pieces of Lycra knit to make into exercise/casual pants. I made the black and navy lycra knits at about the same time into extra long, close fitting but not tight pants (oh the joy of having pants that aren't too short for once!) and squeezed out matching shells from the leftover fabric. These were drafted in Curves as pull-on pants with a cut-on casing, 1" ease in the hips and 0" in the waist. They have a straight leg with a 14" hem, and I did not scale the pattern for the knit because I want the fabric to skim my curves rather than stretch over them. I added inseam pockets and am thrilled with the fit since I removed an inch from the crotch depth and added an inch to the length. I was satisfied with my pants draft before, but now I feel I have "nailed" it. I cannot find my style sheet or pattern for the top, but I'm pretty sure it is the Curves polo top draft, with a V-neck front and the back placed on a seam to fit on the fabric leftovers. I zigzagged 1/4" elastic to the wrong side of the neck and armhole edges for "basting," serged it for looks, then folded the elastic to the inside and topstitched using a double needle. This photo is the black shell and pants. The navy pieces appear as coordinates in some of the other photos. |
|||
|
|
||||
| Heather blue interlock top and capris, Curves V3, 2/05 | ||||
|
I confess. I am a catalog shopper. I do sometimes buy clothes that really "sing," but mostly I just shop for design ideas. The idea for this top came from a catalog I'd never heard of before, called Monterey Bay. I thought the top was cute but didn't care for the colors or fabric. It seemed to be the time to use some heather blue knit I had aging for awhile. The hardest thing was finding the zipper. I was afraid this metal one (which had the look I wanted) might irritate my neck, but it doesn't. I drafted the polo in Curves with a 6" deep V-neck, set in sleeve 12" long, and no ease. I didn't scale. For the neckline design, I held the cut out front up to me and pinned the zipper on top the way I wanted it, and then marked and trimmed for the wider and deeper neckline. I fused interfacing and stay stitched a rectangular shape for the zipper part that is closed, then carefully sewed in the zipper like piping, finishing with a facing cut to match the neckline. The bottom rectangle is by no means perfectly sewn on the inside. The triangular inset of white knit is folded double to avoid a hem, and I serged it to the outer edges of the facing so it looks like a top layered underneath. The Capri pants were drafted after measuring some ready made capris in my closet. I settled on an inseam of 20" and a finished width that would be 13" at the ankle on the tapered draft had I made them full length. To coordinate with the white knit inset at the top, I cut some extra seam allowance at the sides of the top and pants hems. Then I sewed in an underlay of the white knit. However, the pleat kept popping open in the soft knit, even after I hand stitched the creases. So I finally topstitched 1/2" away with a point at the top for a very narrow flash of white, but one which doesn't add visual width where I least need it! |
|||
|
|
||||
| Plaid seersucker pantsuit, PMB V3, 8/04 | ||||
|
|
A few years ago, I bought this plaid and a pattern to make a dress and jacket. Since I dress more casually for my new job, I decided to make a pantsuit. It wasn't until I had it cut out and the pieces on my sewing room floor that I realized, "Whoa, that's a lot of plaid!" However, I received some compliments when I wore the pieces together, so I guess I'll continue to wear it as a pantsuit instead of separates. The pants are my standard elastic back slacks, but the light bulb went off and I drafted these with less crotch depth. I'm happier with the fit. I did the one-ended welt pocket like the checked pants from March, and built the opening into the pockets instead of using a zipper. The front interfaced waistline is cut on the bias, and the elasticized back casing is cut on the straight grain. The jacket is the same classic panel styleline that I drafted for the purple pantsuit in April, but I could have used some more ease in the hips for this fabric. I decided I liked the shoulder line of the casual draft, so I overlaid the pattern for the casual shoulders onto the classic jacket. (The casual draft doesn't give the option of panel style line fitting.) I replaced the collar with the collar from the commercial pattern I had bought several years ago, and used the pocket flap design from that pattern, too. I trimmed the neckline to fit the collar pattern by copying the commercal pattern neckline. The collar and flaps are piped in commercial piping. After constructing and pressing the collar, I pinned it into position on my dress form to dry into shape. |
||
|
|
||||
| Denim "gauze" beaded top, Curves V3, 7/04 | ||||
|
|
This knit from Needle Nook looks like a crinkled gauze. I liked the back side with a hint of a stripe, but used the plain right side for the sleeves. I decided to make a basic top with 7" deep V-neck front and 4.5" deep V-neck back. This is the polo draft again, and I lengthened it while cutting out to use all the fabric. For the beading, I first stitched seed beads around the neckline and sleeve hems, adding a few loops at the center back. Then I created the netting at center front. I pinned a sheet of printer paper into the neckline, and sketched the lines I wanted on it. I basted a larger blue bead onto the paper at each intersection, then starting at the bottom, built the beaded netting by stringing the seed beads across, back and forth and anchoring them well on both sides. The capris are store bought, but I replaced the machine stitched hems with a row of beading. |
||
|
|
||||
| Mint print camp shirt and shorts, PMB V3, 6/04 | ||||
|
I had a big chunk of fabric leftover when I laid out a long sleeved shirt-jacket, so I decided to eke out a camp shirt and shorts instead. This was the first time I drafted the casual blouse, and I really like the shoulder line when I add medium thick shoulder pads. I tried drafting the shorts with less body depth at the front. They do not fit well at the front, so I returned to equal-equal and shortened the crotch on the next pair. The top is the keyhole backed shell from 5/04. |
|||
|
|
||||
| Royal/black checkerboard top, PMB V3, 7/04 | ||||
|
|
This top is the result of having large chunks of scraps left over from the pants and top made March 2003. I would have loved to draft this in Curves so I could scale it. However, I wanted to start with the Princess lines so I drafted this in PMB and it came out way too big even though I did some scaling. I made the horizontal slices in Pattern Editor, and marked each pattern piece with the appropriate color before cutting it out. The neckline was too low and too wide, so adjustments were made while sewing and fitting. I added the beads strung on elastic cord after wearing it the first time, and made the necklace to match. While I don't think this top has the greatest fit, it is rather striking looking. |
||
|
|
||||
| Pink pointelle knit top, Curves V2.2, 6/04 | ||||
|
I used the polo shirt draft with a boat neckline and semi-fitted sleeve for this top. I made this one with no ease and didn't need to take it in quite so much. (Note: it has stretched out or something and I need to take it in a year later.) The neckline was copied from a Coldwater Creek style. The front is a mitered inset about 1/2" wide, and the back and sides are faced. The neckline is a bit wide and I'm not sure it was worth the trouble. |
|||
|
|
||||
| White pointelle knit sweater set, Curves V2.2, 5/04 | ||||
|
|
Needle Nook had some lovely, high quality pointelle knits. I purchased two different patterns to make this shell and cardigan. The top is a polo with a sweetheart neckline. I faced the neckline from a suggestion on the chat list and used ribbing at the armholes, which gives them a bit of a cap sleeve effect. The cardigan is the polo draft with V-neck and zipper front, semi-fitted sleeve with knit cuff. I used ribbing to finish the neckline and front opening. |
||
|
|
||||
| Exercise Capris and shell top, Curves V2.2 5/04 | ||||
|
|
Mom asked me to drive with her to western Kansas to see my sister, and I asked her if we could stop at the Needle Nook in Wichita. While she doesn't sew any more, we spent a lovely hour there and I left with a shopping bag full of knits. I bought three lycra knits to make exercise pants from. Since I only wanted capris from this denim color, I had enough to make a sleeveless top. The pants were drafted with close fit but I didn't scale them because I wanted them to skim rather than conform to my body. The top is a boat neck polo draft. Since I had to seam the back, I cut out a keyhole neck with extensions, and threaded the extensions through a small white plastic ring after serging and topstitching neck edges under. I added an armhole dart to shape the front better for MY curves, and finished the armholes using self-fabric like ribbing. |
||
|
|
||||
| Purple knit pantsuit, PMB V3 and Curves V2.2 4/04 | ||||
|
I wanted to make a summertime purple outfit from cotton interlock, so I emailed Anne at Needlenook Fabrics in Wichita. After a couple of swatch exchanges, I purchased this lovely interlock. I selected the classic jacket, panel styleline and set-in sleeve. The collar is the sailor collar with the outer styleline changed to a Chelsea style at the front. The bow came off a purchased blouse and the trim is middy braid from Hancocks. The pants were made using the Curves pull-on pant with sewn-on waistline. I used 2" of ease in the hips for a comfortable, loose fit. |
|||
|
|
||||
| Ensemble of black and white check in two textures, PMB V3, 3/04 | ||||
|
|
Having purchsed four yards each of a flat black and white check with a coordinating crinkled check, I wanted to give myself a design challenge and make something special. The first thing cut was the blouse. The crinkle has 20% stretch so I thought about using Curves, but I also wanted a raised neckline and an armhole dart. So I drafted it in both PMB and Curves, then laid the two patterns on top of each other and printed. When I cut out the garment, I used the styleline from the PMB pattern but cut the side seams closer to the Curves pattern in which I drafted with a 20% stretch factor. I needed a back opening, so I used a shirt sleeve style continuous placket and added buttonloops. The pull-on skirt was the last thing cut, because I had enough scraps! The seams landed at side back, and the waist is finished with an elastic casing. For the pants, I used an elastic-back slacks pattern I had drafted before. I made welt pockets which extend up to the waistband, which means I only had to sew carefully at the bottom end! I used the crinkled fabric for the elasticized portion of the waistband, and the flat fabric for the front waistband and belt loops. This fabric has a touch of lycra so the pants very comfortable, but I do have a bit of pulling between the CF and the pleats. After cutting out the jacket and slacks, I tackled the jacket. I had enough fabric for a jacket if I made it half and half or one-third/two thirds contrasting fabric. I sketched a number of ideas using symmetrical and asymmetrical color slicing, yokes, etc. I narrowed down that I wanted the crinkle in the sleeves so I could roll them up, and finally arrived at this design. This was a real Pattern Editor challenge! I started with a raglan style jacket with a V-neck and straight sleeve. I rotated the dart into the armhole, and placed the sleeve next to the front before drawing my yoke line. I did the same thing with the back, then cut a half size muslin and tested the fit. After a bit of tweaking, I cut the top yoke from the bottom yoke, and added seamlines. Click here to see a pdf of the final pattern without facings. The yokes are separated with poly cotton ready-made piping, and the V-neck and front opening is piped with the crinkle fabric. I'm very pleased with the results, as long as I ignore the slight caving in of the white piping at the armhole. |
||
|
|
||||
| Fabulous Cashmere Blend jacket-PMB V.3 and slacks-PMB V.2, 1/04 | ||||
|
Sometime it pays to spend more on fabric. This cashmere/wool blend cost $20 per yard at Harper's Fabrics in Kansas City, but it sewed so beautifully that I loved working on it, plus I was able to squeeze this suit out of only three yards! (I bought enough to make trousers and a vest, then changed my mind...) With the fit from PMB and the fine tailoring helped along by the fabric, this pantsuit came out absolutely fabulous! While cruising through PMB version 3, I found a "panel style line" under darts when selecting the Classic Jacket. Since I was getting tired of the shoulder princess line, and no side seam equals less plaid matching, I decided to try it. I drafted this with a shawl collar, wing type, and a front neckline depth of 7". I selected 24" for the length to save fabric. This is shorter than I usually make jackets. Since I only had 3 yards of fabric, the pockets use narrow welts, and I had to cut off the collar. Click here to see the pattern piece with the collar removed. I also had to piece the facing, and the sleeves are the very basic set-in style. I did lower the sleeve cap half an inch and increased the wrist circumference by 1", since the black crinkle suit sleeves were a bit snug. The slacks were made using the pattern I drafted for the Slacks Fitting Shell-Crop Pants outfit made 7/03. These are pleated front slacks with a high-rise waist created in Pattern Editor to avoid a waistband. I used my favorite welt pockets and other details from Mary Ellen Flury's Sew Pro Classic Tailored Trouser pattern. The trim is a chenille and rattail braid and matching piping that I bought on the American Sewing Guild trip to New York the summer of 2002. I hand sewed some of the piping around some covered buttons from the Pendleton outlet store. My PMB group thinks this suit would retail for hundreds of dollars, and my son's teen girlfriend told me it looked like a Chanel suit, so I guess I'm not the only one who thinks this turned out exceptionally well. |
|||
|
|
||||
| Black crinkle pantsuit PMB V.3, 12/03 | ||||
|
I decided to explore suit jackets right after I upgraded to version 3, but was hesitant to cut into expensive suiting using the new version. Since I badly needed a pair of black trousers, I decided to sew this rayon/poly crinkle for my "practice" suit. I'm pleased with the fit, but you can tell in these pictures that the fabric does not lay as nicely as a suiting with more body. The back view is also pulling because I posed with my hands in the inset pockets. I drafted an elastic-back pair of slacks with the Wild Cut. After I got these constructed, I decided the Wild Cut was not for me, so I took off the back waistband and trimmed 1/2" off the center waistline tapering to the sides. It is hard to show the details with the black fabric, but you can see a front closeup of the pants in the photo of the blue chevron striped top. I used my favorite welt pockets which don't gape like a slant or side seam pocket. My design decisions were determined by the softness of the fabric and my desire to "Keep It Simple and Get it Finished." This is the shoulder princess classic jacket, with a double breasted front and V-neckline. I made a side seam inseam pocket, used the darted cap sleeve, and decided not to add the Italian collar I had drafted. I also taped the two back pattern sections together, and inserted a casing of Seams Great for elastic which extends from side front to side front. I like the softly tailored effect of the shirred design detail with this fabric, but wish it was a little better quality. |
|||
|
|
||||
| Velour stripe top, 9/03, Curves | ||||
|
I've been so pleased with the fit and appearance of the chevron striped top that I made in December 2002, that I decided to make a similar top with this velour. I redrafted the pattern in Curves using the Polo torso and a V-neck, then cut it as long as the 60" fabric allowed. I modified the V-neckline to be deeper after it was cut out and finished it with ribbing. It was too short for a dress and too long for a top, so I had the idea to add a panel at the bottom. After realizing that I would never wear a casual velour DRESS, I cut several inches off the hem and sewed it back on upside down. Even though the nap is wrong, the bottom cups a bit and I have "bulls-eyes" on the hips, I like this top very much! |
|||
|
|
||||
| Blue knit chevron stripe top, 9/03, Curves | ||||
|
I used the same pattern as the velour striped top to make this top out of a blue interlock with a subtle stripe pattern knit in. I made this version with short set-in sleeves and used a wider band of self-fabric at the neckline. This stiffer fabric does not drape as much as the stripes, but I still like the top very much. The slacks are from the black crinkle pantsuit with my hands in the welt pockets. |
|||
|
|
||||
| Silk Dupioni plaid Shirt-Jacket PMB 8/03 | ||||
|
I used the Darted Casual Jacket with French darts to draft this shirt jacket. The V-neckline is 6" deep, and the jacket is 32" long. I used the Wing Shawl collar and extended the outer style line wider using Pattern Editor. The Sleeve is semi-fitted with a barrel cuff, and both the sleeve and the cuff could use a little more width. I couldn't find buttons with two or three of the plaid colors, so I used three different colored buttons! |
|||
|
|
||||
| Embossed Beads velour jacket, PMB 09/02 | ||||
|
This is one of my earlier PMB efforts, not photographed before because it is BLACK. I used the darted casual jacket draft, with a neckline called the "bateau" but I would describe as "almost a raised neckline". I used a side dart in the front, and on the back tucked between the stripes to create a design detail substitution for the darts. I used the semi-fitted sleeve and close fit, which was 4" ease in the bust and hips and 2.5" in the waist. The pocket welt features a stripe of the embossed beads, and the jacket is lined in tricot for a soft look and feel. |
|||
|
|
||||
| Royal Silk Suit- PMB 8/03 | ||||
|
It was finally time to make up some royal silk duppioni that had been aging for awhile. I had originally bought this fabric to make a dress, but I really needed a jacket more. I had a bit less than four yards-not quite enough to make a two piece suit-but I wanted a skirt, too! So I decided I should face the collar and lapels with a contrast black silk of which I had a large scrap. I found a great pattern in my stash for inspiration. It was a Donna Karan, out-of-print Vogue 2165, which I had purchased several years ago because I liked the lines. What made it perfect is that it can be buttoned into a high neckline or left open with a lapel. Perfect-I could have a solid royal suit and also a blazer with a black collar and lapels. After laying the pattern on the fabric, I determined that I had only enough fabric for a very mini skirt. Since this would not be appropriate for a chunky forty-something who works at a conservative bank, I decided to make a yoked skirt. PMB to the rescue! For more explanation and photos of the jacket pattern modifications, click here I drafted the yoked skirt with straight hemline and two darts front and back. I used the faced waistband and close fit. I decided the yoke was too deep. I think it drafts to the dart length, but I used Pattern Editor to raise it so the seam would be hidden by the jacket front. Next, I rotated the back darts out of the yoke, and raised the waistline 3/4 of an inch and matched the facings. I took the back pleat off the seamline and changed it to a fold, and added extra width to the lower front skirt panel for pleats. I decided I would cut the front as wide as the fabric allowed me, then pleat in the excess at side front. The skirt pieces all fit on the fabric except for the back yoke. So I cut the paper in half vertically, and created a seamline halfway between the two original darts. Click here to see the pattern before I split the yoke. I sewed in a zipper before seaming the yoke to the back skirt. When I sewed the front waist tucks, I converted the four tucks into six. The fabric is rather crisp, so I may topstitch these down someday. The yoke seams "disappear" into the texture of the dupioni, so this turned out to be an excellent solution for getting a skirt out of a too-small amount of fabric. It is so much fun to be able to create a pattern on order to solve a cutting challenge! |
|||
|
|
||||
| Slacks fitting shell- crop pants outfit- PMB 7/03 | ||||
|
The next outfit was made to test average settings for the abdomen and buttocks on the pants draft (see jade and royal pants). I drafted a new slacks pattern with these settings, and took the pattern into Pattern Editor to change the waistline to a raised, no-waistband style. My absolute favorite tailored trouser pattern is made by Mary Ellen Flury in her Classic tailored trouser pattern #100. Unfortunately, she has gone out of business. I have made variations of this pattern over a dozen times, because I like the welt pocket,and find the raised waist to be comfortable. Using pattern editor, I copied the top area of each pants piece, flipped it and merged it at the top seamline with the leg piece. Then I determined the height and trimmed the top edge to rise about 1" above the waist. I copied the waist area again to make facings, which also have the darts folded in. To see the final pattern, click here. I didn't want to cut the new slacks pattern out of "good" fabric, so I decided to make a muslin. The least cherished and most appropriate fabric in my stash was this black/royal seersucker plaid. I reused Simplicity 8575 to make a top, and cut the pants as capris, given the fabric was on the narrow side. The pattern was a success-I am definitely more average-average than round-round! The fabric is so thin that I added a 5 inch strip of elastic at the side waists between the pants and facing. This outfit is very comfortable and I'm wearing it a lot-too bad this Internet-purchased fabric is already fading... | |||
| Iris blue slacks- PMB 8/03 | ||||
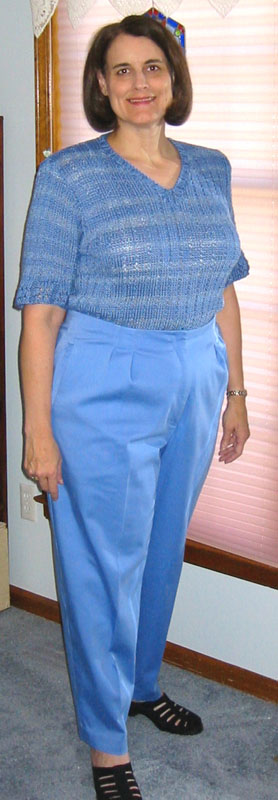 |
After making the seersucker "muslin," I was able to proceed with confidence to cut and sew this pair of cotton/lycra sateen slacks. This is the slacks draft with front pleats, regular cut legs, floor length, and close fit. (I need the room from the front pleats for my abdomen, and I sew them as short tucks. This cotton/lycra sateen is a pain to iron, but it matches my hand-knit sweater perfectly. (I hadn't knit a sweater in over two decades, but I couldn't let the yarn Mom gave me last fall go to waste, right? She bought it in 1988, and I found a different yarn to coordinate perfectly with it in case there wasn't enough!) Normally, I wear the sweater over the slacks, as they appear a bit snug here. | |||
| Mint Print Jammies- Curves 8/03 | ||||
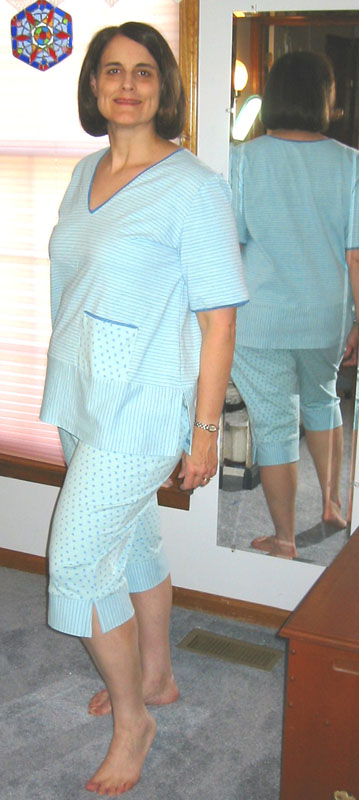 |
After laboring over the silk suit, I had to make something fun and fast. Five of us gals from the Kansas City PMB group recently went to Needle Nook, a Wichita fabric store specializing in knits. Beth Tanner raves about this store and she is right. Talk about interlock and lingerie fabric heaven! It was well worth the 7-8 hours of driving! I fell in love with these two coordinating print cotton jersey knits, but couldn't imagine wearing them out in public. So I made some summer pajamas suitable for lounging around the house. I used the knit sloper pants pattern from Curves for the pants, and cut them a comfortable, cute length. The top is made using the pattern I did last spring for the jade/royal striped top with the hem panel and v-neck. I used elastic as piping to finish the neckline and sleeve hem, and the pants hem band is doubled into a self facing. I wish I had cut the sleeves out of the dot, but otherwise am very happy with the results. By reusing patterns and sewing knits, I completed this outfit in less than six hours! | |||
| Jade Pantsuit- PMB 7/03 | ||||
|
This pantsuit two lucky Internet fabric purchases. The jade poly/rayon crinkle matches the jade/royal striped knit perfectly, so I decided to use the scraps of striped knit to make piping in princess seams. I drafted the top using the single-breasted, shoulder princess blouse draft. It has a jewel neckline, shirt collar, and elbow-length set-in sleeve. I used close fit, and took it in a little.The knit was cut into vertical strips to wrap around some thin piping. I cut the sleeve hem off to insert piping while I was making it. The pants are the slacks draft with regular cut legs and an elastic back. I took in both the inner leg seams and the outer leg seams. After reading the chat list and sewing several pairs of slacks, I have just about decided I need to change my abdomen and buttocks settings from round to average. I put welt pockets into the side fronts of the pants. Inseam pockets and slanted pockets gap open so badly, that welt pockets are worth the extra effort. | |||
| Top with back interest- Curves 4/03 | ||||
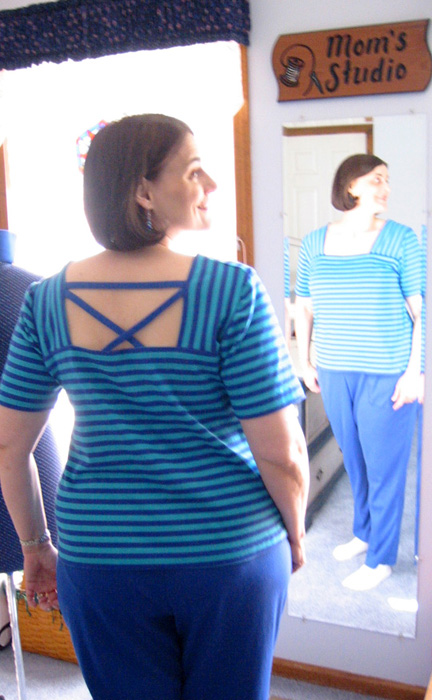 |
Ok, so now I have two tops out of the same fabric but I had a large piece left, and another design idea. I used a very close Polo shirt draft with a square neckline. The neckline front depth is 5", the back depth is 7.5", and the neckline width is 2". The sleeve is the semi-fitted draft. I used Pattern Editor to slice off the shoulder areas level with the square necklines to create the contrast effect. While sewing, I did need to make the shoulders shorter, and further fine-tuned the back fit after attending a Kansas City area PMB meeting. I also added the back neckline straps for design interest and functionality-the neckline did tend to fall! | |||
| Interlock Pull-on pants and Striped Top- Curves 3/03 | ||||
|
Don't ask me why, but I made the pattern for these Pull-on pants with "close fit" and no scaling. I guess it comes from too many years needing to add "ease" to commercial patterns for my pear-shaped body. I ended up taking these pants in a LOT. Having them cut too big did work to my advantage, however, because I accidentally put my cut and faced pocket openings into the back pieces. Don't tell anyone, but since the fronts and backs were very similar except for the crotch extensions, I turned them around, worked some of the excess crotch out as I took them in, and am wearing them with the inseams a bit far back... I used a sew-on waistband for these pants, because of the faced-edge slit pockets. This T-shirt is made from interlock using the Polo shirt, short semi-fitted sleeve, and close fit. I made the V-neck 6" deep in front and 1.25" wide, but scooped it out some more after printing the pattern. I used Pattern Editor to split off the bottom panel pattern pieces for cutting on the different grain. I cut 2" wide strips of stripe for the edge finishes, and folded and serged them on like ribbing. The V-neck insert was created on the fly, and is attached by stitching in the ditch on the V. I did need to take this top in a bit- I've GOT TO trust that very close or fitted is okay for knits! | |||
| Sports Top and Capri Tights 5/03 | ||||
 |
Here is my second attempt at making exercise Capri's and a sport top. I did much better with my scaling this time, so the fit is better. Both of these were drafted at very close fit, with 0 ease and a 40% stretch factor built in. The sports top has a Princess front and flat back. Draft one of each pattern and print only the parts you want to use, or tape the back Princess panels together. I used a front scoop Neckline depth of 5.5"' and a back scoop depth of 9.5", and made the neckline width setting at 1.5". I used 3/8" elastic in a casing on the neckline, and 1" elastic in a casing on the midriff because I like the extra coverage. I am wearing an underwired sport bra under this. The Capri's are the tights draft with a cut on casing. I shortened them a bit from the mid calf length. My only disappointment is that this "mystery" fabric from one of our national chains is a little warm when I wear it. Note to my patternmaking friends: Photos and text explaining the Sports Top and Capri Tights details have been removed because of immature adolescents who think it is "fun" to post images into a blog of a classmate's mom. | |||
| Four Piece Swimsuit- Curves 4/03 | ||||
 |
I have a swimsuit that I like from Silhouettes that is a tankini top and skirted bottom. I decided to duplicate it with several things in mind.
I had thought about making the tankini top with double straps, then realized that I would get the same effect by wearing the bra top under the tankini top. I wrapped the lycra around elastic for the straps. For details, visit here. Note to my patternmaking friends: Photos and text explaining the swimsuit details have been removed because of immature adolescents who think it is "fun" to post images into a blog of a classmate's mom. | |||
| Black interlock top with lace yoke- Curves 3/03 | ||||
 |
My favorite Coldwater Creek T-shirt has faded from black to charcoal grey. I LOVED the cut and look of that shirt and thought about dying it, but did not like the jersey fabric. So upon finding a nice piece of black interlock, I decided to make a new shirt and dye only the lace yoke. I used PMB for my pattern, because I wanted the fit I get from French darts. I used close fit, and should have used very close or no ease, because I took the sides in 3-4 inches (total)! I cut this with a jewel neckline, and after sewing the shoulder seams, placed the front/back on my dress form with dissolve-away stabilizer underneath. After pinning the lace yoke to the top through the interlock and stabilizer, I used two rows of zig-zag to topstitch the yoke in place. I trimmed the excess stabilizer and interlock away, then finished the shirt. MY version is better than the original! | |||
| Slinky dress, top and jacket- PMB 8/02 | ||||
 | 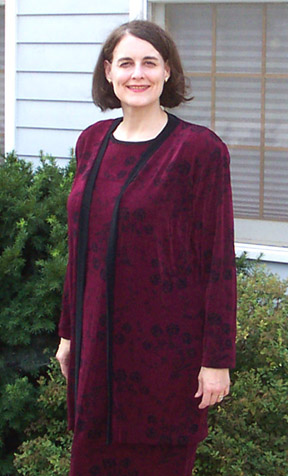 |  | This is the first outfit I made using Pattern Master Boutique. Made out of slinky with an flocked floral design, I made a chemise dress, cardigan jacket, and short sleeved top. I used close fit, and trimmed edges with black slinky used like ribbing. The dress is a sheathe with French darts and a set-in sleeve. The cardigan started with the darted casual jacket, v-neck, front opening, french dart, and set-in sleeve. The only way I could make the top out of the remaining fabric was to cut it with a center back seam and armhole princess front. | |
| Slinky striped two-piece dress- 9/02 | ||||
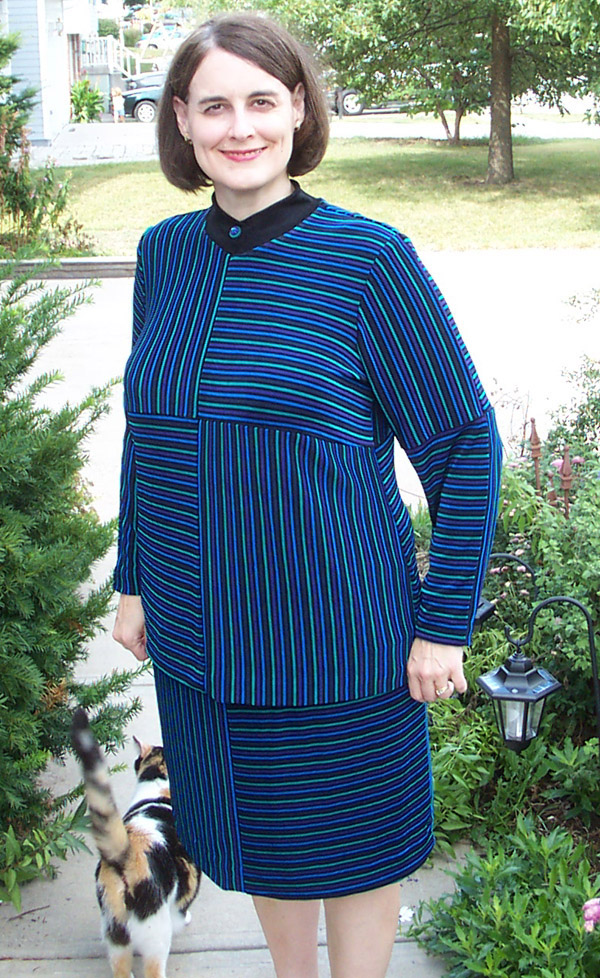 |  | Sliced slinky top pdf | This two piece dress was fun because of the stripes. Upon realizing that slinky stretches 4 ways, I decided to do a color sliced top with the stripes alternating directions. I used Pattern Editor to cut the pieces through the French dart at the bust and vertically. After I made the pattern, I decided to use the same checkerboard effect on the sleeves so I did that in the paper pattern. The ribbed contrast collar was going to be a split Peter Pan type, but it was too "sweet" so I overlapped it and sewed some stacked buttons on the Center Front. The skirt pattern is the basic straight skirt with an elastic waist. I used the blouse draft with french darts, a jewel neckline and semi-fitted sleeve. The PDF will show you the pattern before I made the paper alterations. | |
| Slinky ragland cowl two-piece dress- 10/02 | ||||
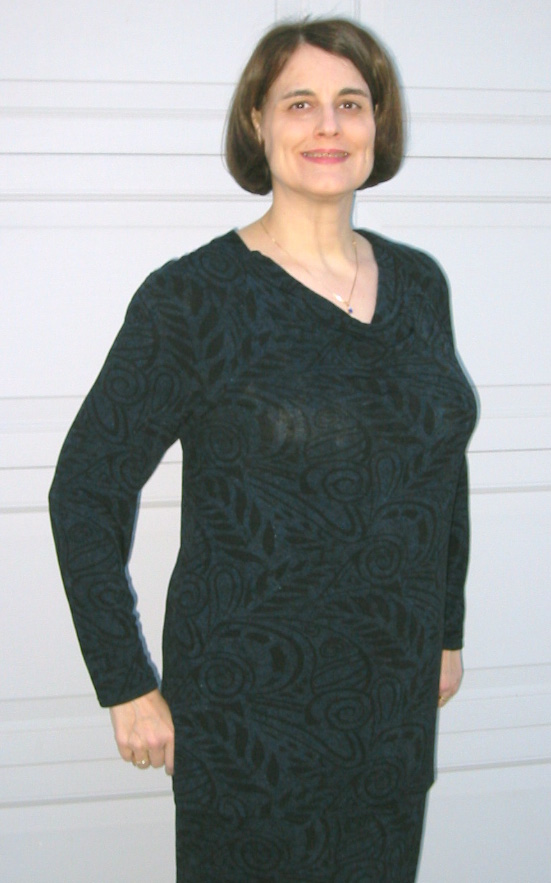 |  | Raglan cowl pattern pdf | I wanted to try a cowl neckline in this slinky dress. I remembered a nice cowl that I made in the seventies, and discovered that I still had the Belleville Sasson pattern. I drafted a sheath with raglan sleeves, and took it into Pattern Editor to draft the cowl neckline and combine the sleeve pieces into one pattern with a shoulder dart. After trying a muslin in tricot, I raised the back neck one inch and added 1/4" at the front armhole area of the bodice. Then I made a pattern for the revised facing. Open the PDF in Acrobat Reader and you can see the pattern shapes and notes about the design. I had enough fabric to make this a two piece dress so I can wear the top with slacks, too. | |
| Chevron stripe knit top- 12/02 | ||||
 |
After spending weeks sewing the hiking pants and raincoat, I decided I needed a quickly sewn project. I had bought a striped knit while at the American Sewing Guild convention in July. Remembering a favorite knit top from the 80's, I decided to sew the stripes on the bias. This is the blouse with no darts, front opening, semifitted sleeve, close fit. I ended up taking in the side and back seams a lot, but the sleeves with the knit cuff are a bit snug. I used Pattern Editor to add a Center Back seam, and drew in my bias lines. The neckline was a jewel neckline--I cut the V to match the stripe after I cut it out. I made the neck band 2/3 the length of the neckline opening by 3-inches wide, and sewed a reverse miter before sewing it on. | |||
| Hiking pants- 11/02 | ||||
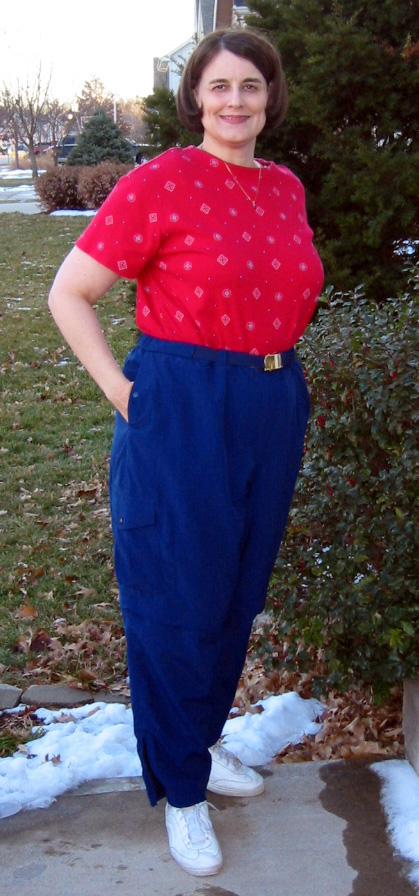 | 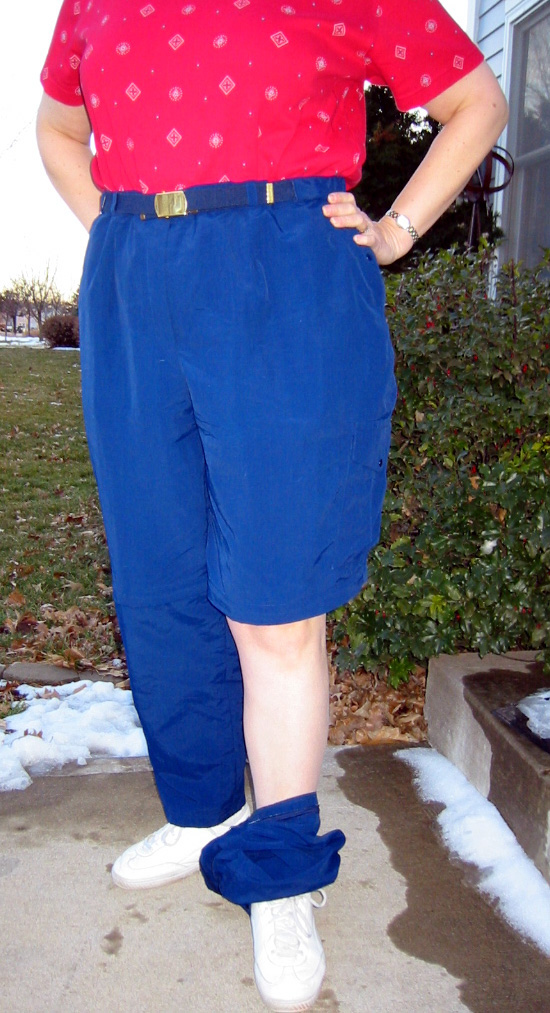 | 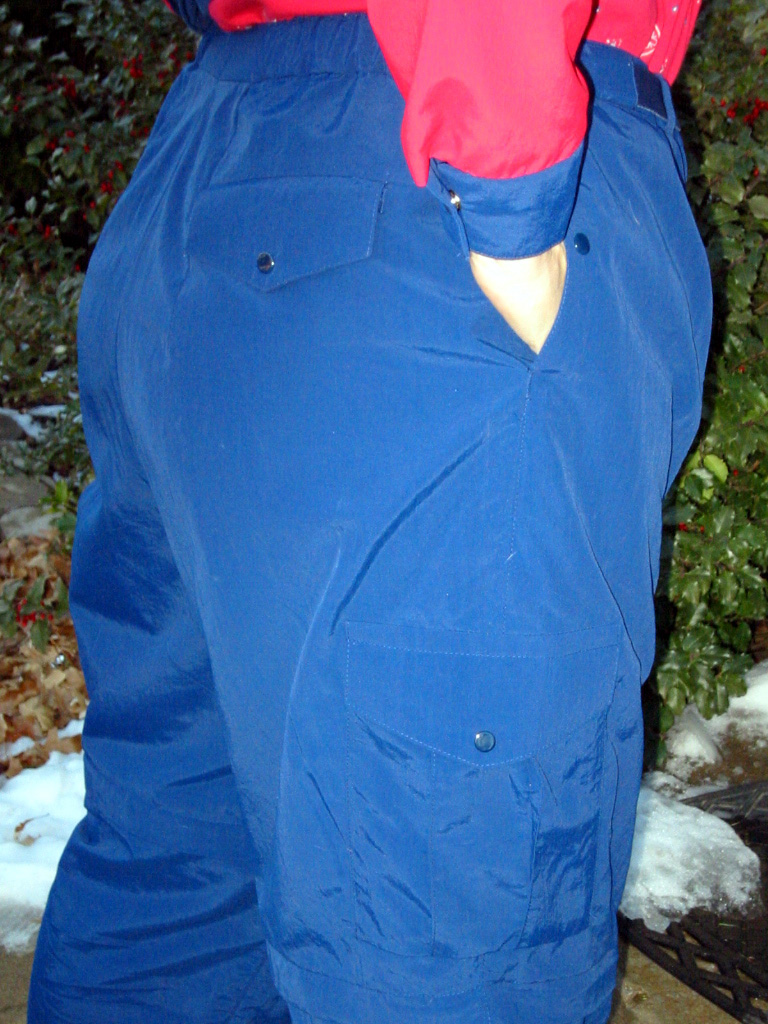 | I have wanted a pair of hiking pants with the zip off legs for years, but have had problems finding them in any color but khaki OR in my size. I discovered Pattern Master Boutique has hiking pants, but determined that I wanted them two inches longer. I used the slacks draft (but might have been better with a closer fit) with a regular leg and a 15" hem. I used Pattern Editor to change the length of the shorts, create inseam pockets and a welt pocket for the back, and cargo pockets for the legs. I wanted a comfortable, stretchy waist, so I put buttonholes into the side fronts of the waistband and threaded navy elastic belting into the side and back waistband. The belting appears at the front and joins with a slide buckle. Navy decorative snaps close the pocket flaps and front opening. I used two 14" nylon separating zippers in each leg--I didn't want the bulk of snaps or velcro or big plastic zippers. I also put zippers at the bottom of the pants legs so I can remove the lower legs without taking off my shoes. The pants legs can be stored in the cargo pockets while hiking. These pants were made from nylon Supplex which I found very nice to sew and press. | |
| Wind jacket navy side- 11/02 | ||||
 |
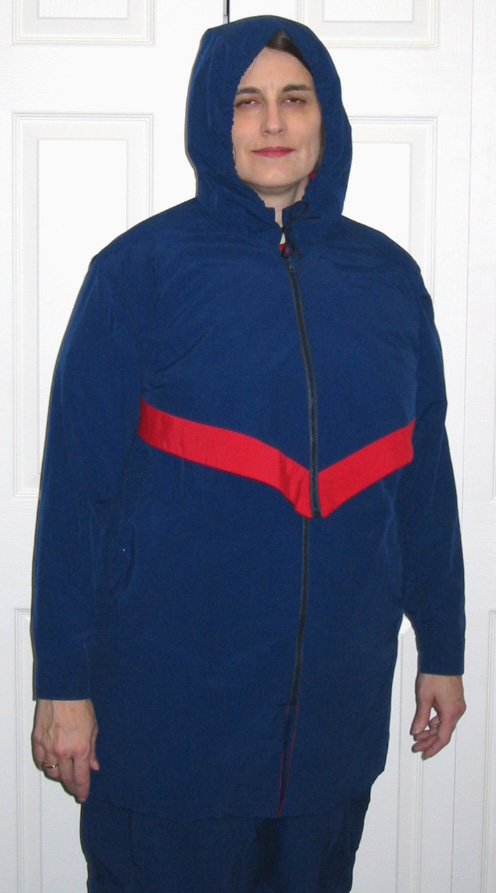 |
Wind jacket for chat list pdf | I have been looking at too many travel catalogs with reversible garments and lots of pockets. I like hoods on my raincoats, and wanted both a dressy jacket and a sporty one. I really liked Linda McPhee's pattern that has a terrific hooded short jacket which you wear over a full length lined vest. I bought her pattern but it was too unfitted for my body shape, so I started putting all my desires into a single PMB project.
I used the darted casual jacket with a front zipper opening and waist darts. The sleeve is set-in with a two-inch cuff and the collar is a 2-inch wide mandarin. I used the fitted level but took it in a bit. I took the jacket into Pattern Editor and rotated the waist dart so it angled toward the side hem. I also sliced the yoke front and back for the red side. Then I created another jacket with less fit for the hooded over-vest. I used Pattern Editor to do the color slicing and eliminated the extra length off the bottom. I was not happy with the hood shape, so I copied a RTW 3-piece hood and made the navy side 1-inch wider than the red side. You can see all the pattern shapes except for the modified hood if you open the PDF. The pieces in this view are divided by color so I could take them into Yardage Calculator to figure how much fabric to buy. | |
| Wind jacket red side- 11/02 | ||||
 |
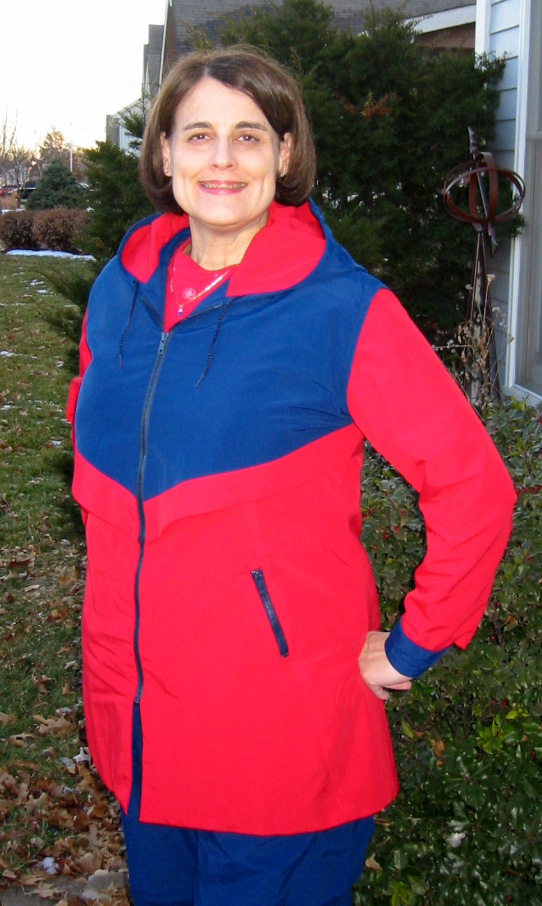 |
 |
This jacket took a long time to sew! The navy side has flap pockets set into the side front seams and a welt breast pocket. The red side has two patch pockets and two set into seam zipped hand pockets, plus a welt pocket at the center back with the zippered opening hidden by a back waist belt. I can store the hood in the back pocket but it creates a pretty unattractive bulge! Finding a reversible separating zipper was a challenge, and the pocket zippers are a different brand from the front jacket zippers. I used snaps on the pockets to match the hiking pants. I had a navy hood cord and eyelets for the hood, but it took me a long time to find them! I am very pleased with this entire project, especially the removable hood-vest! | |


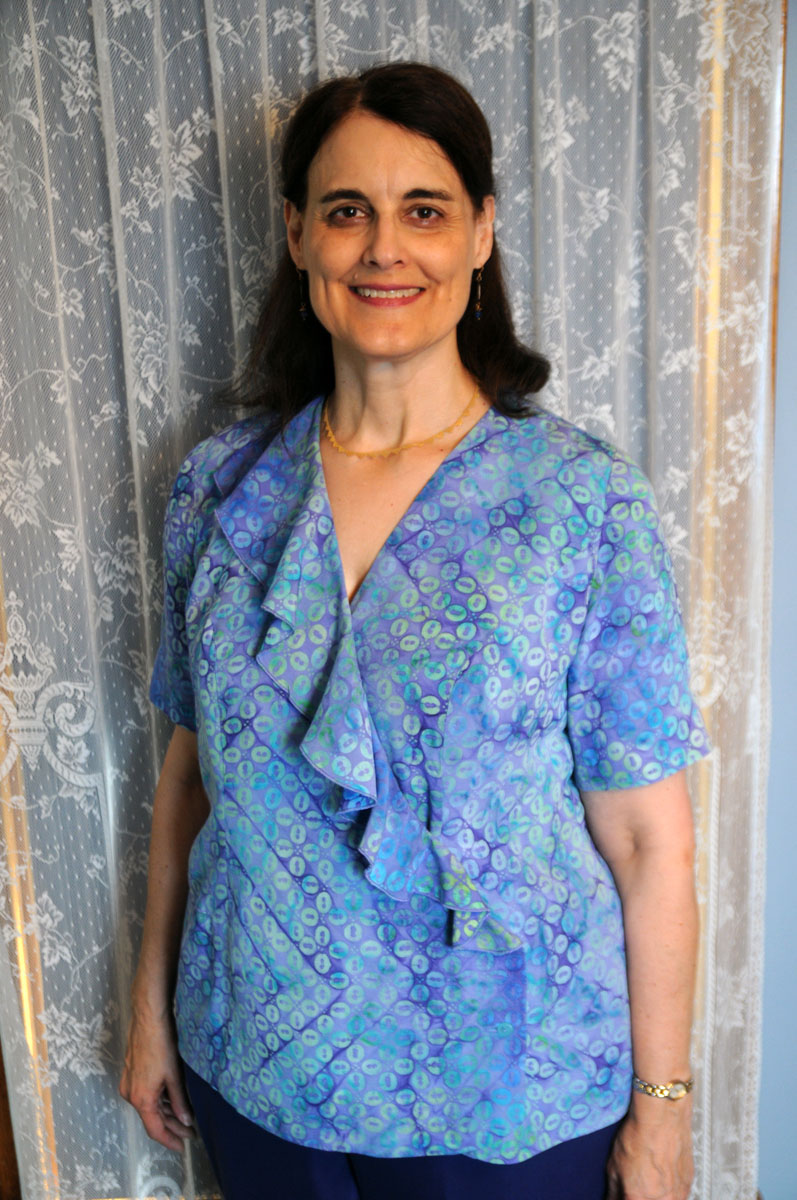


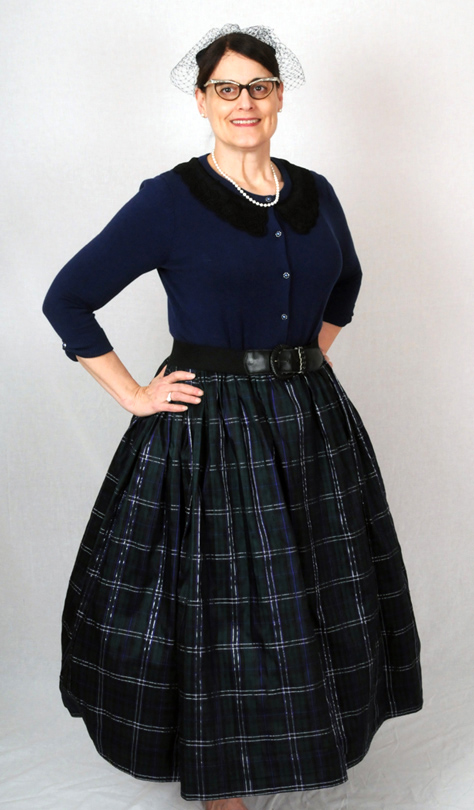


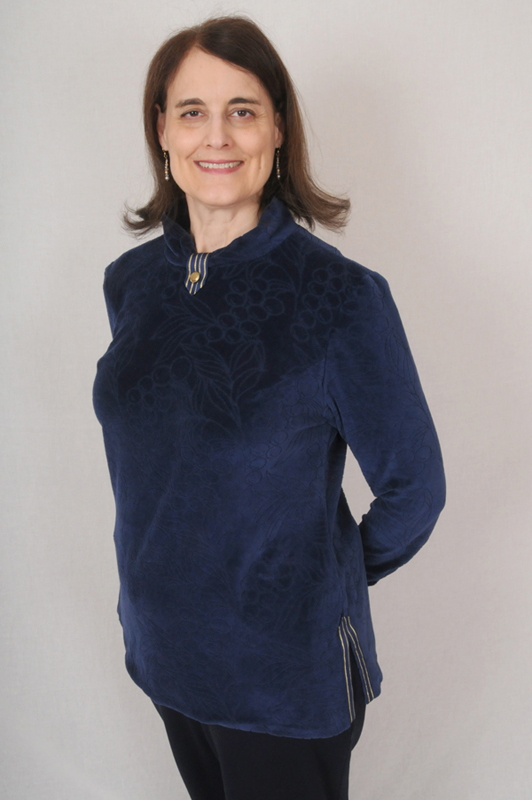
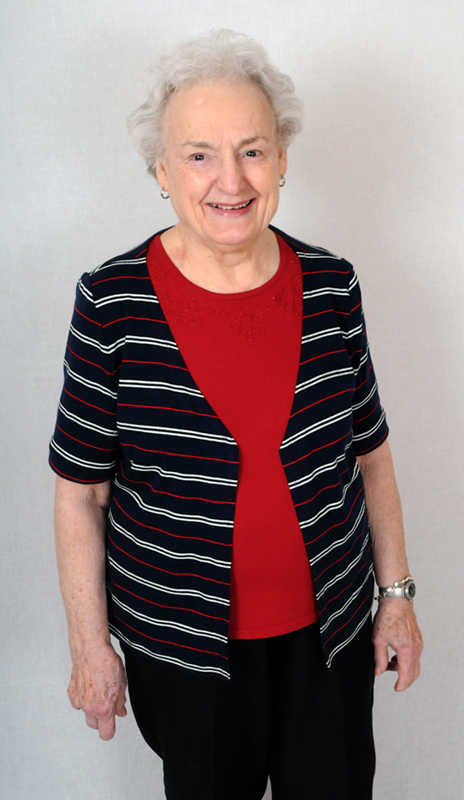


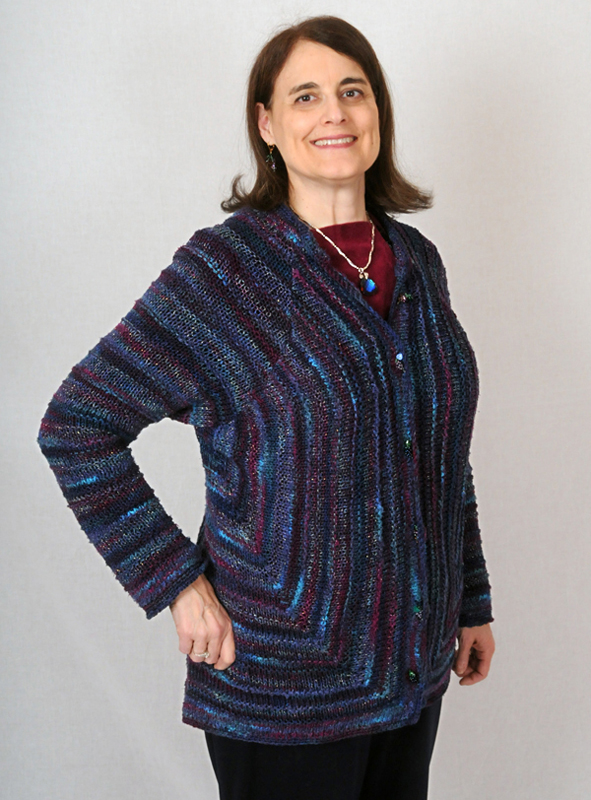
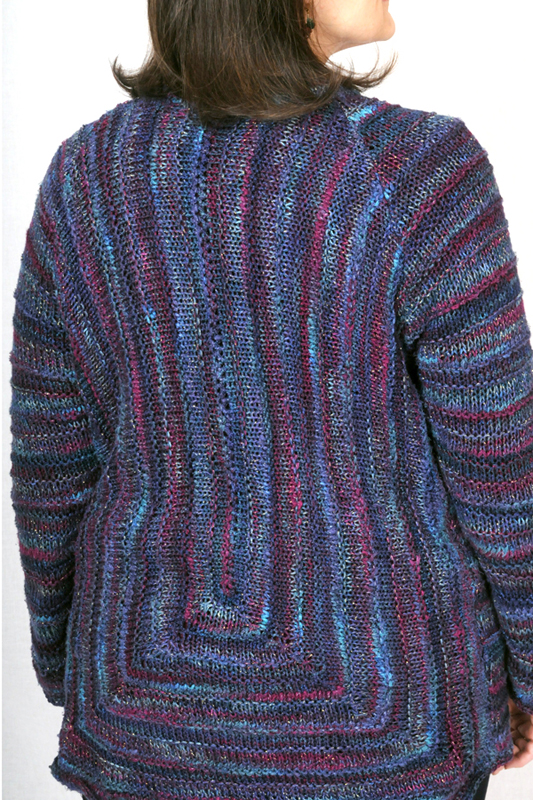


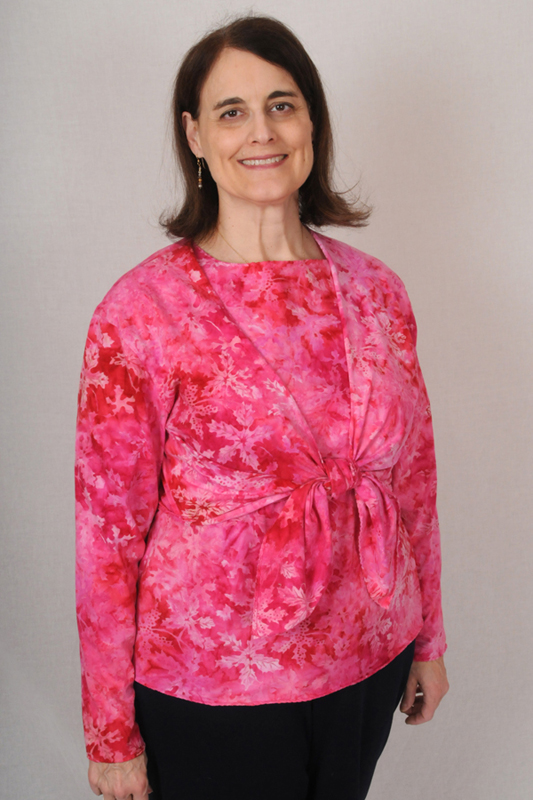


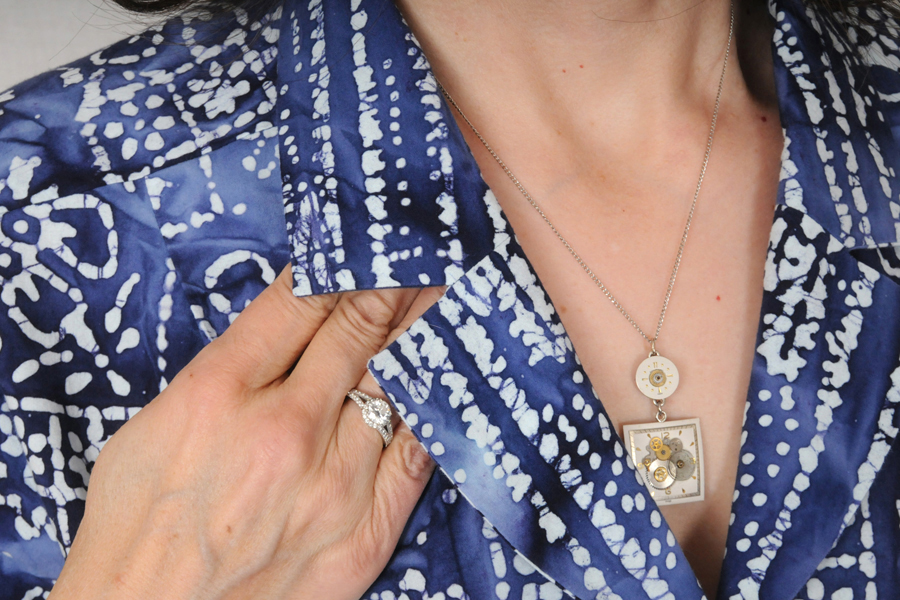

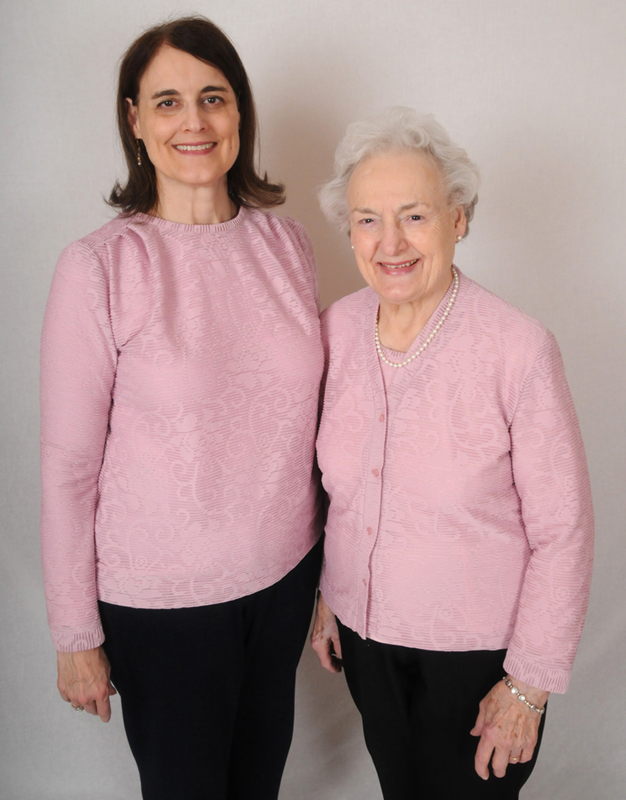
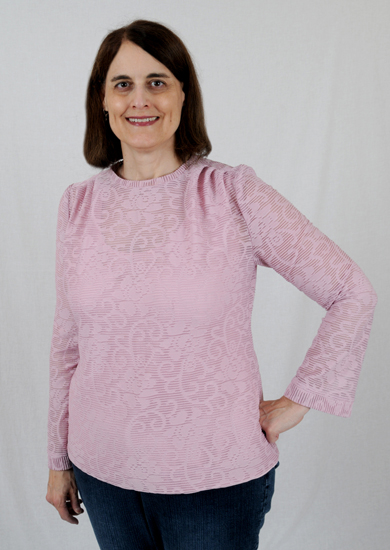
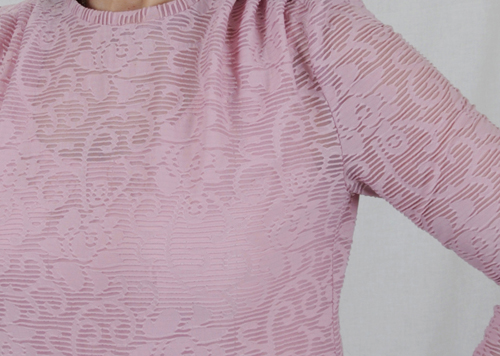
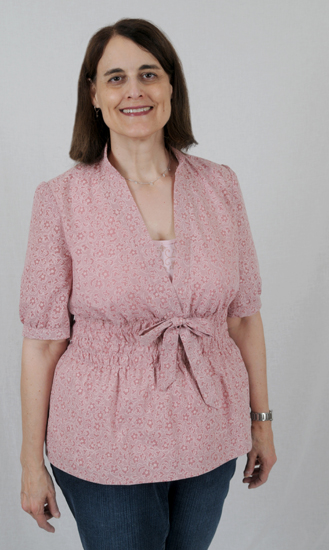


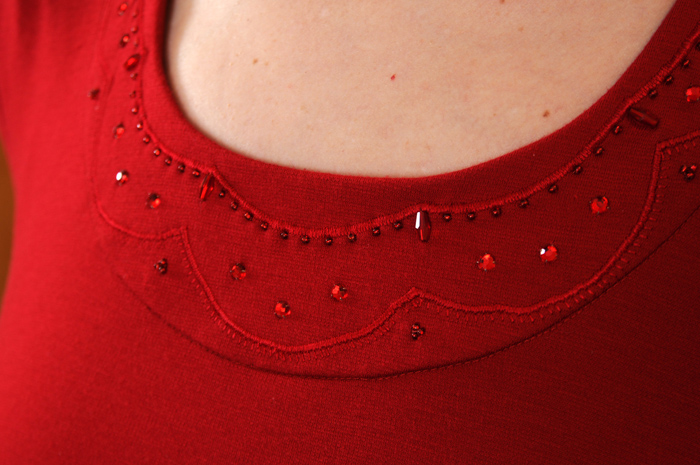
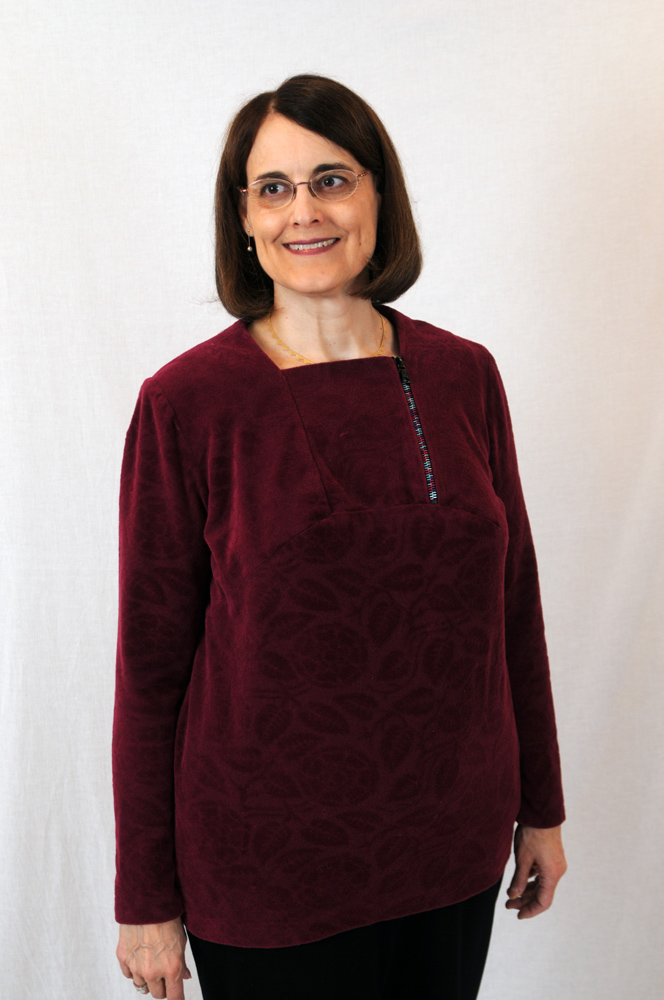

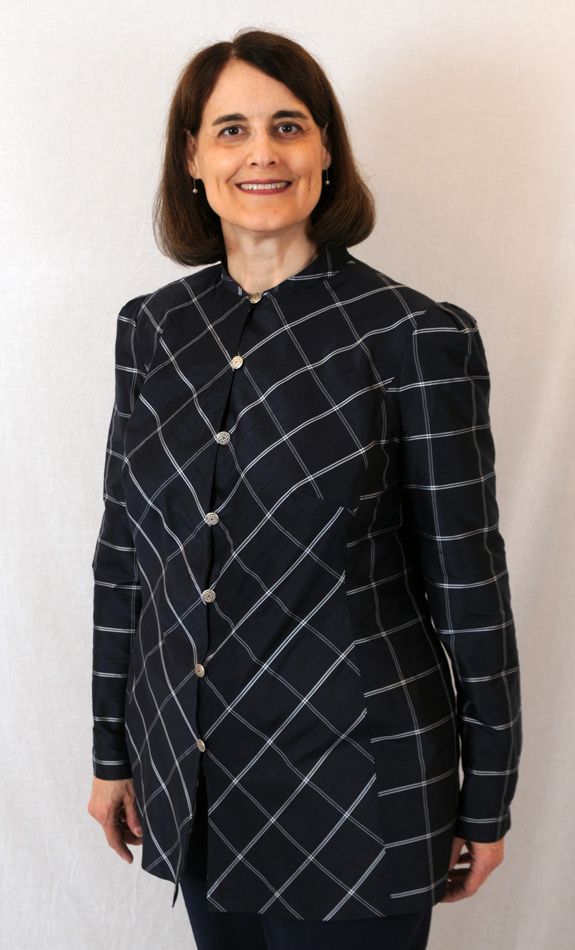


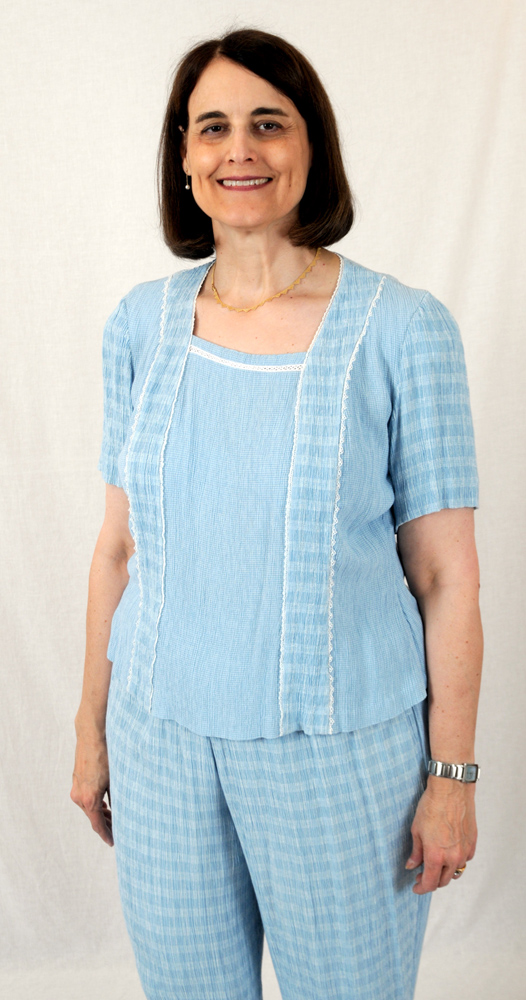


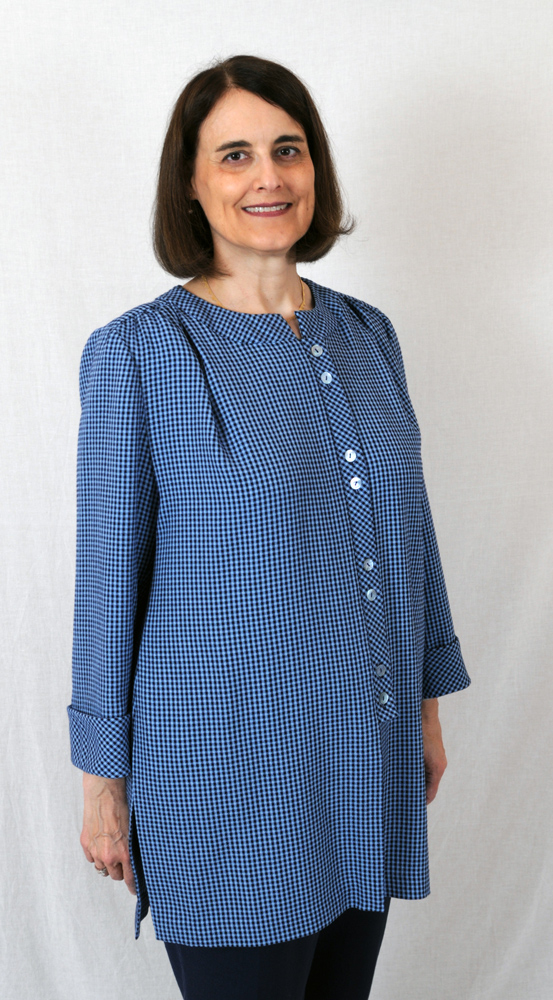


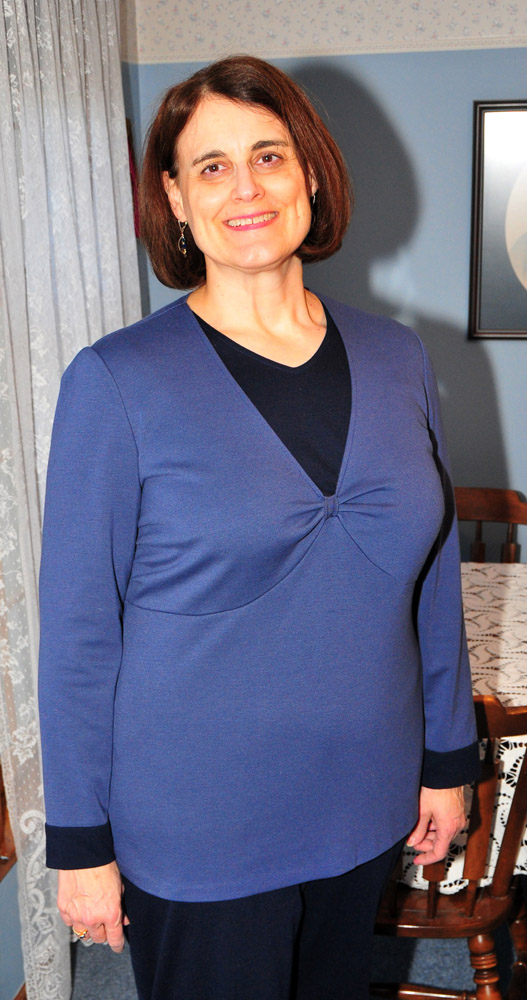


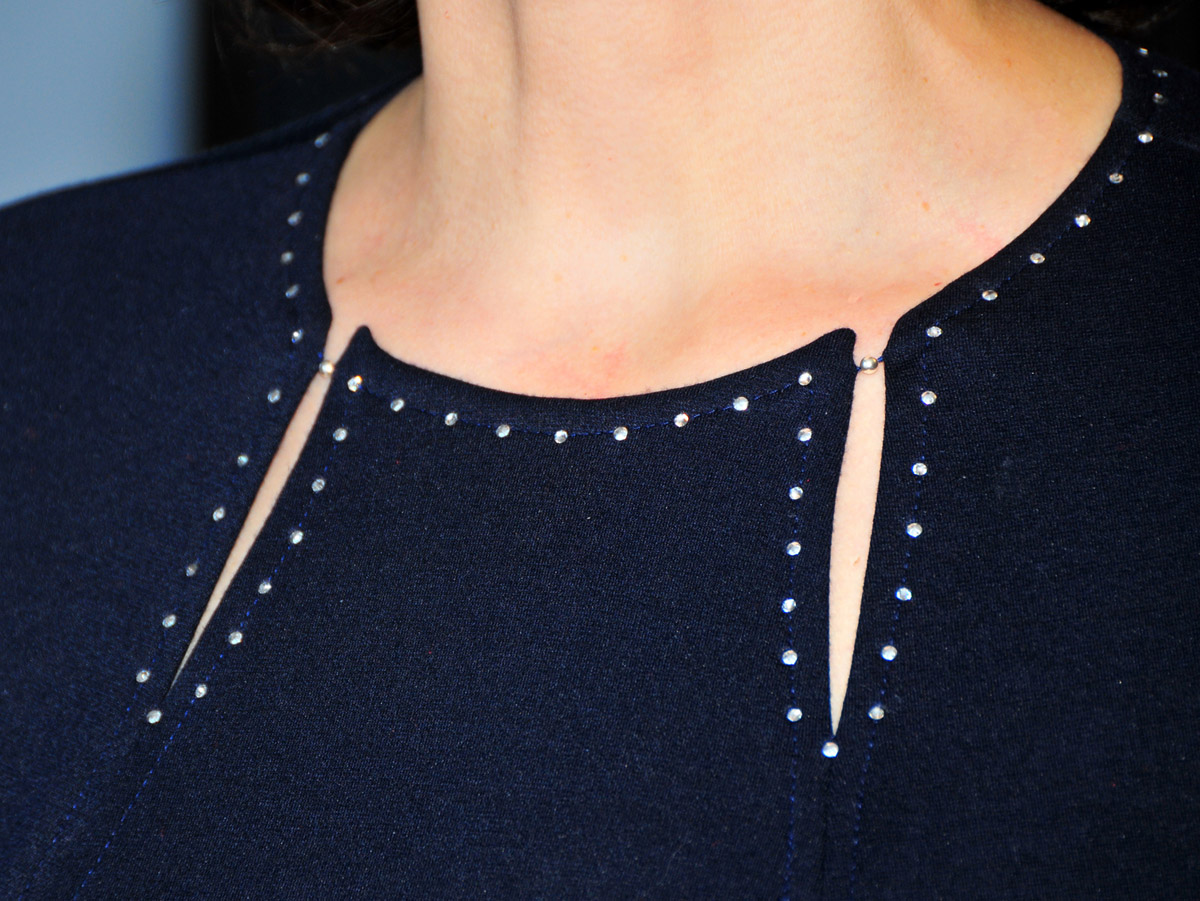
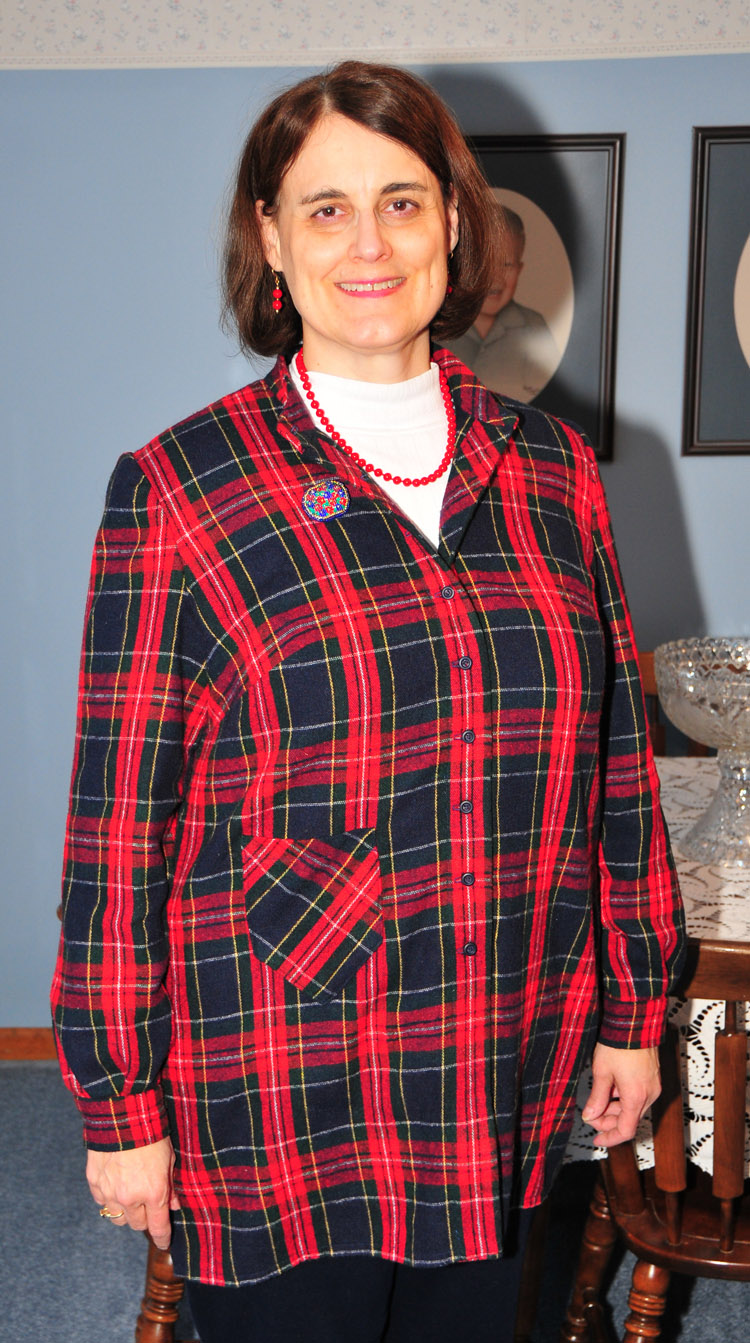


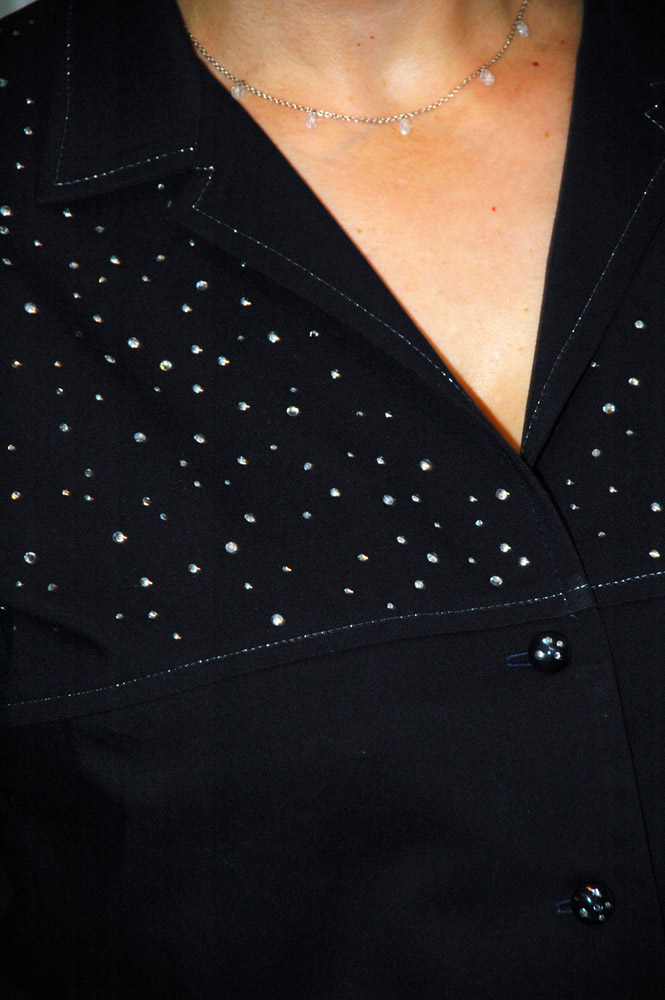
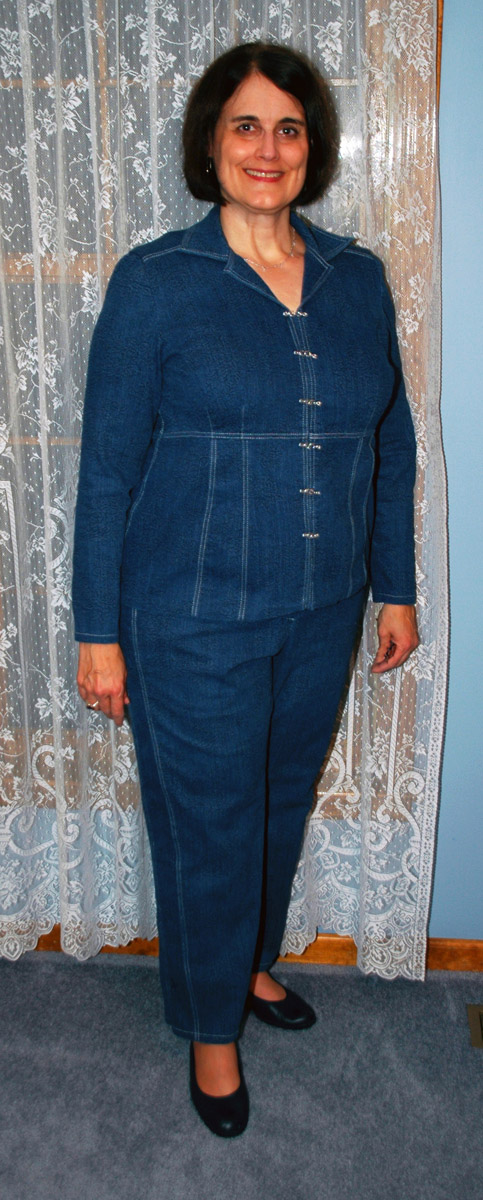
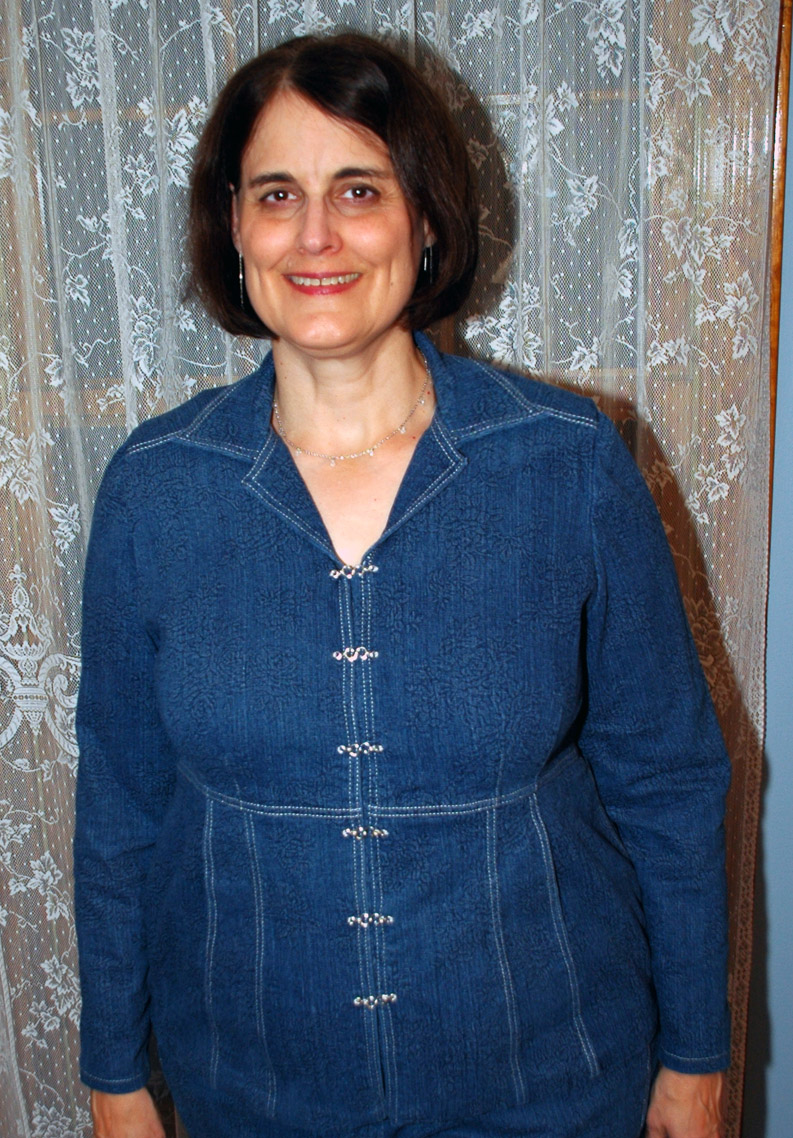

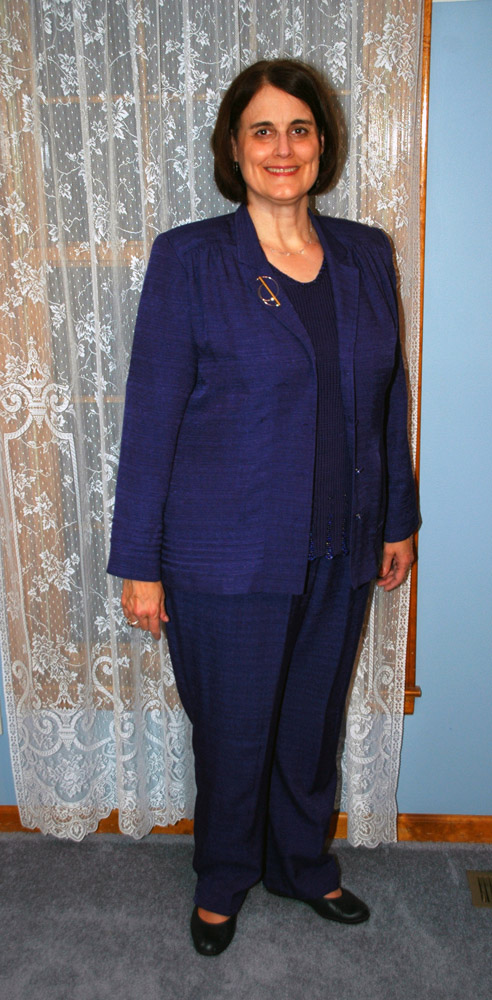
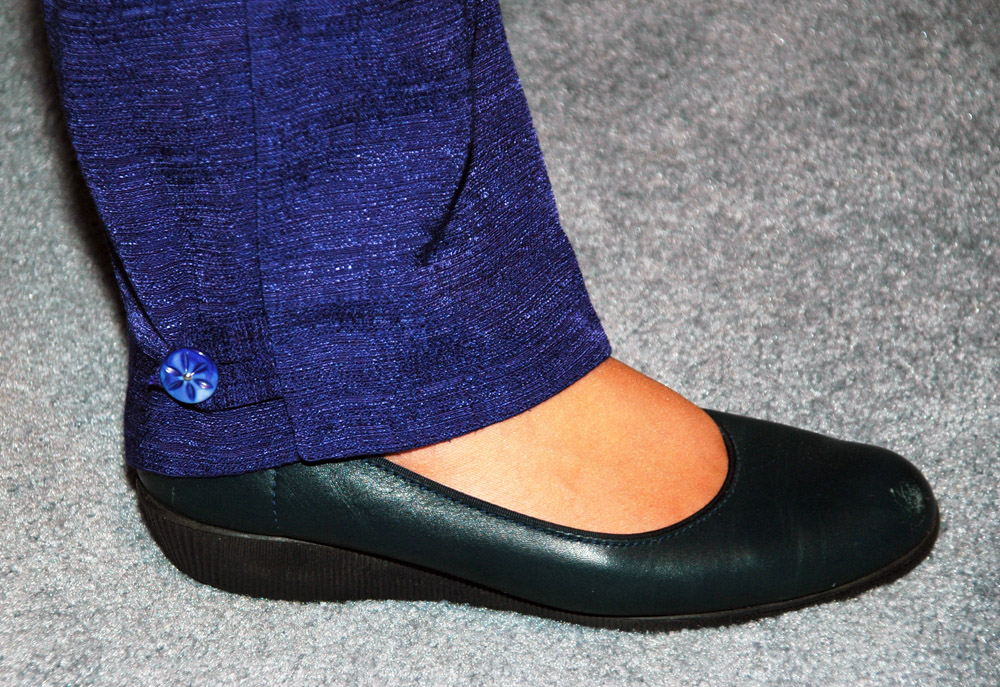
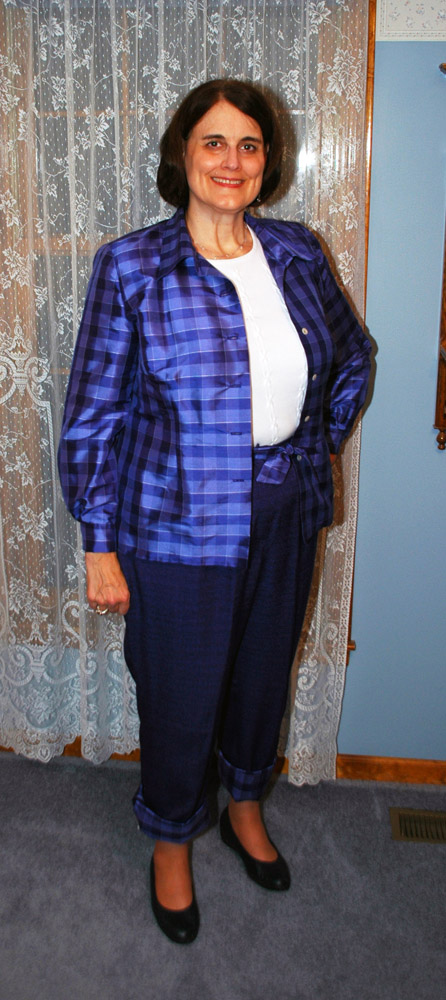
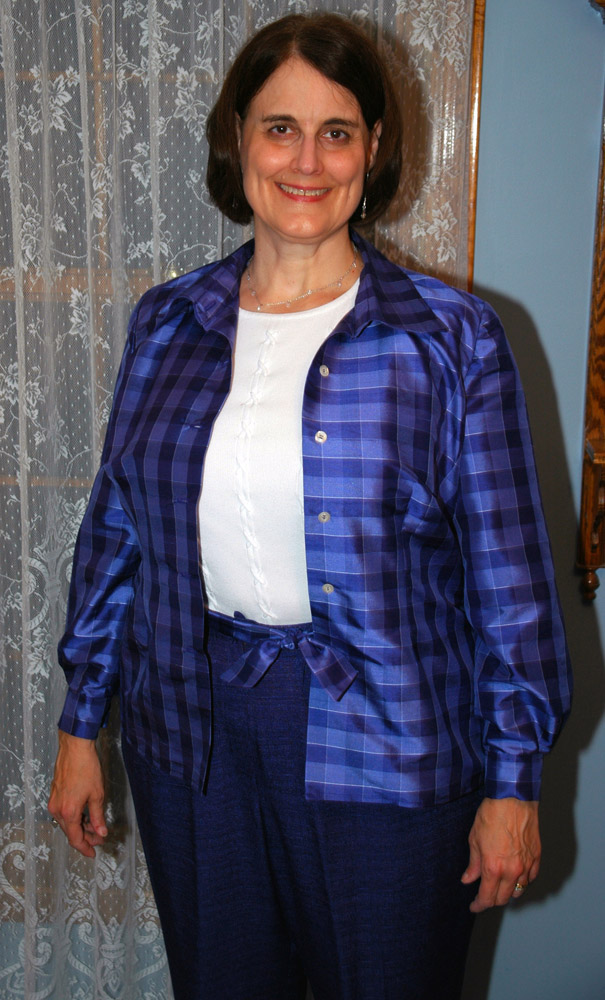
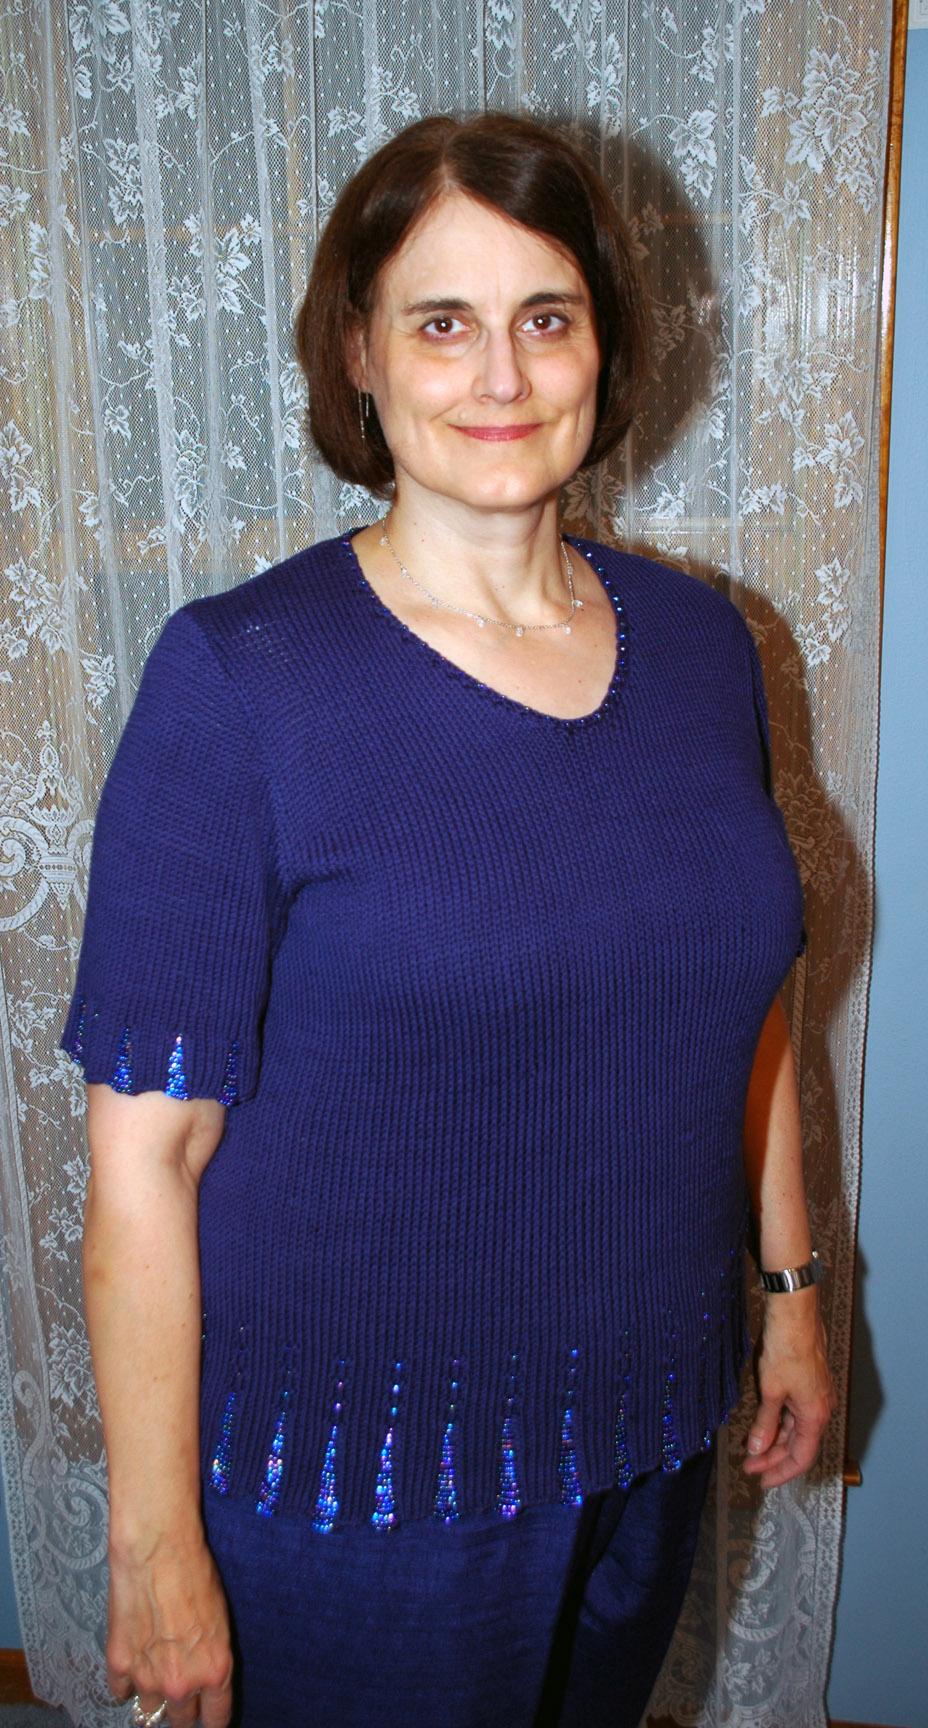


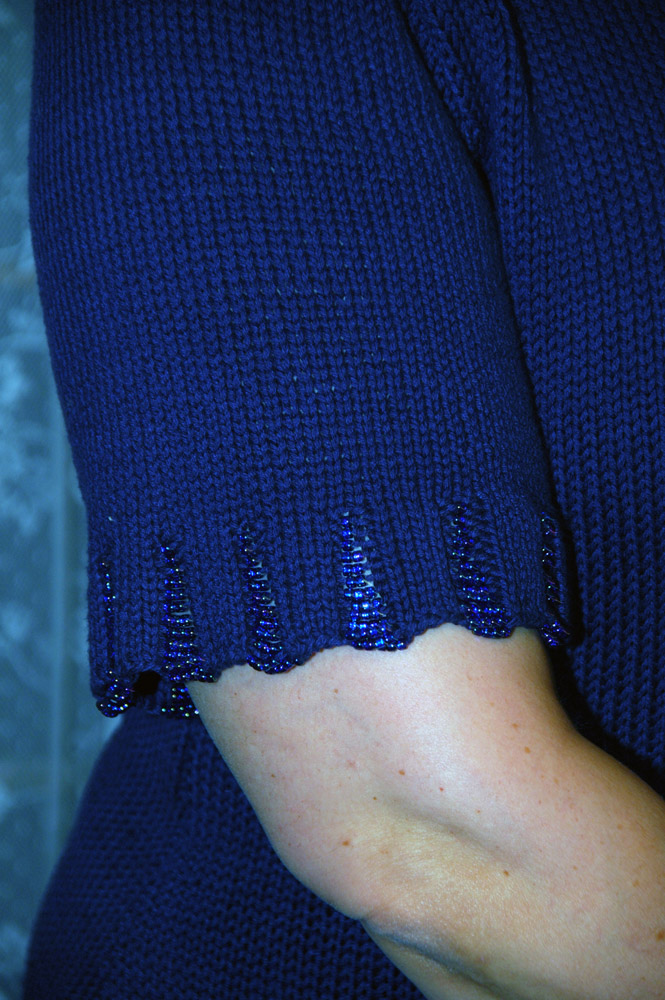

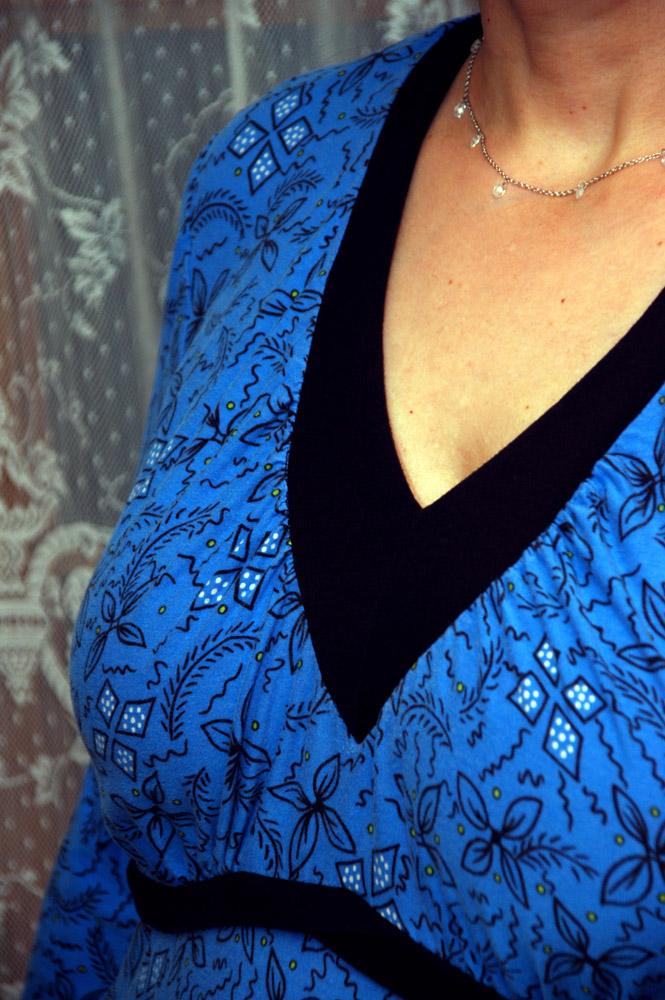
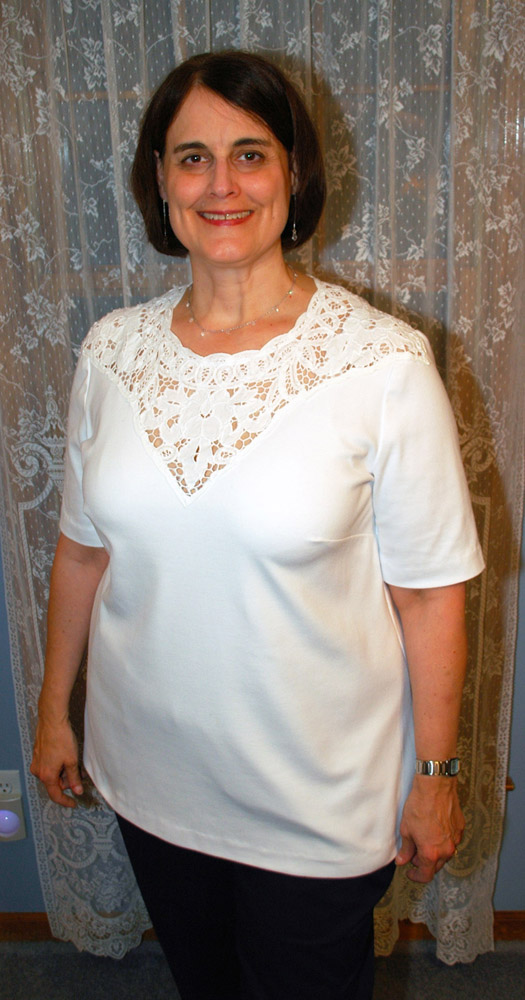
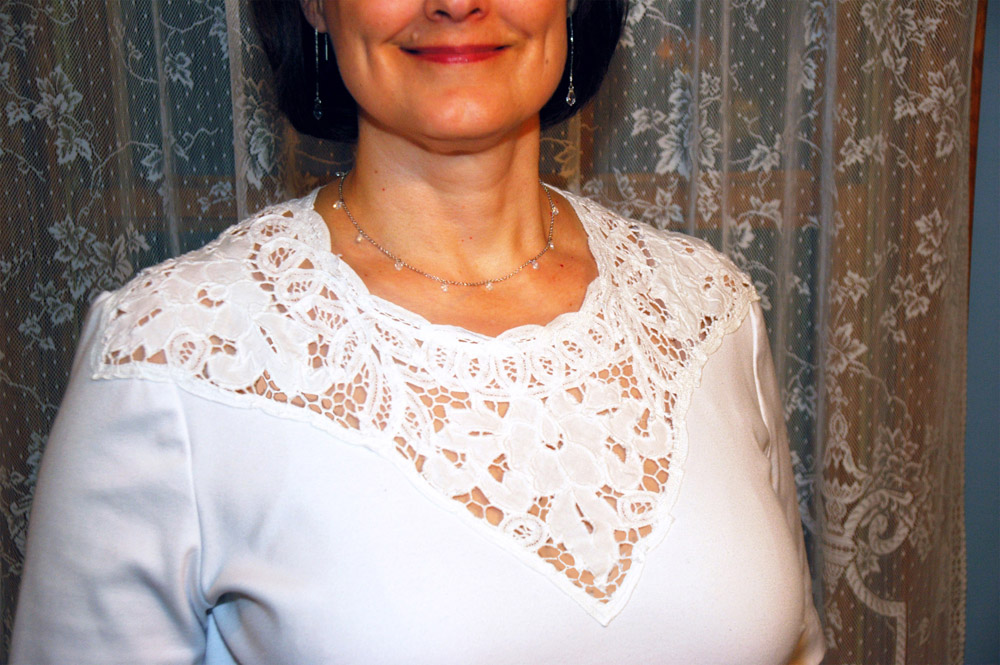
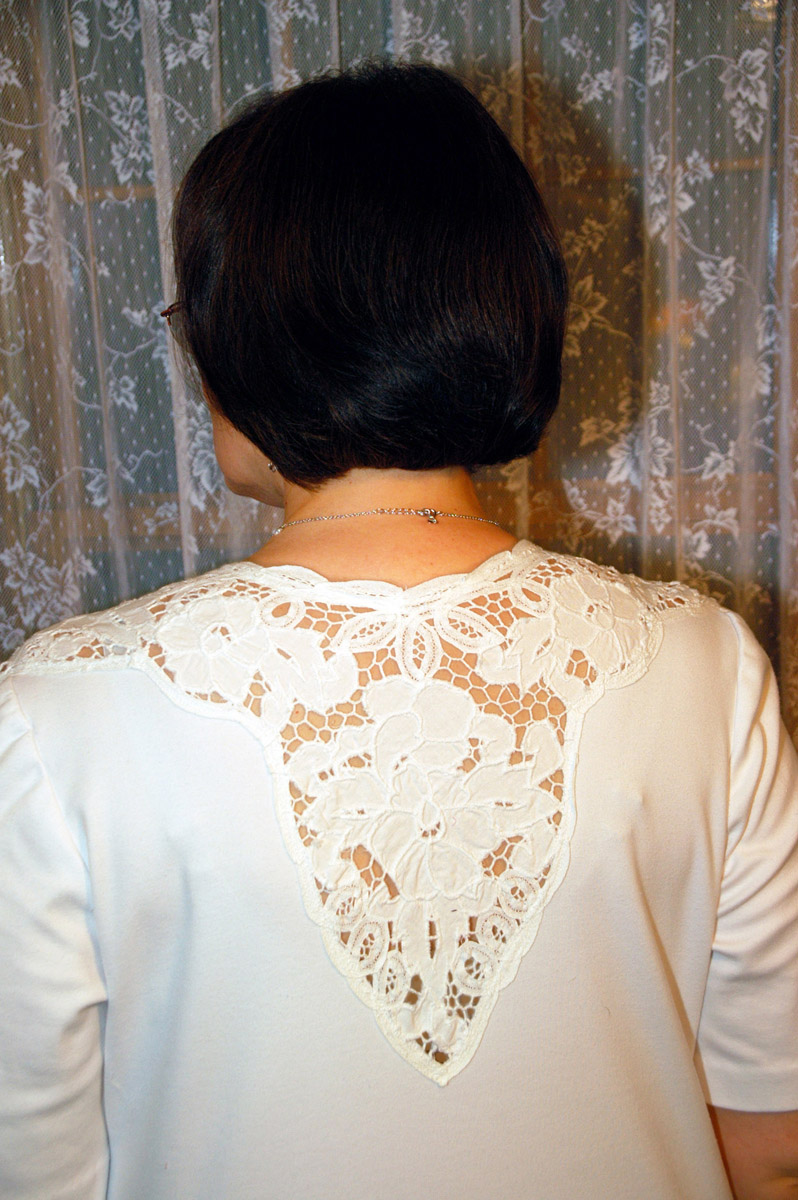

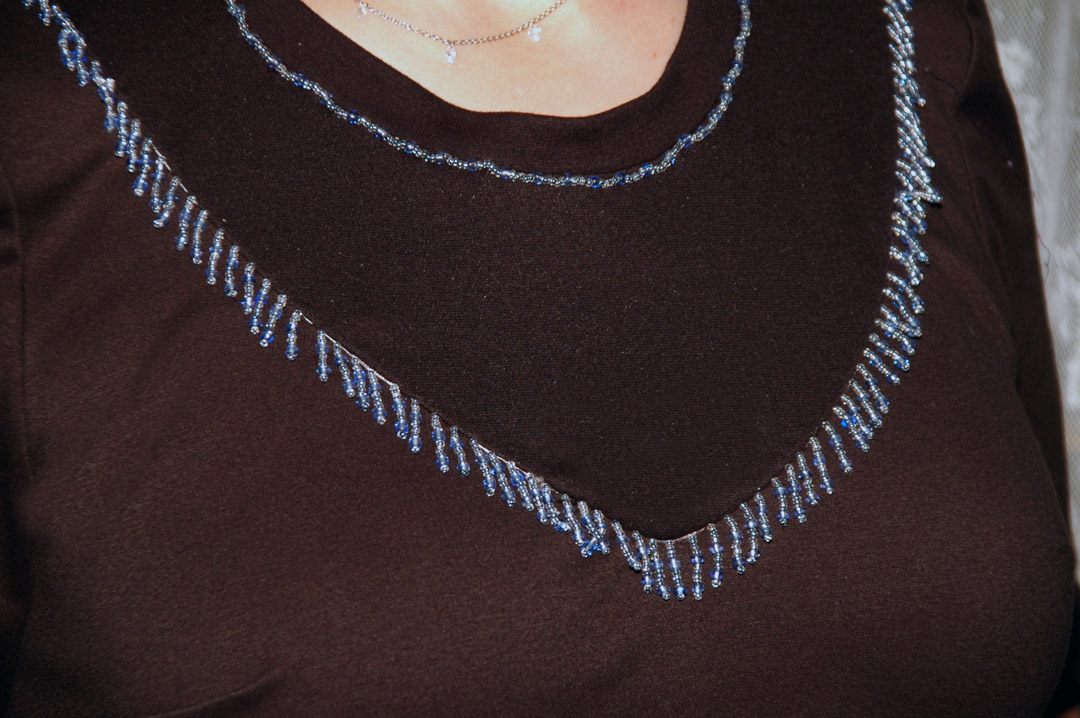
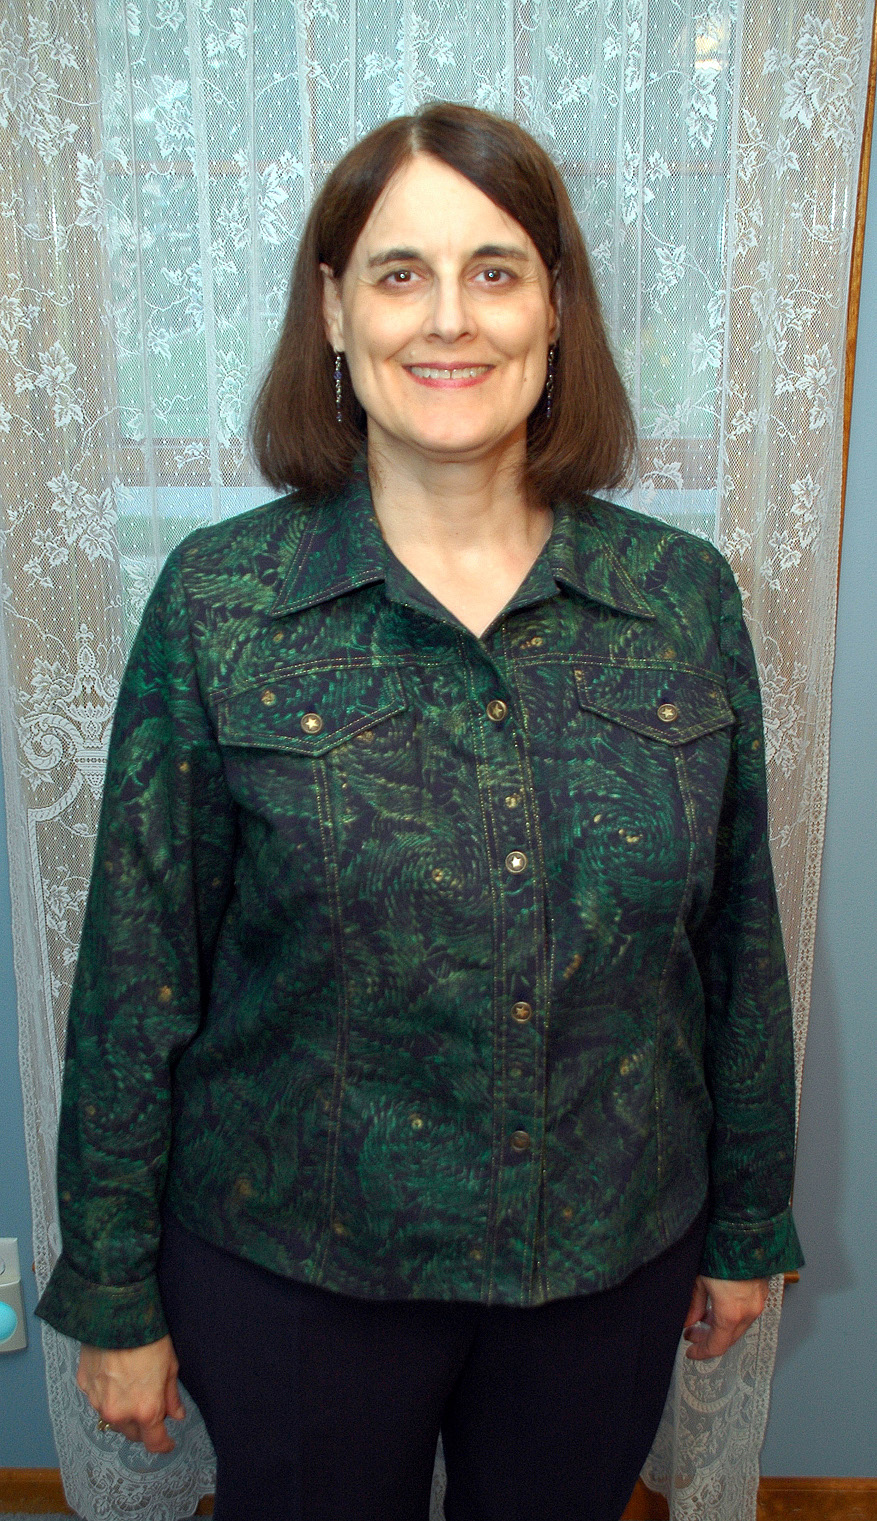
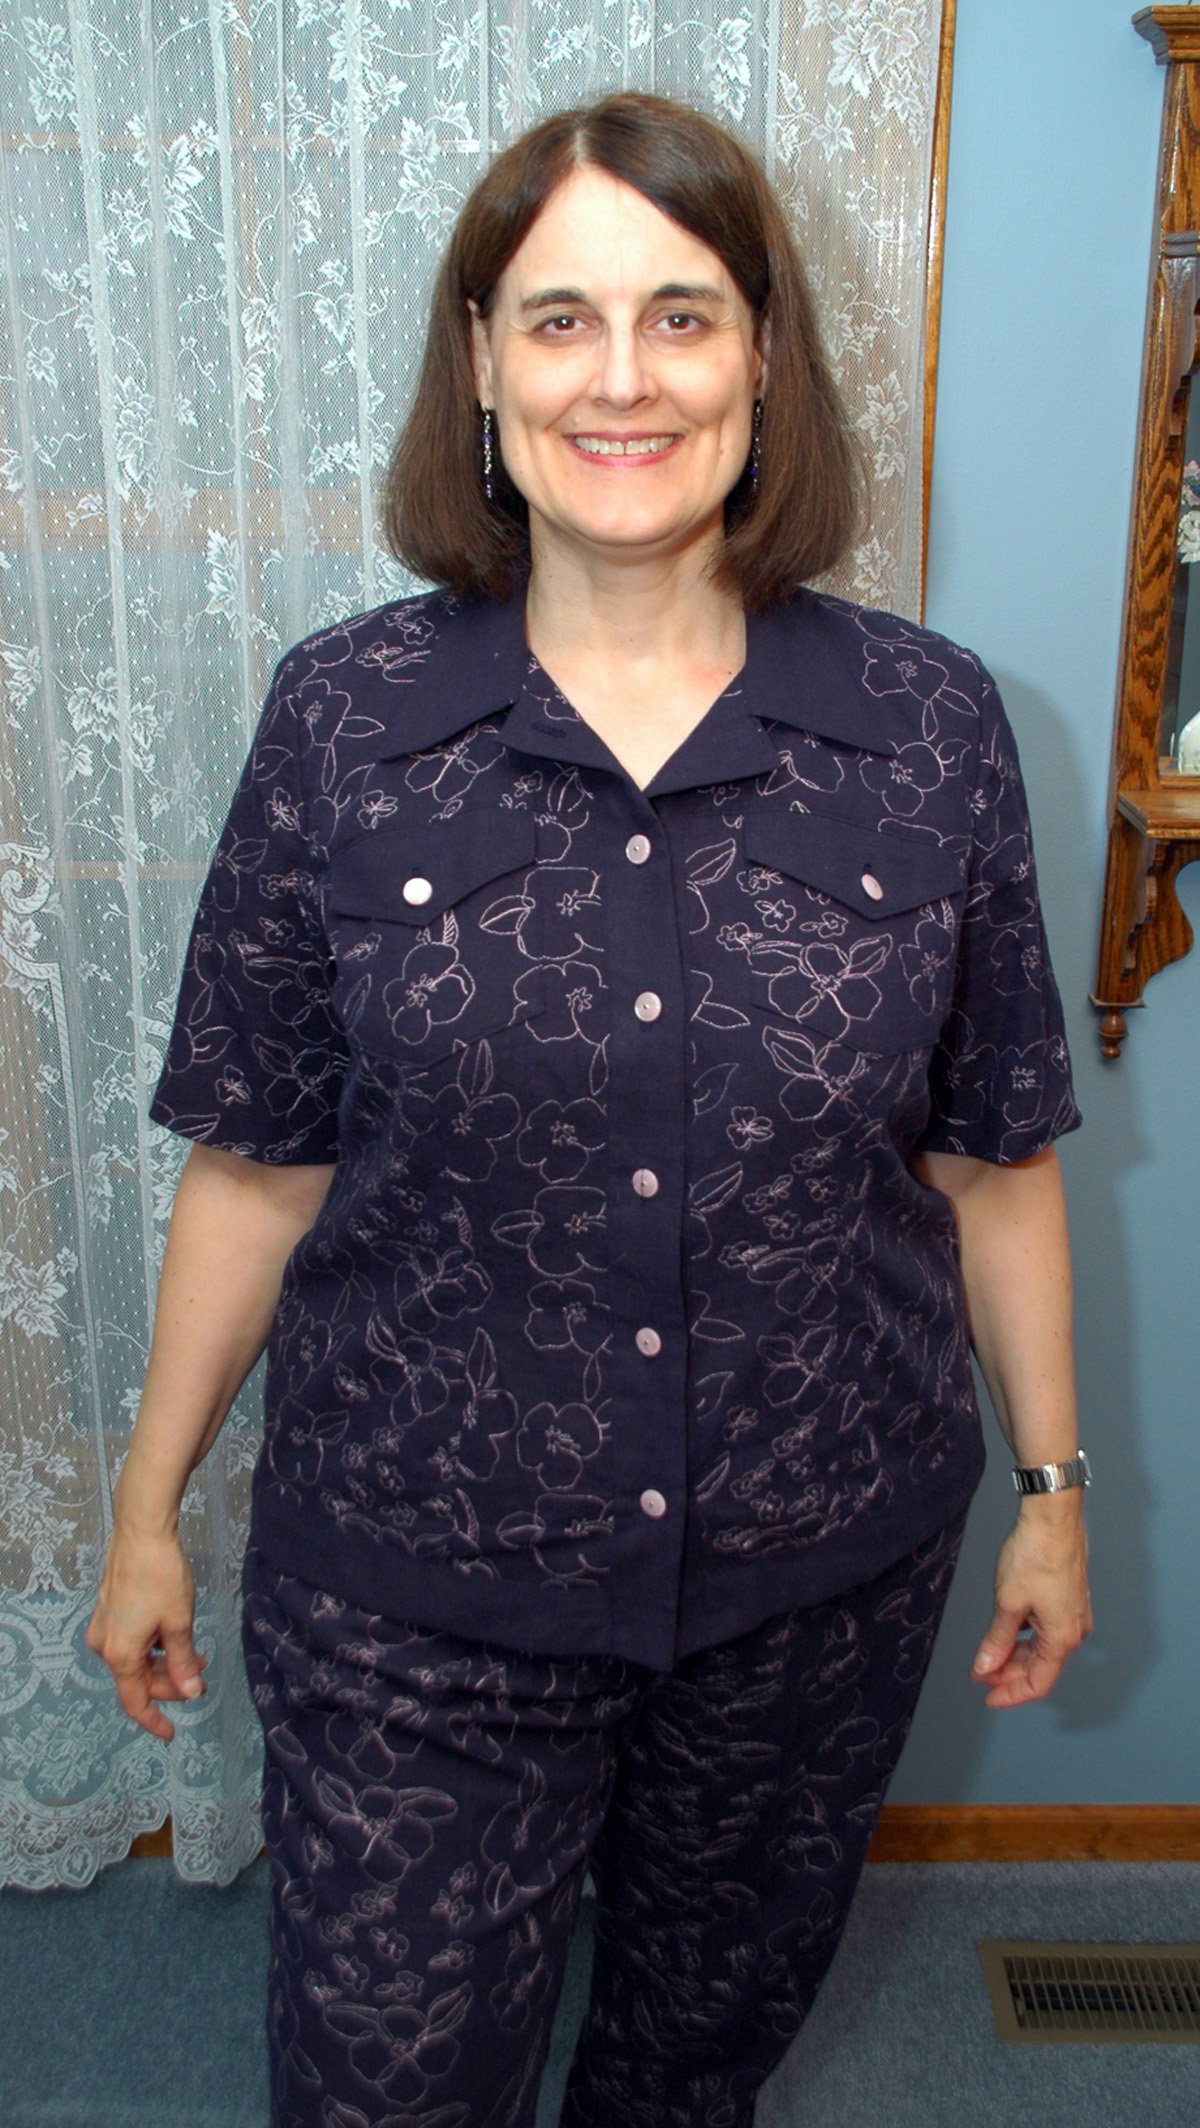

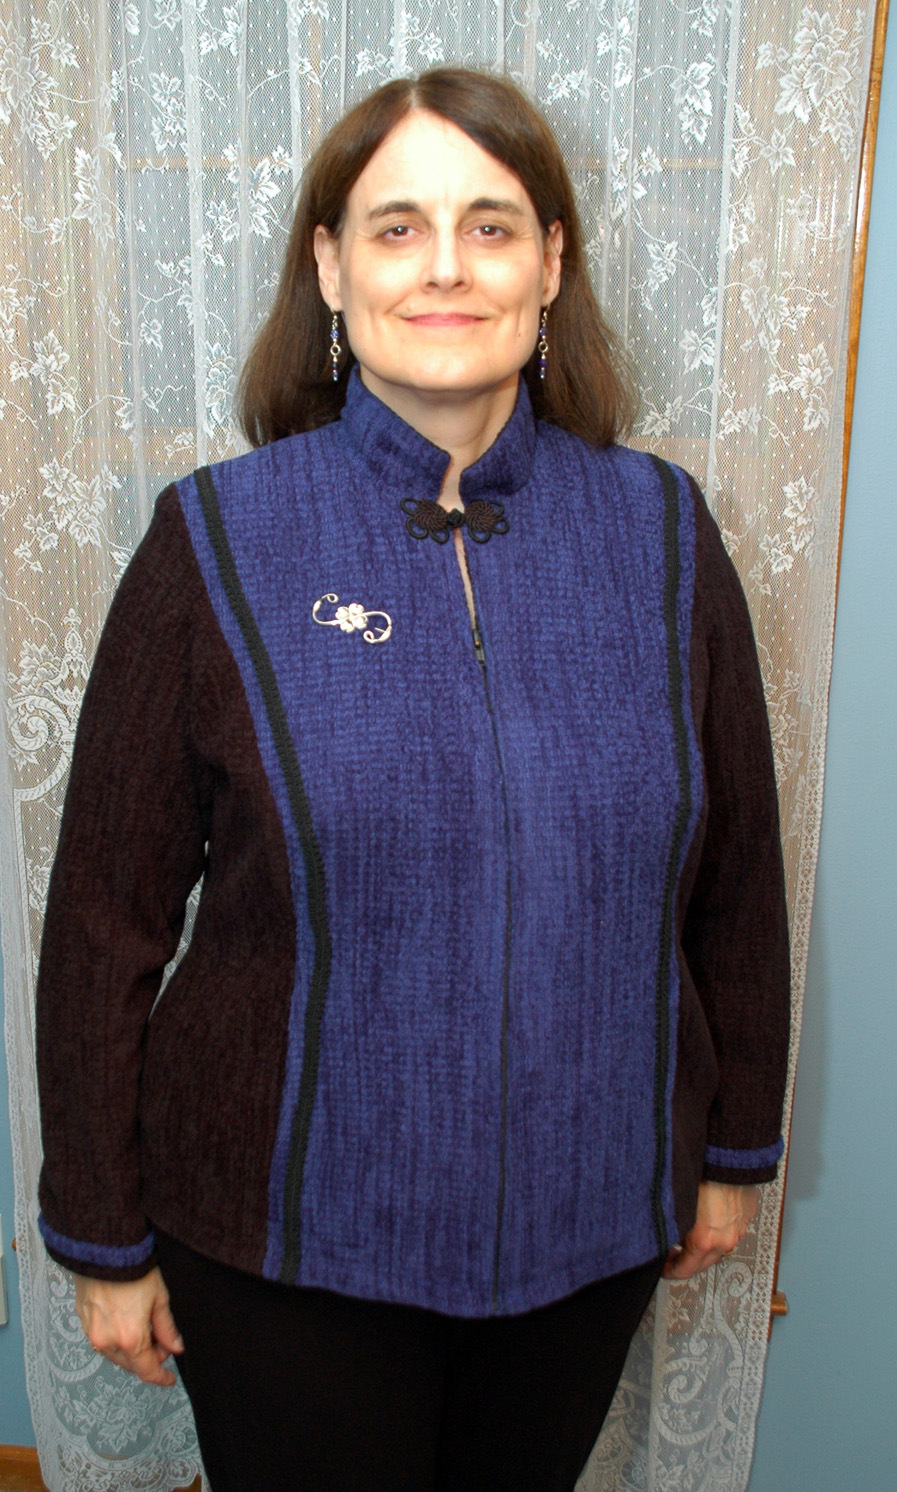
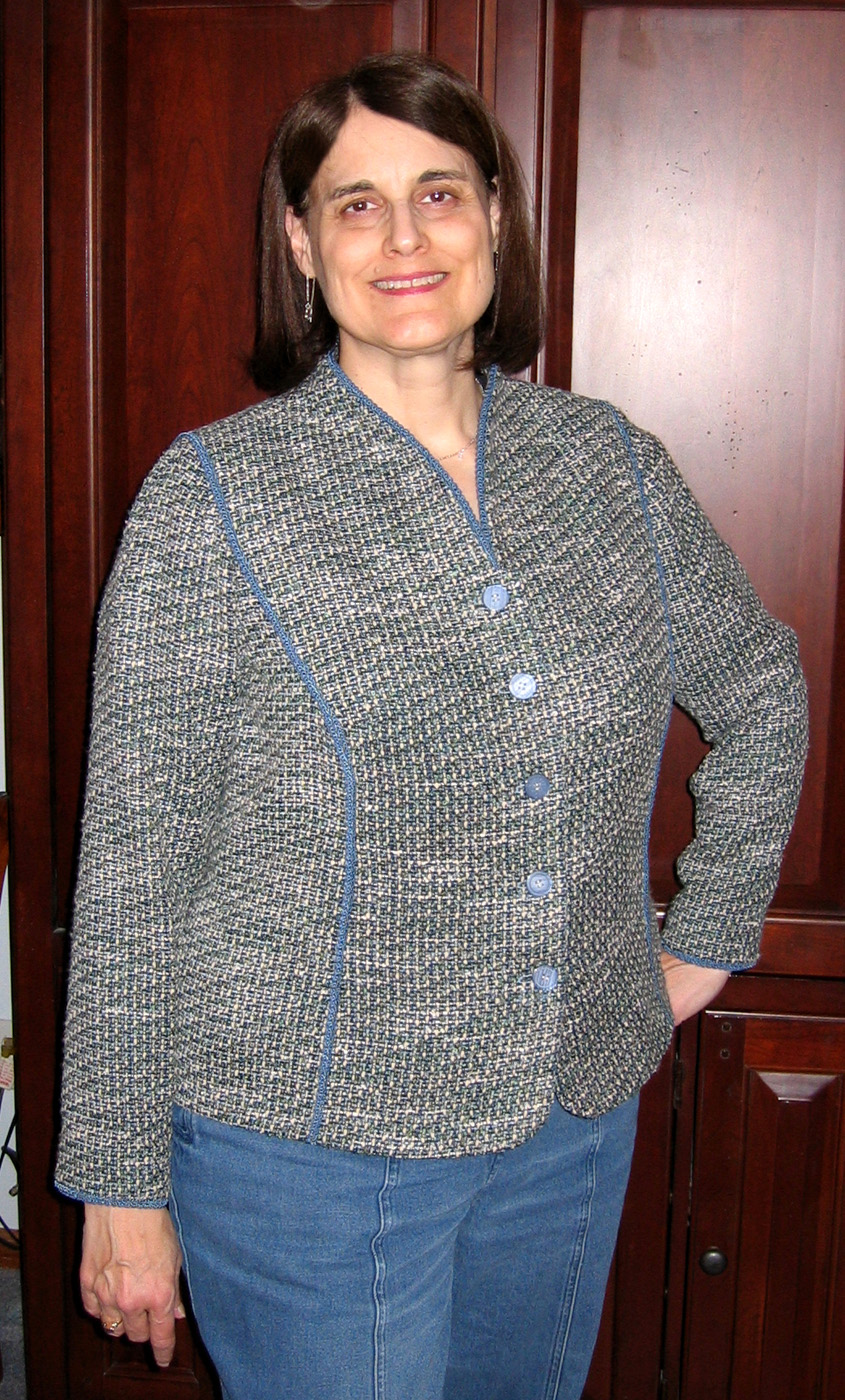

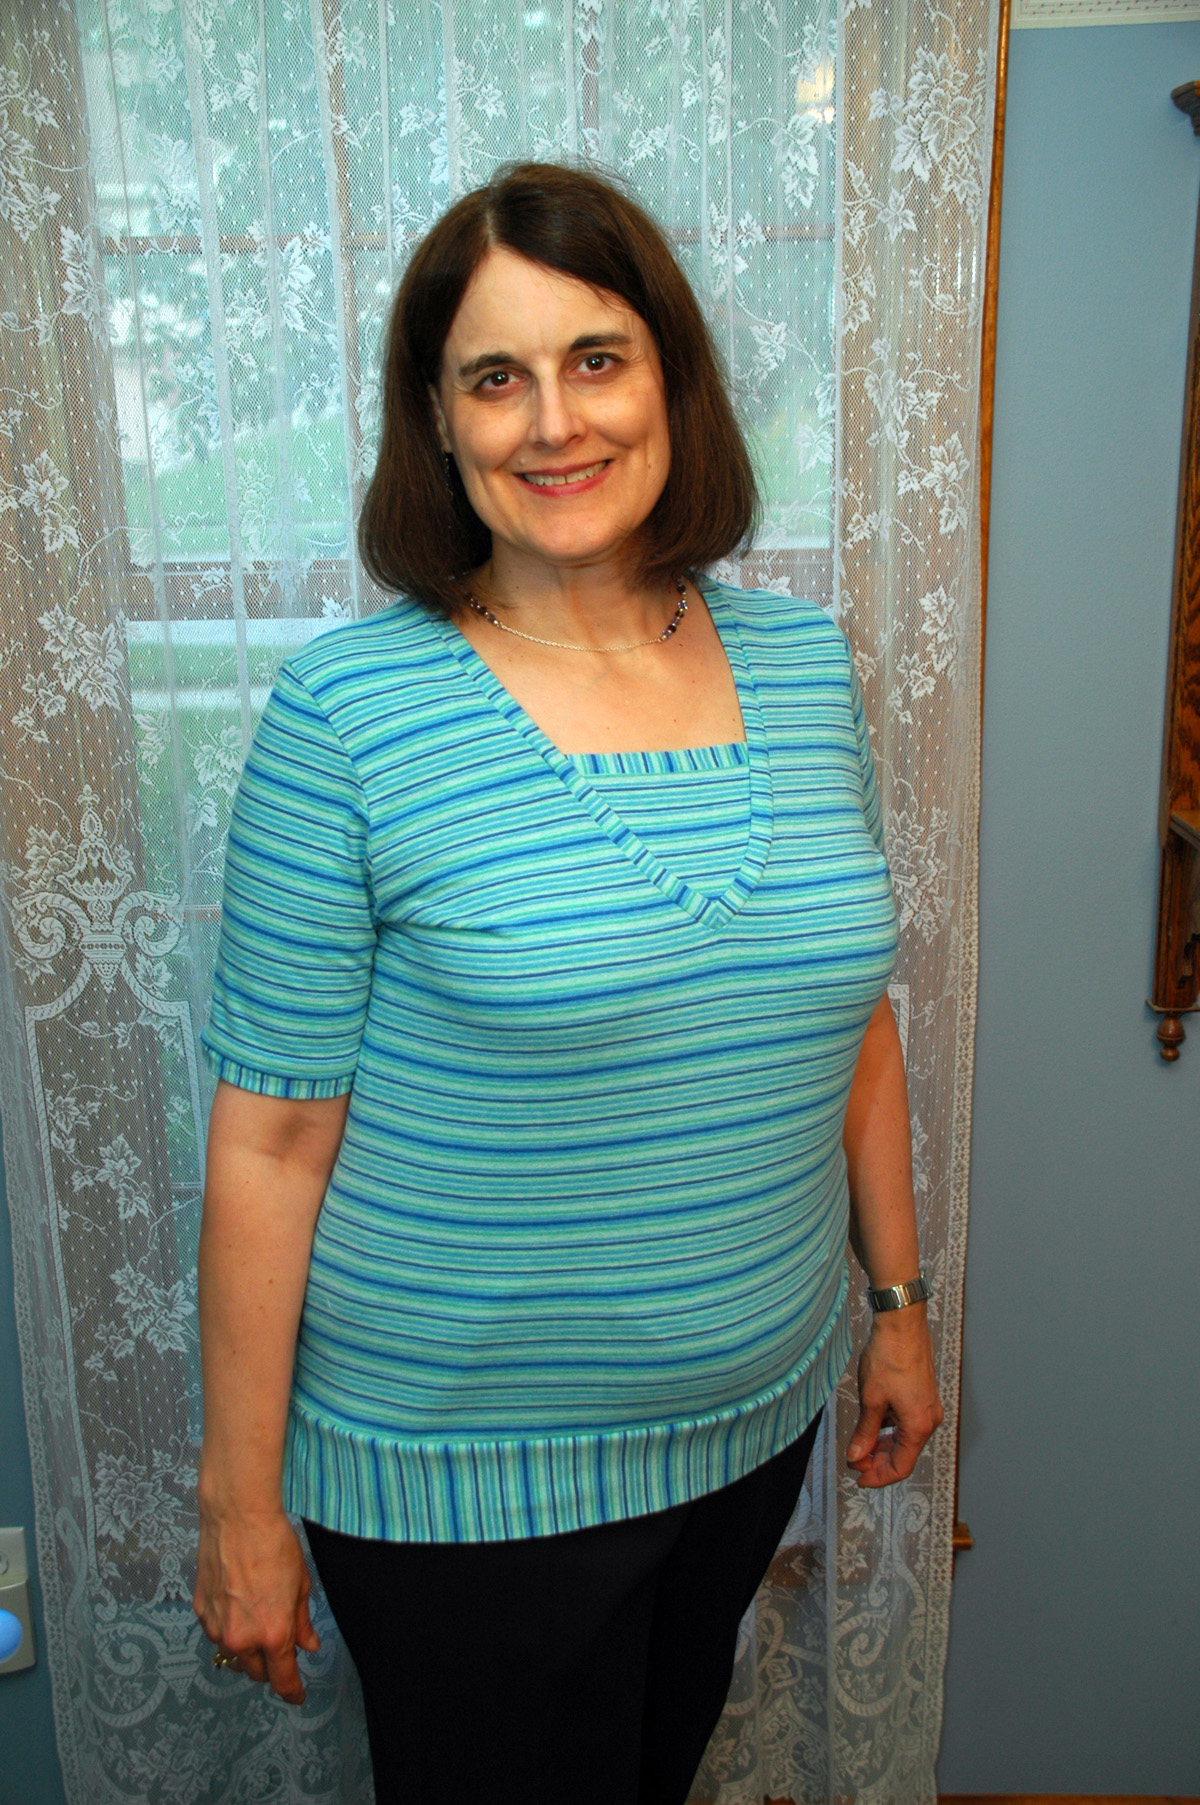
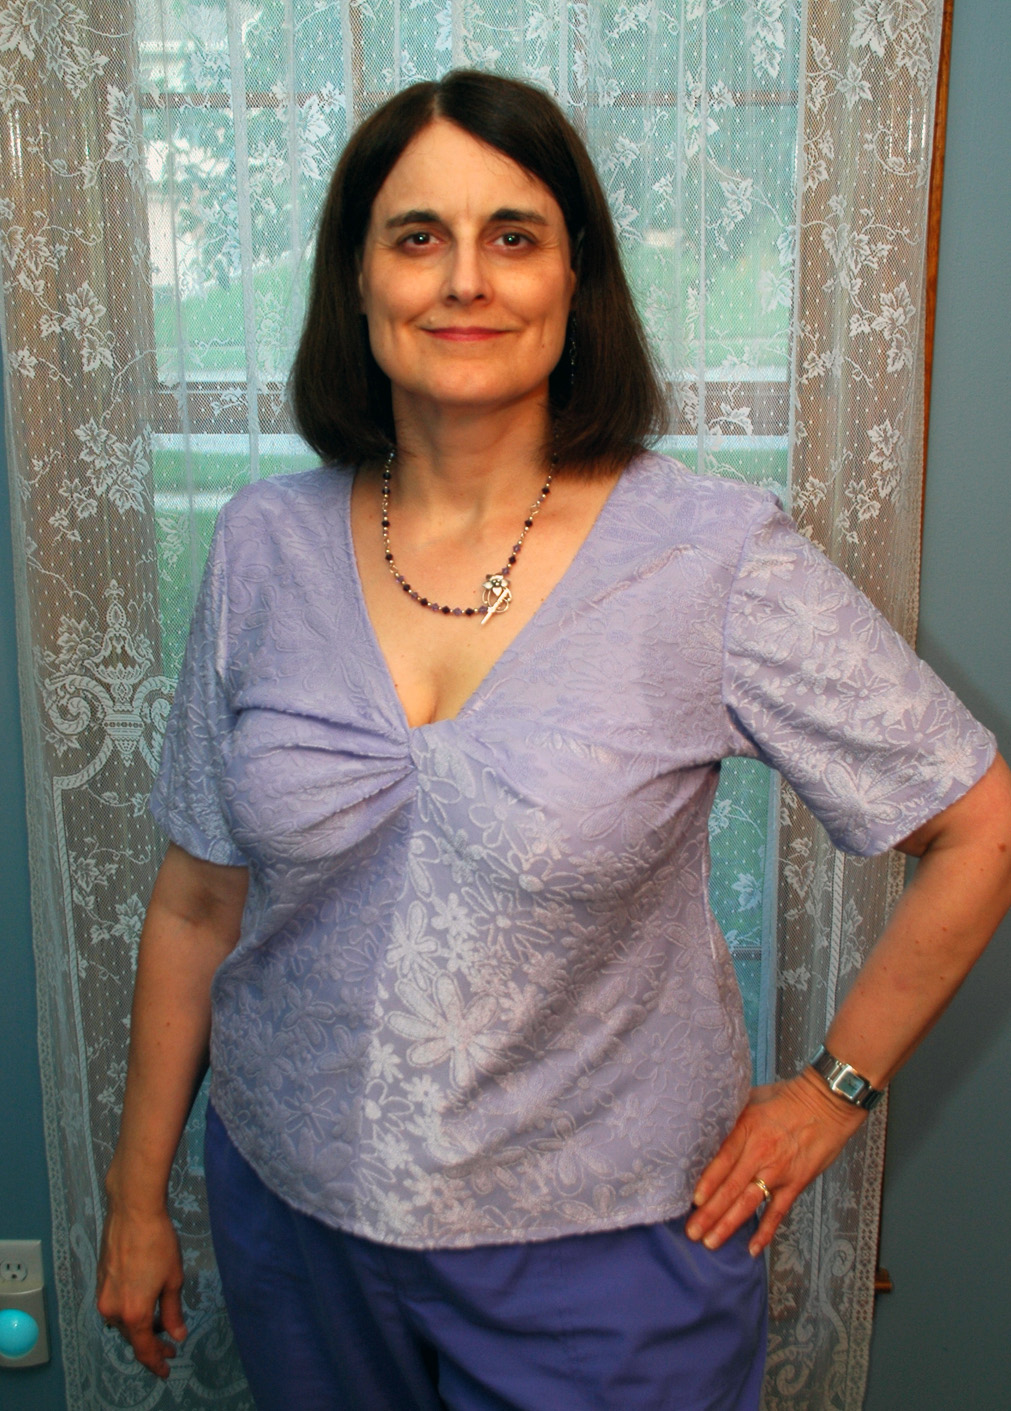

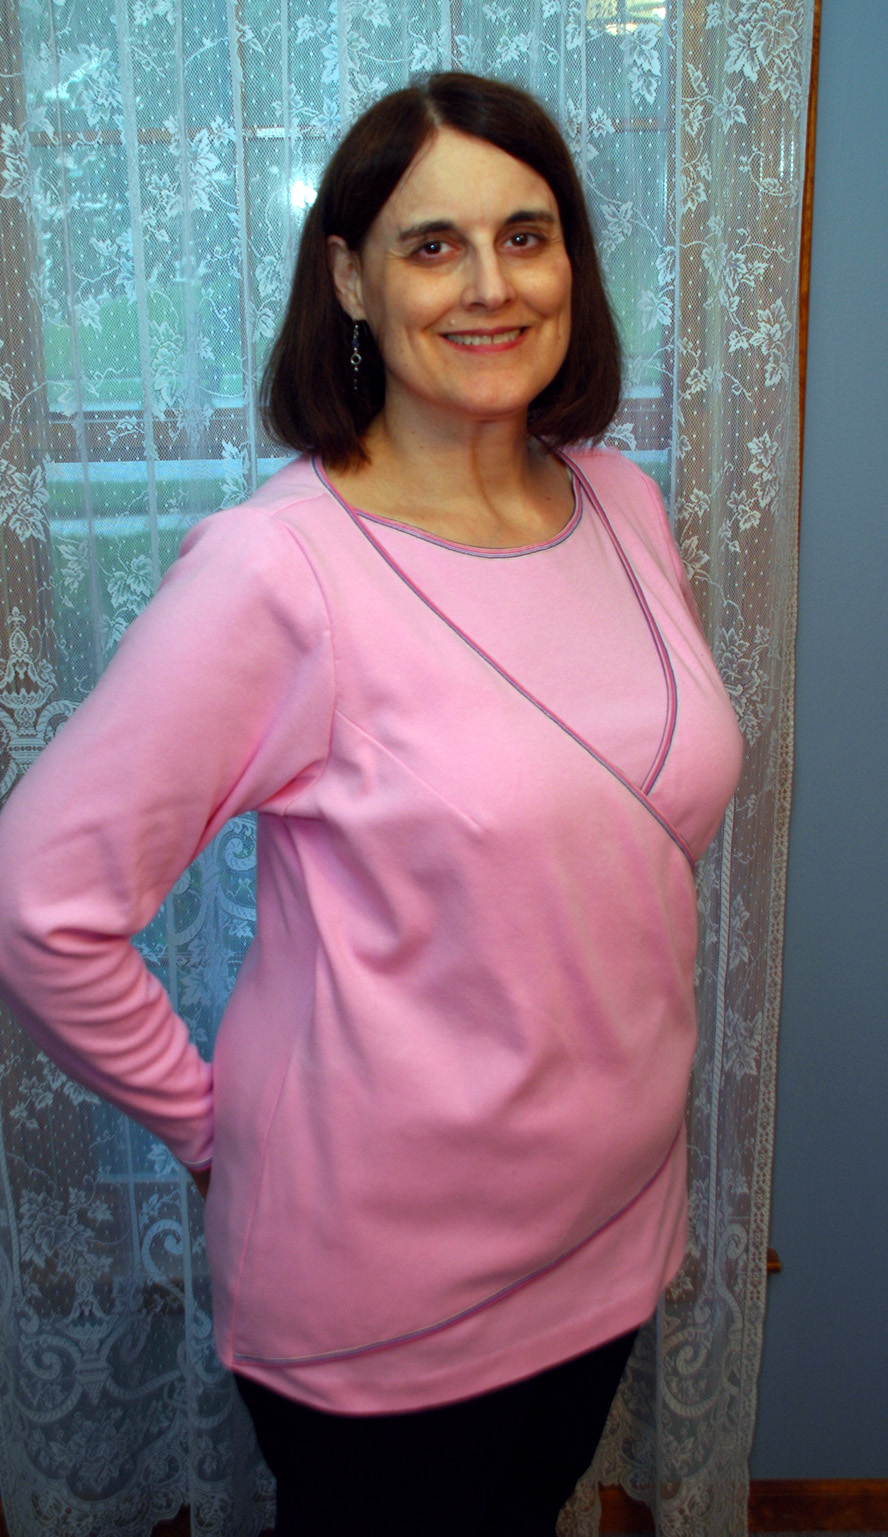
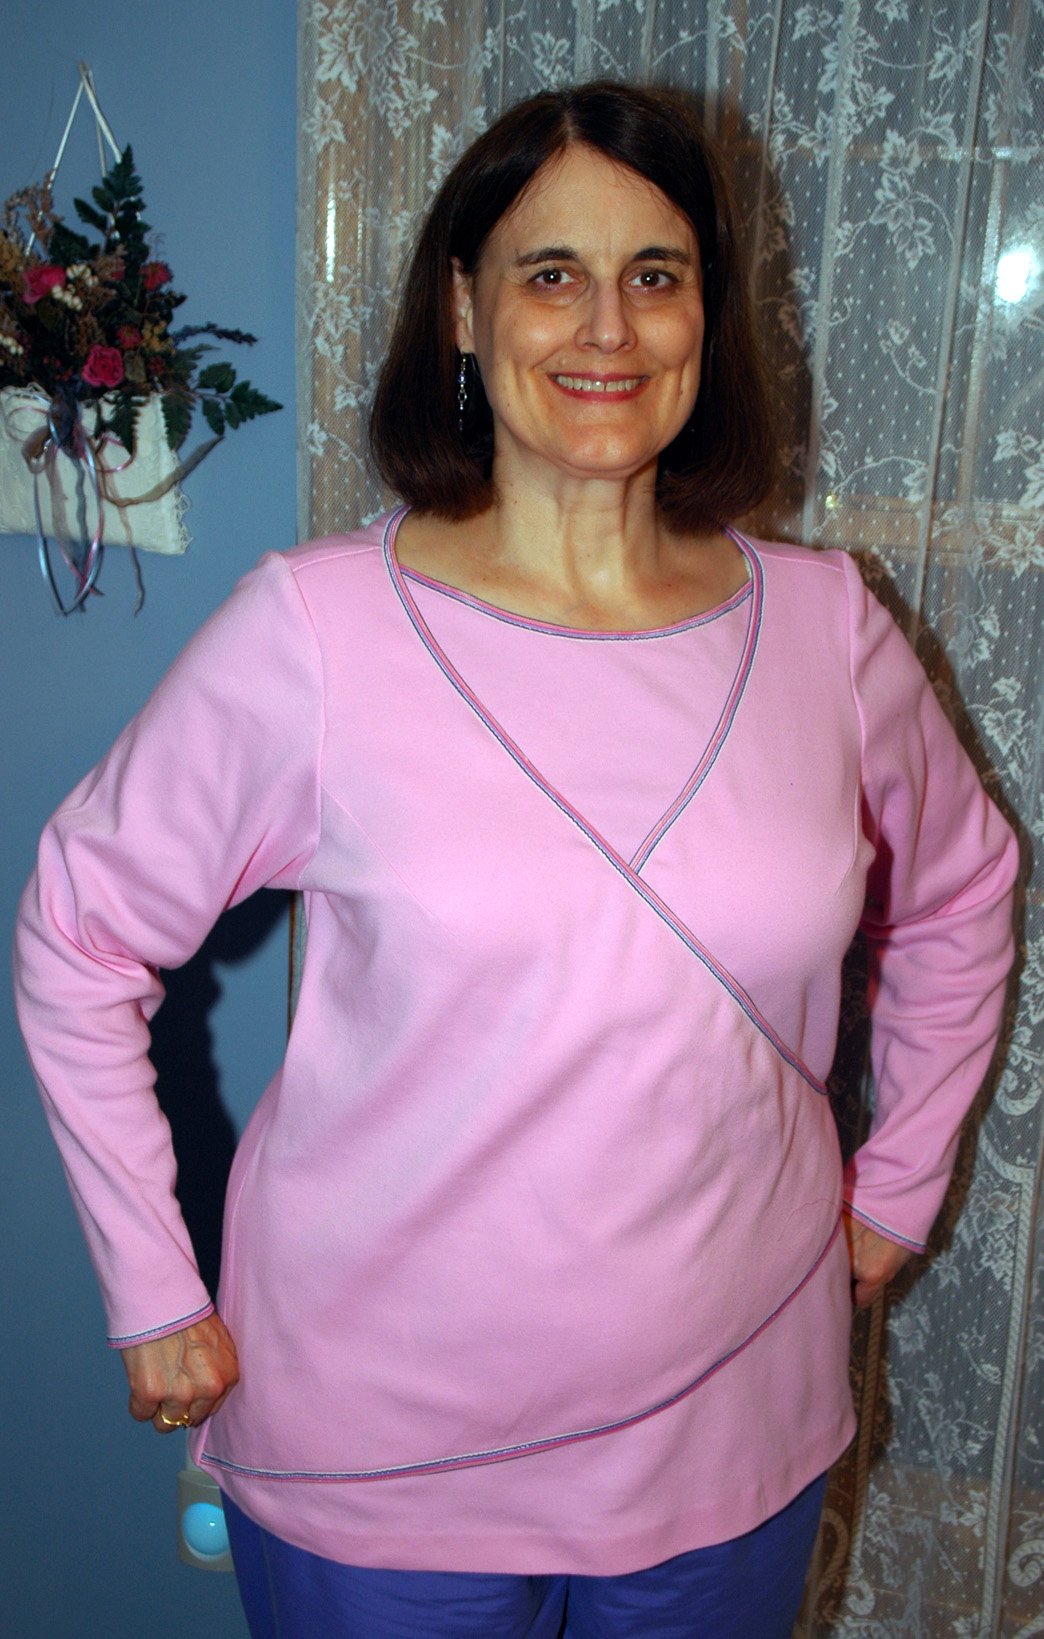
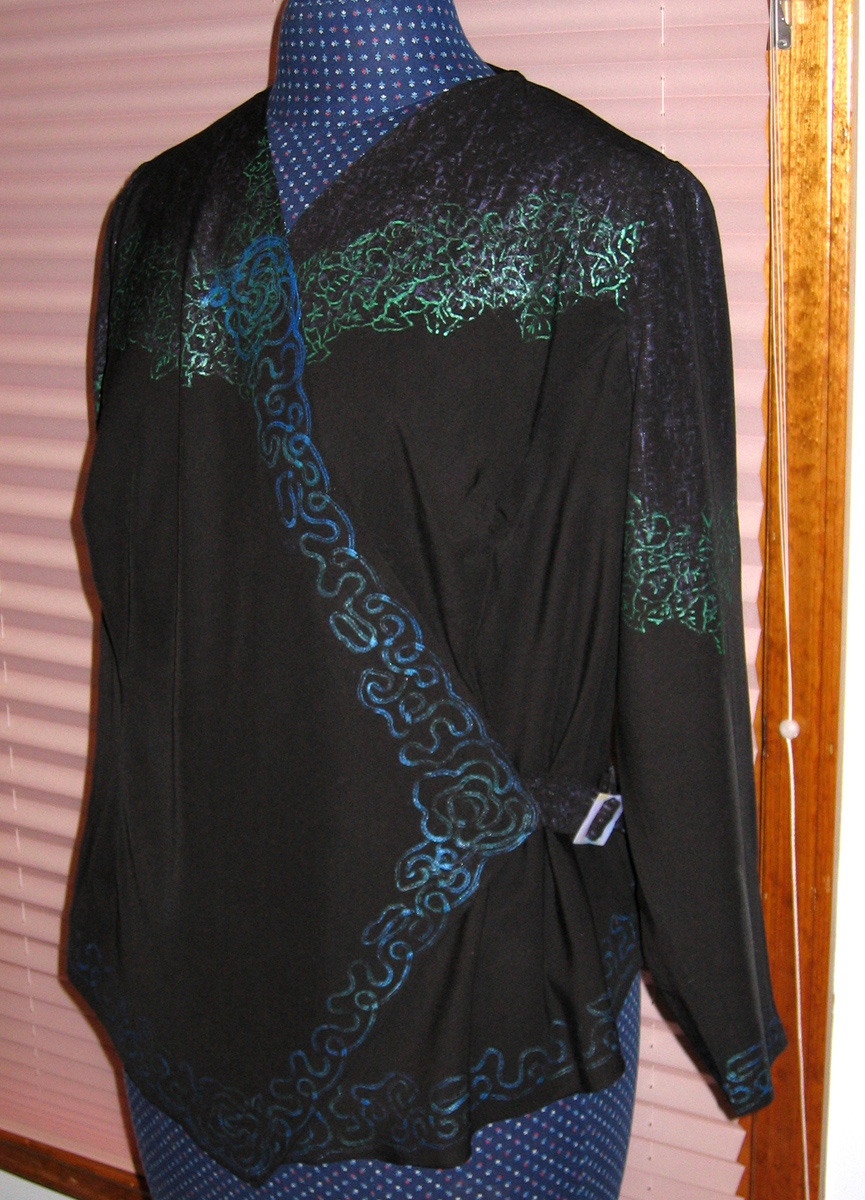

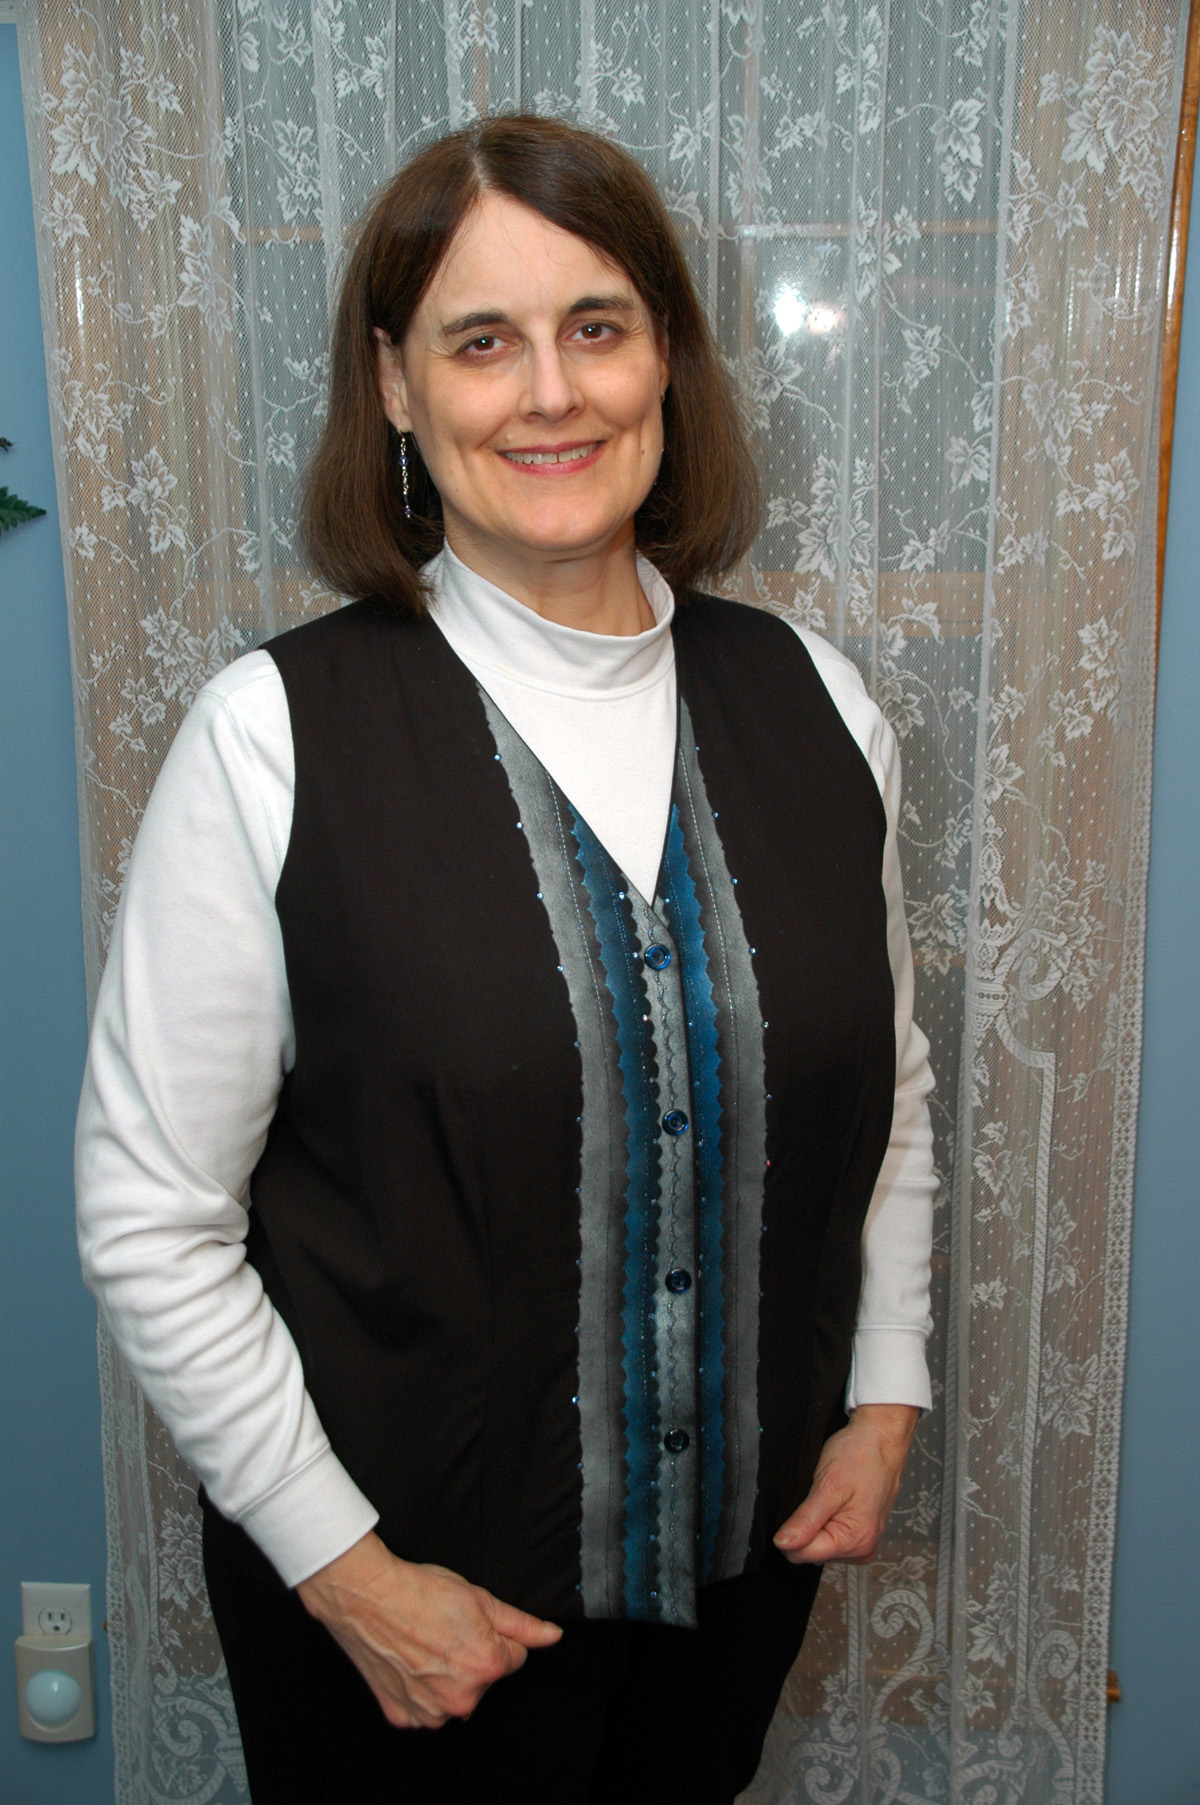
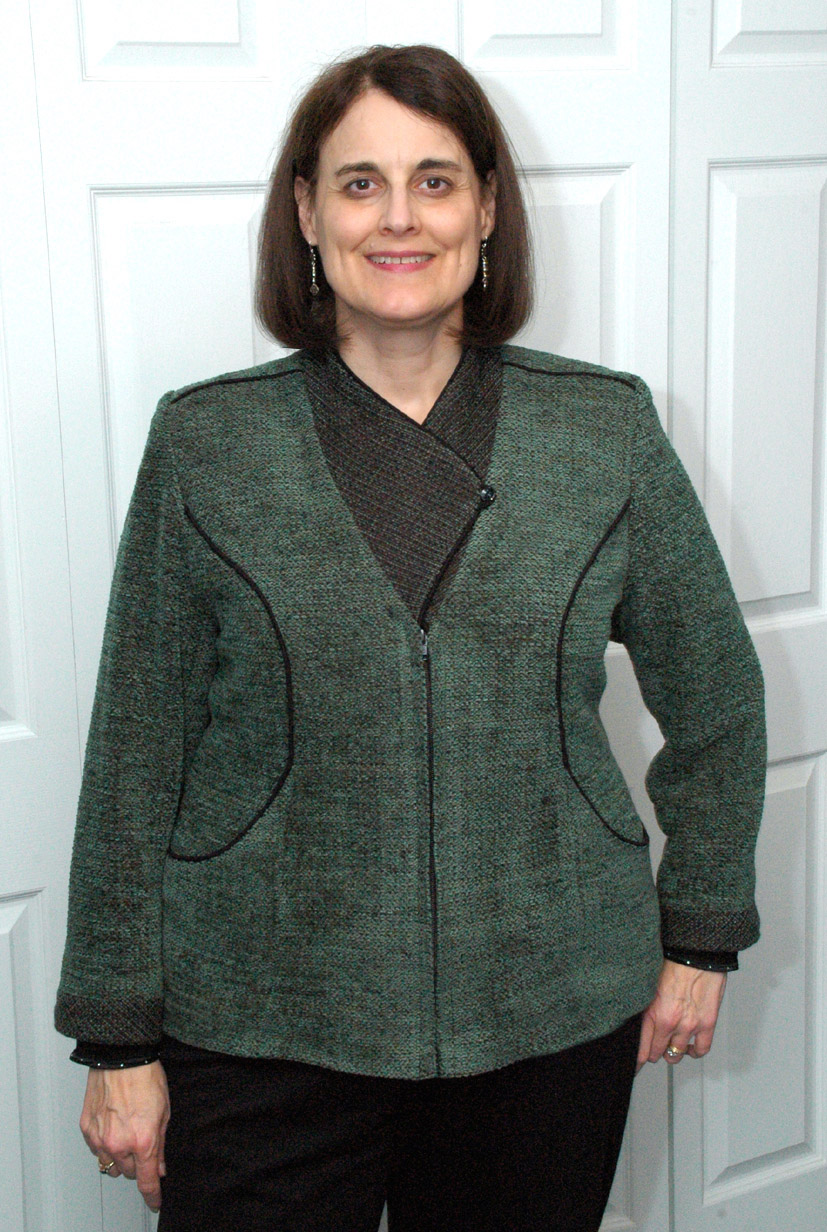
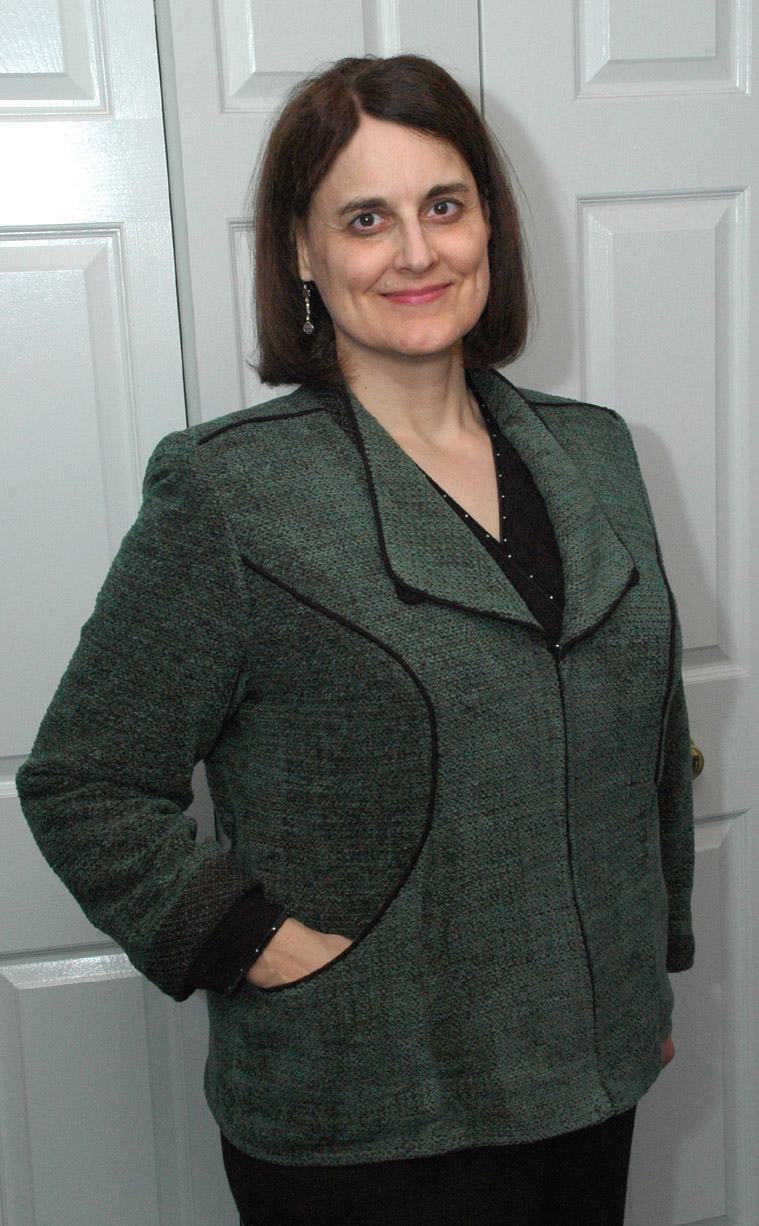
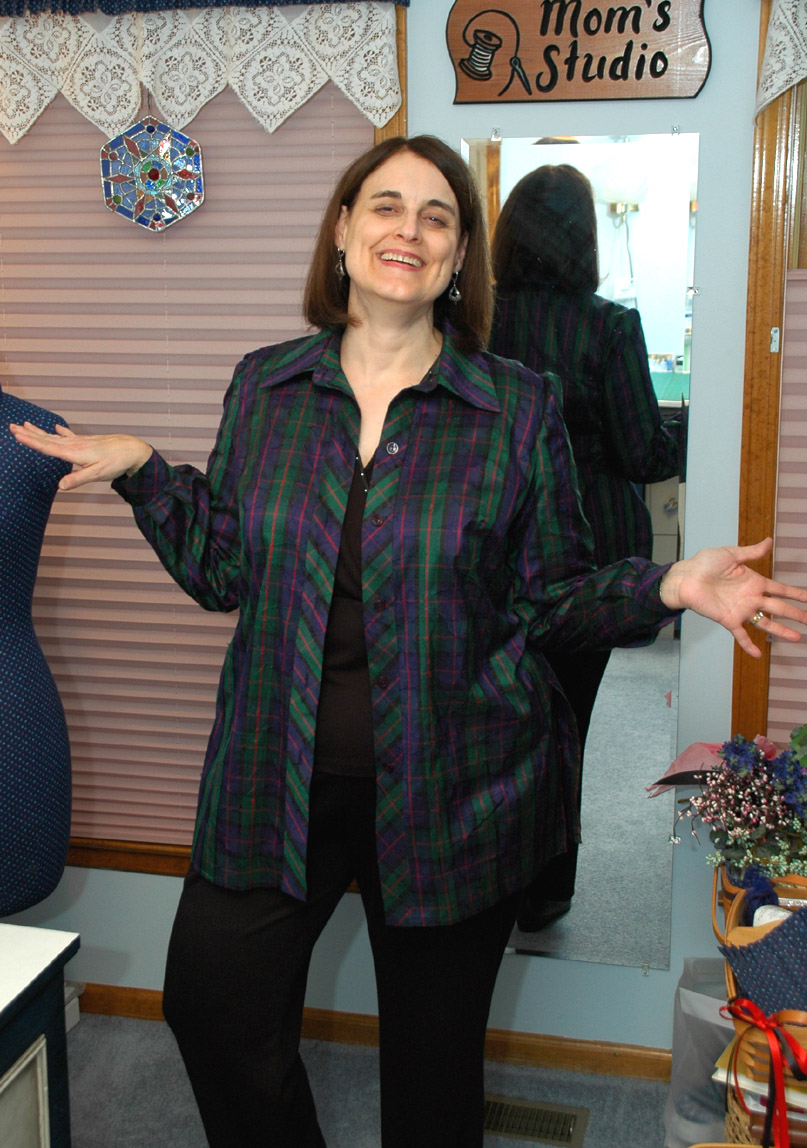
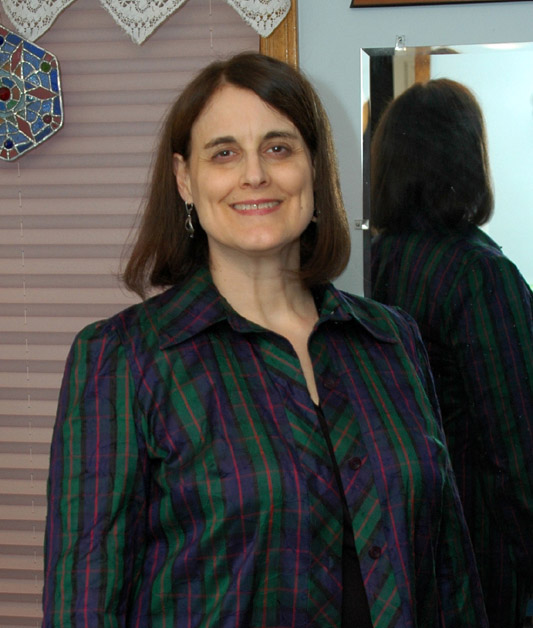
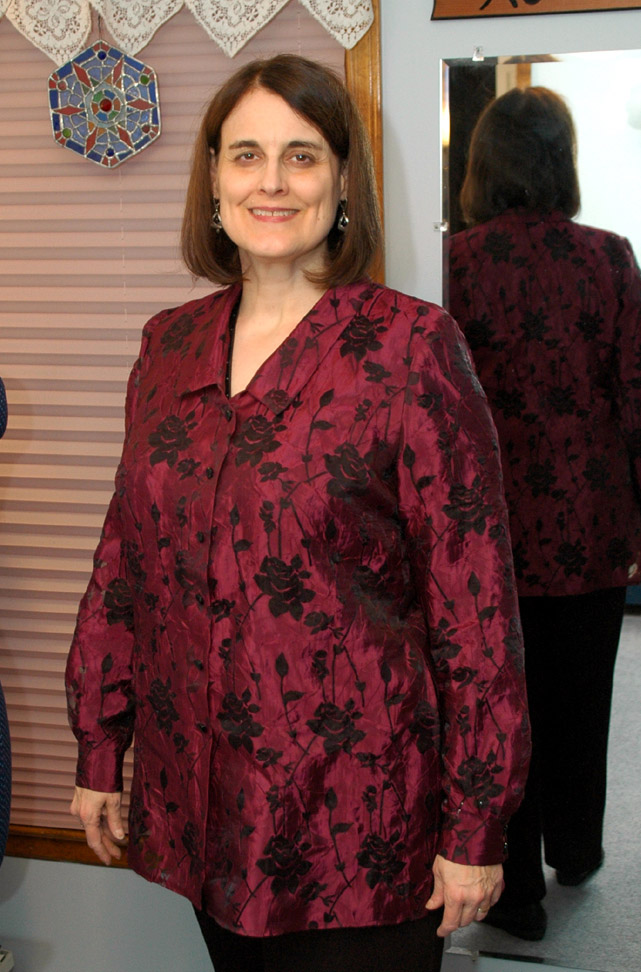

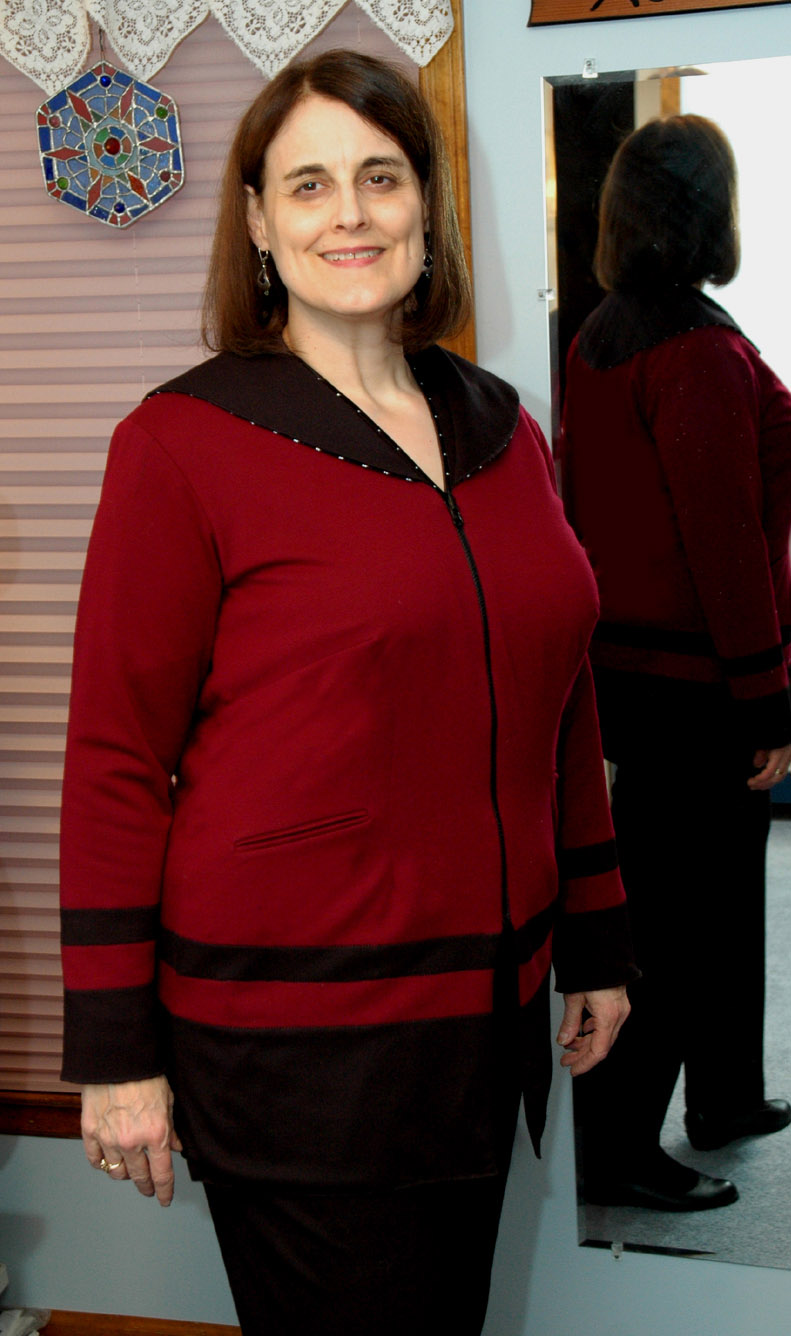
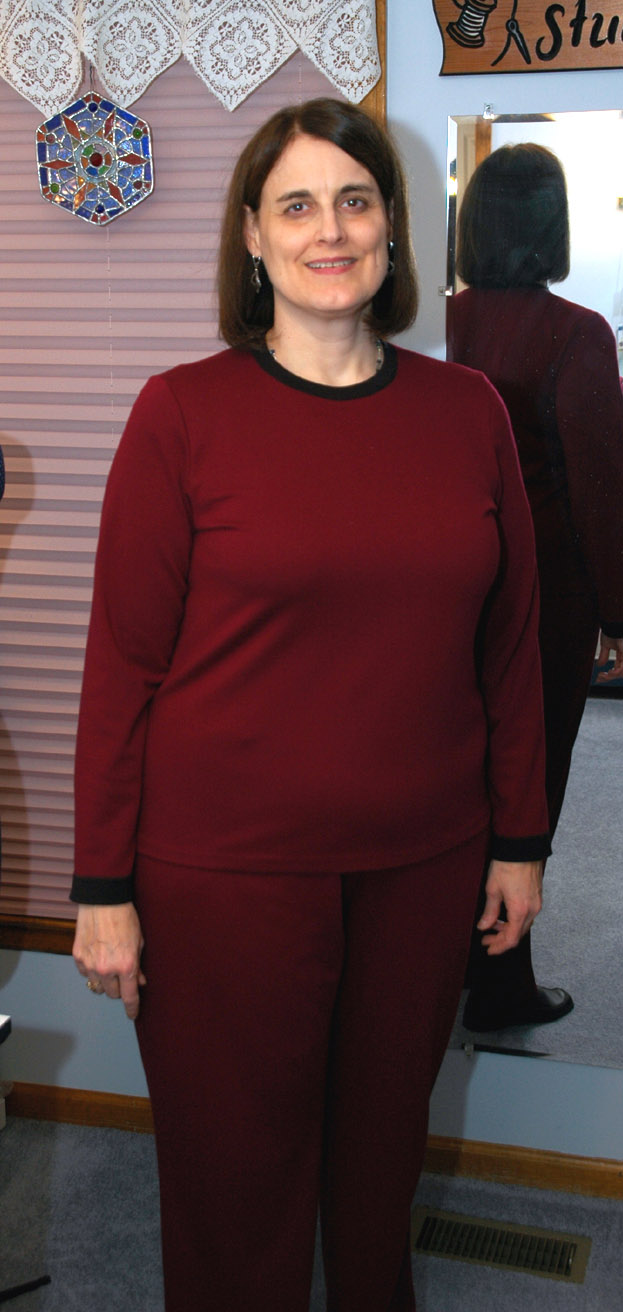
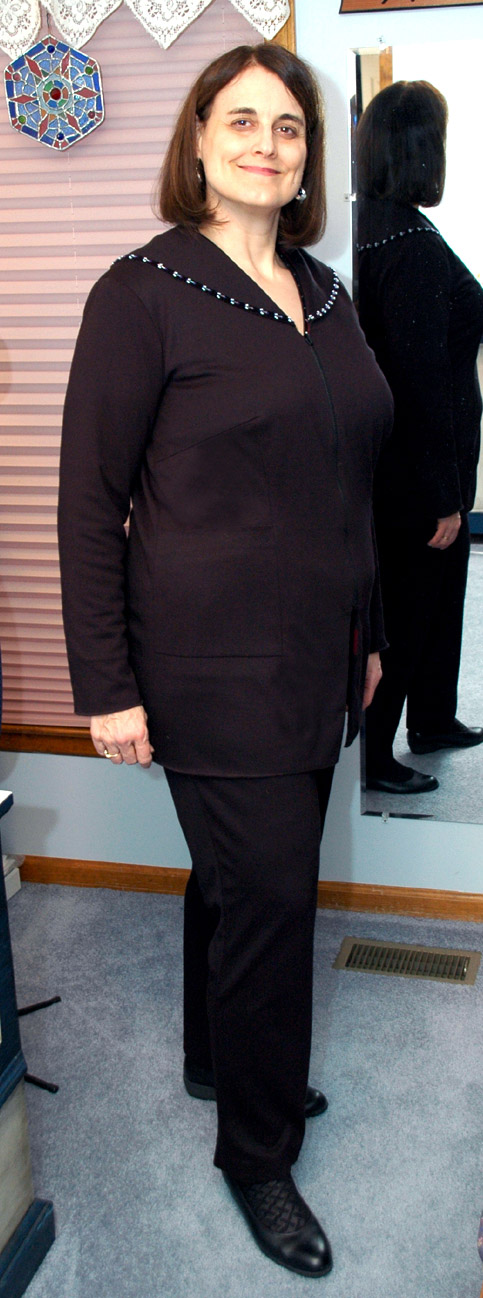
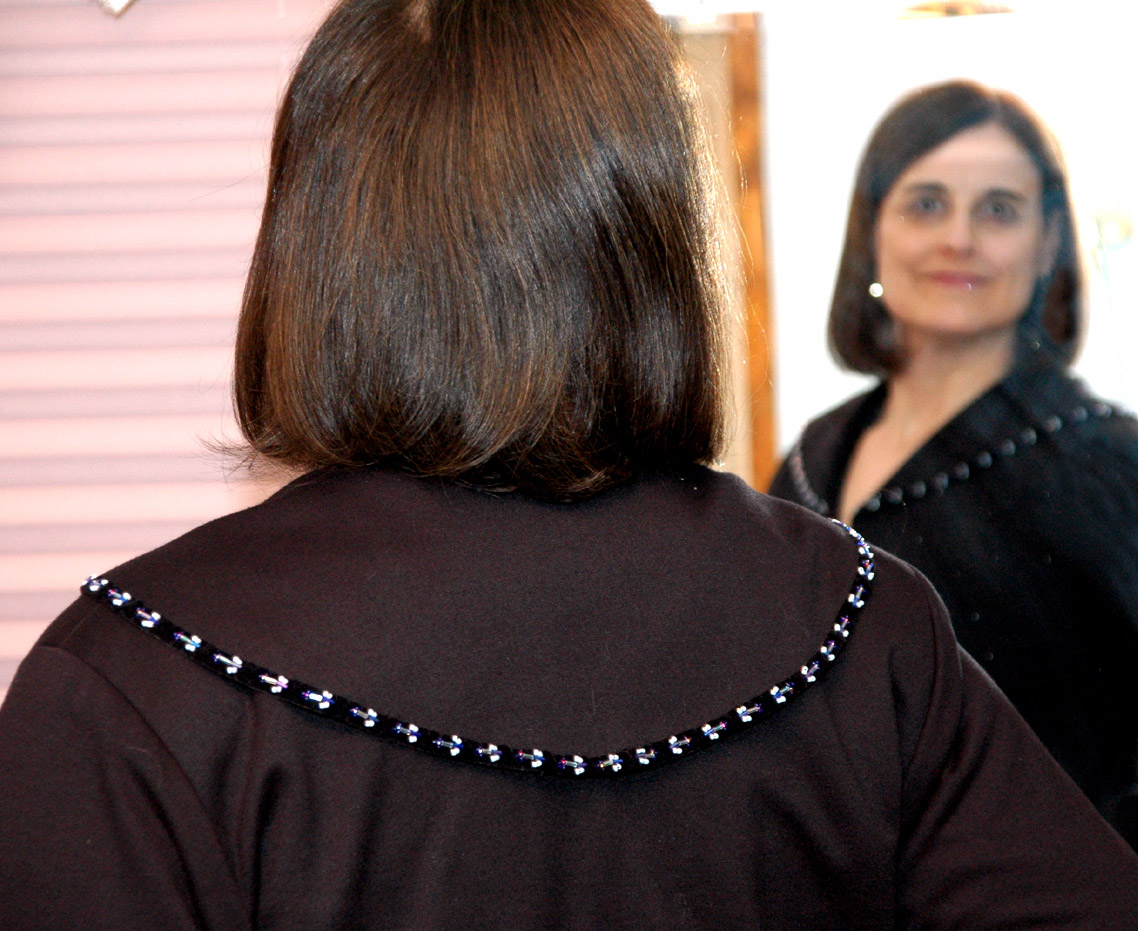
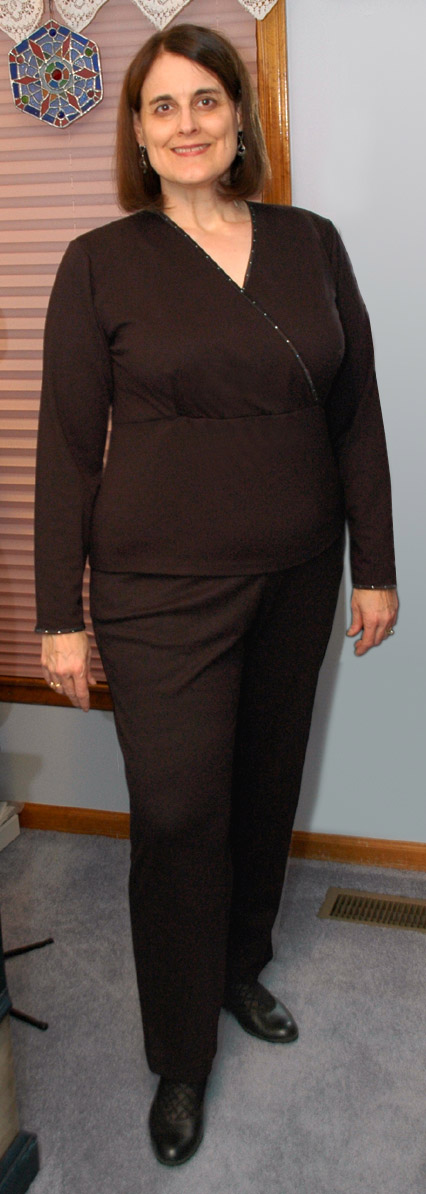

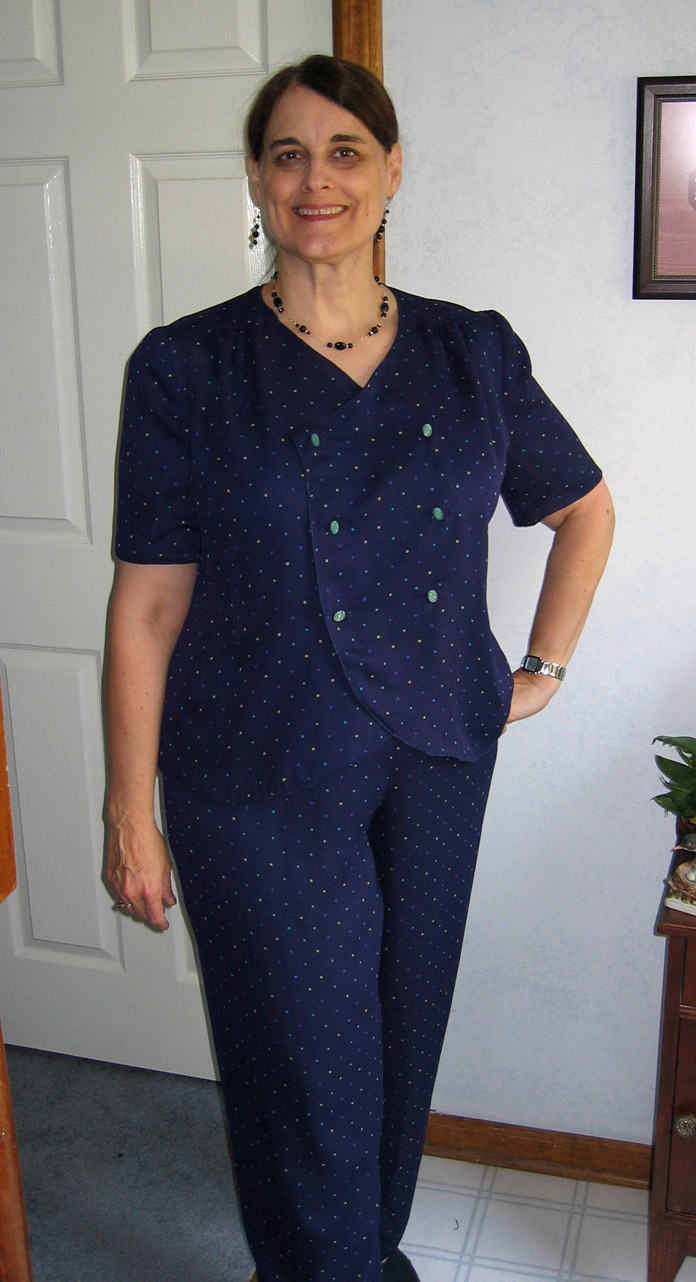
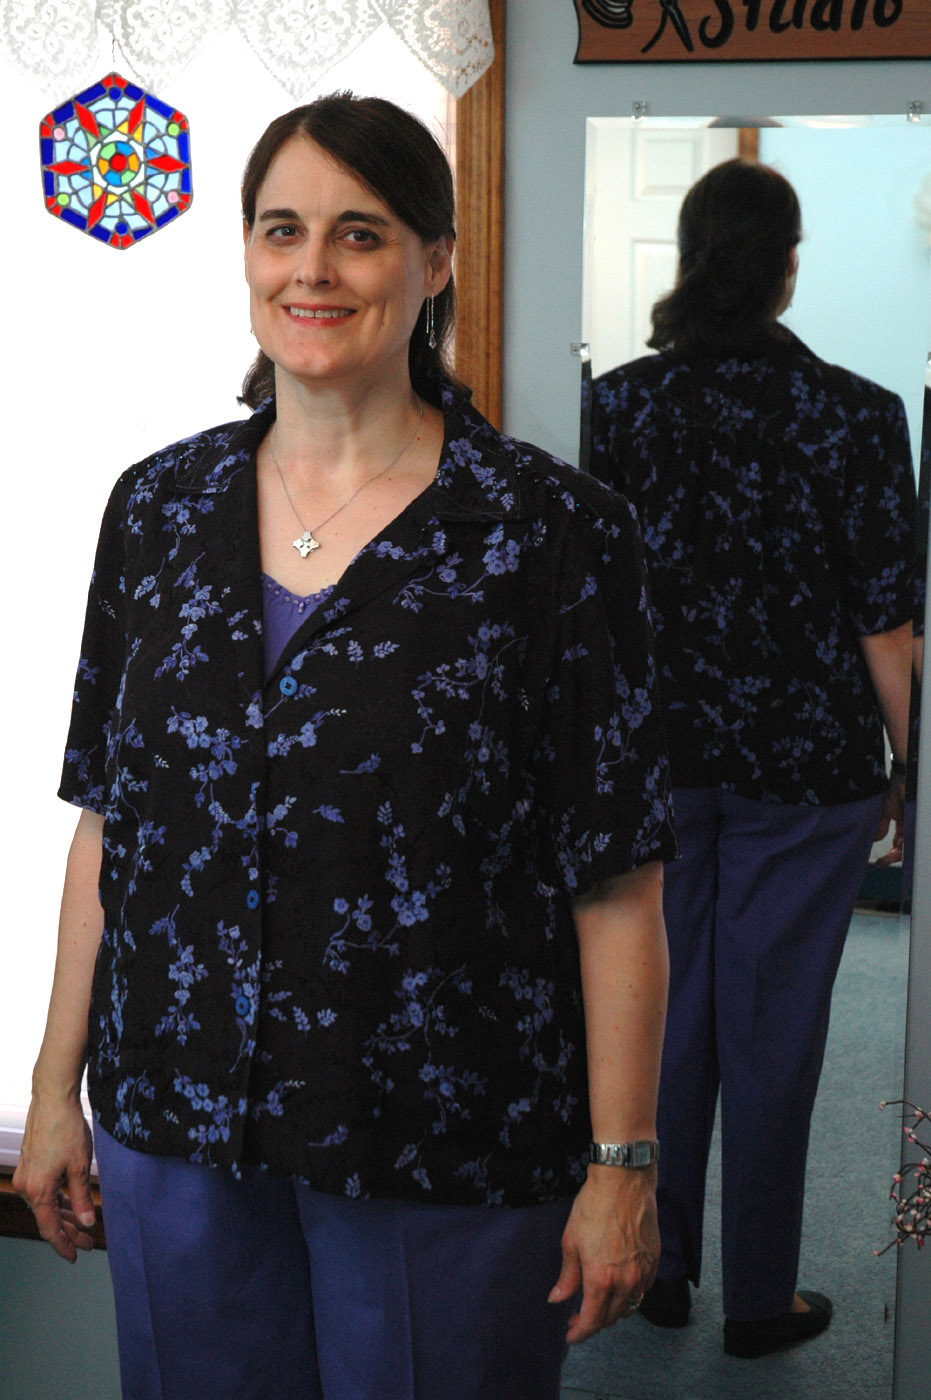
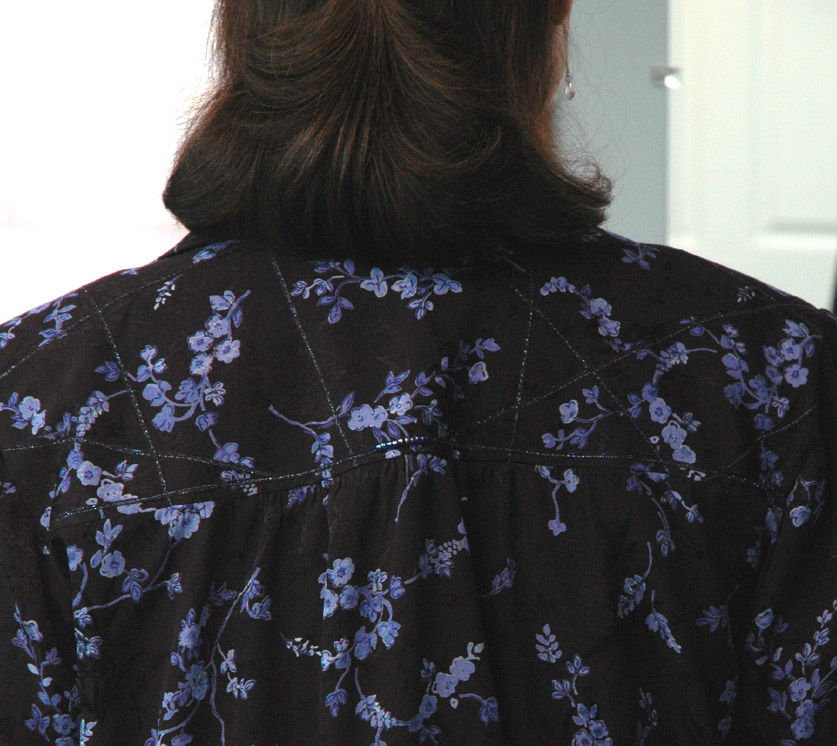
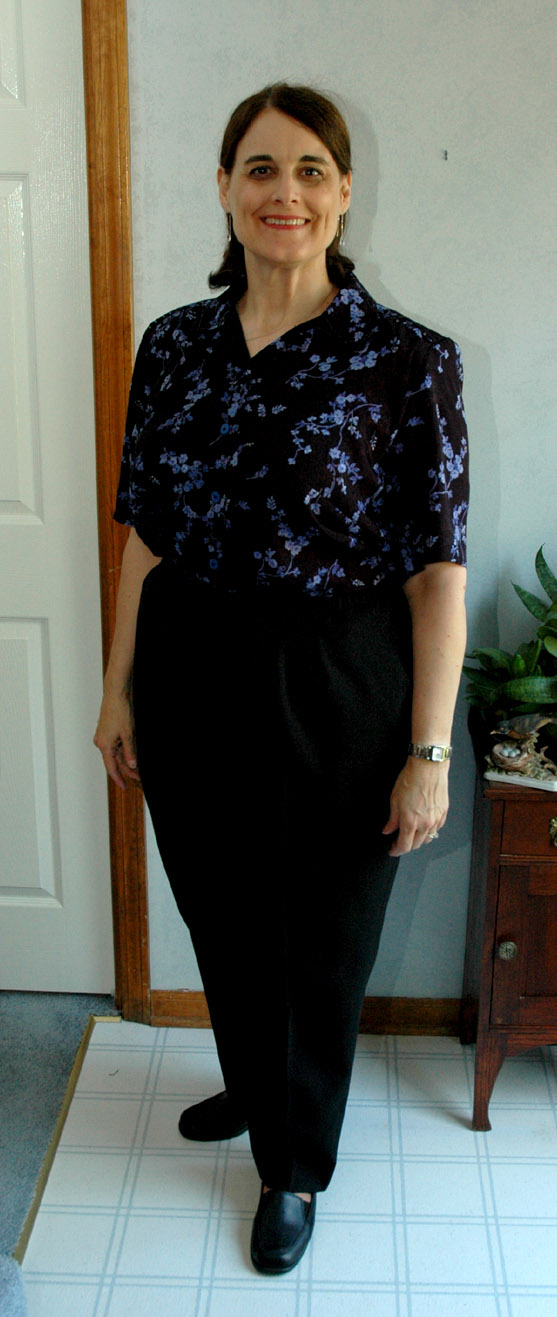
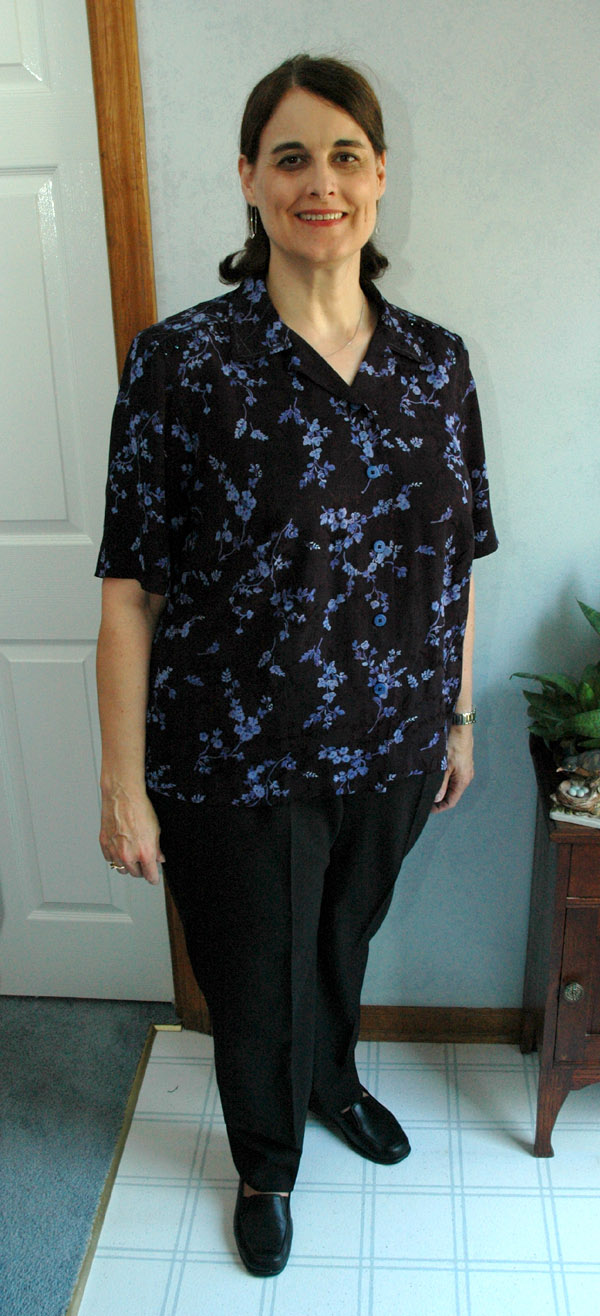

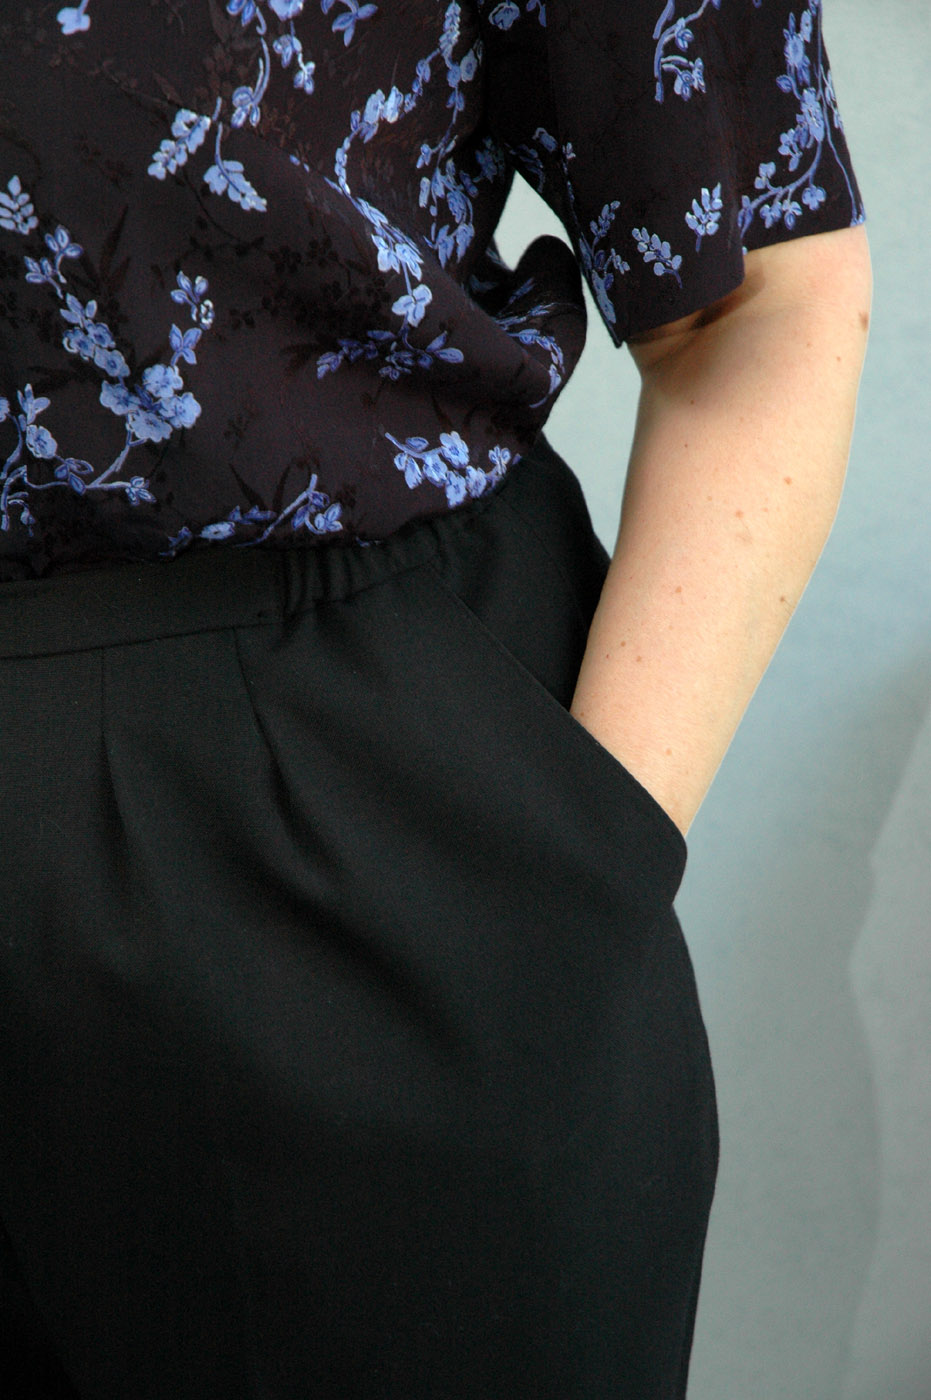


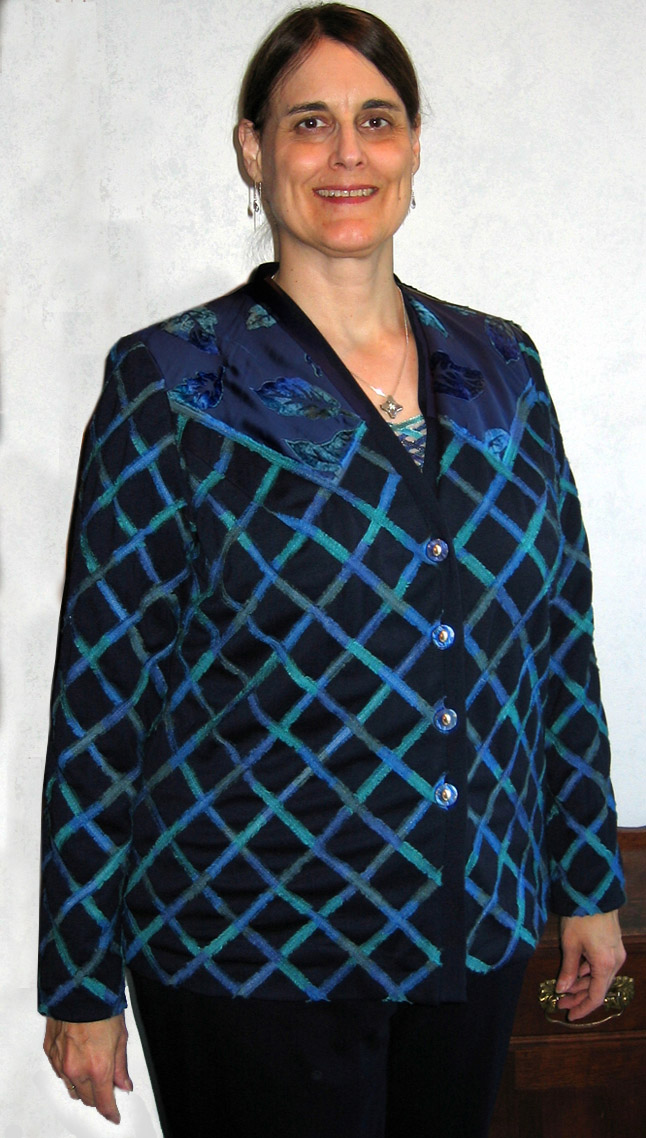

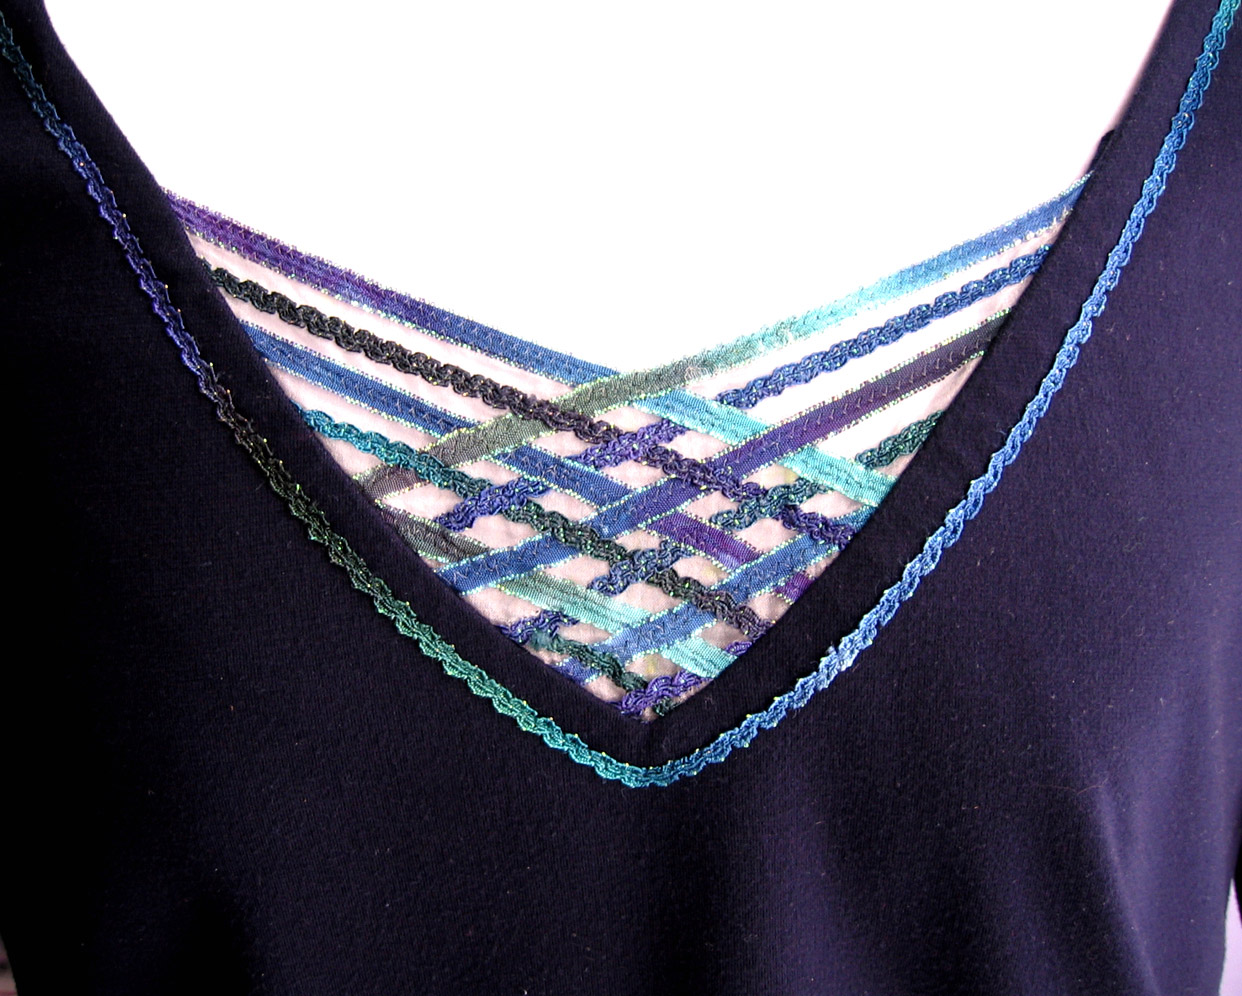

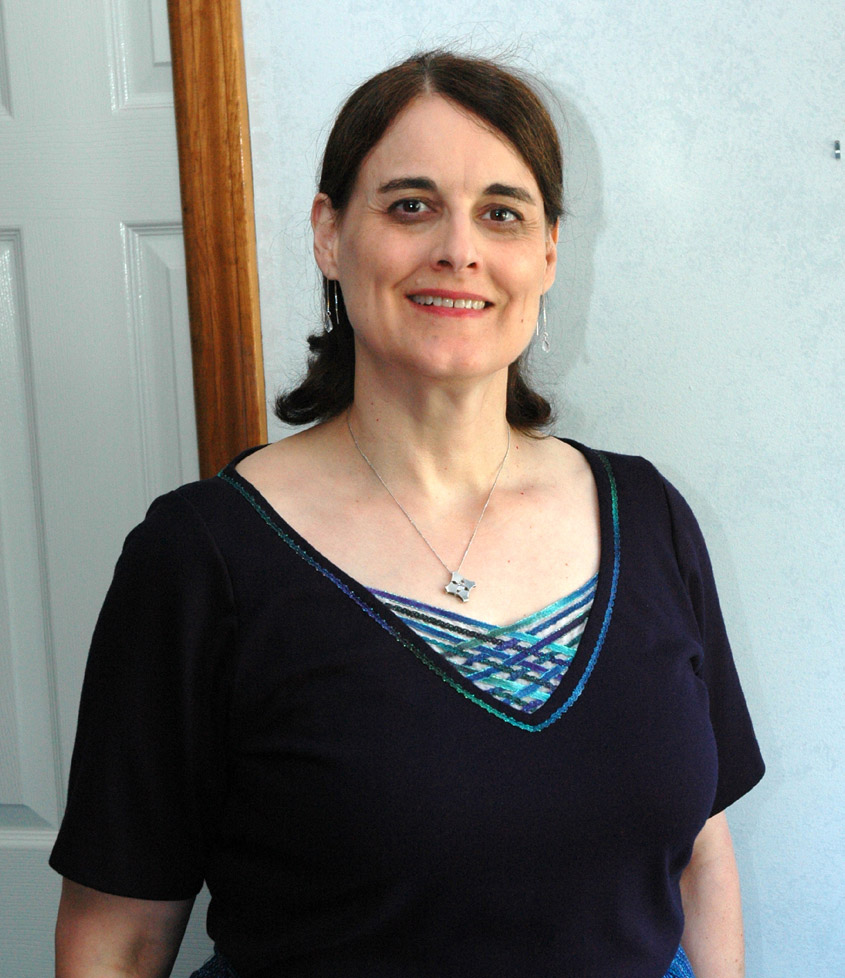
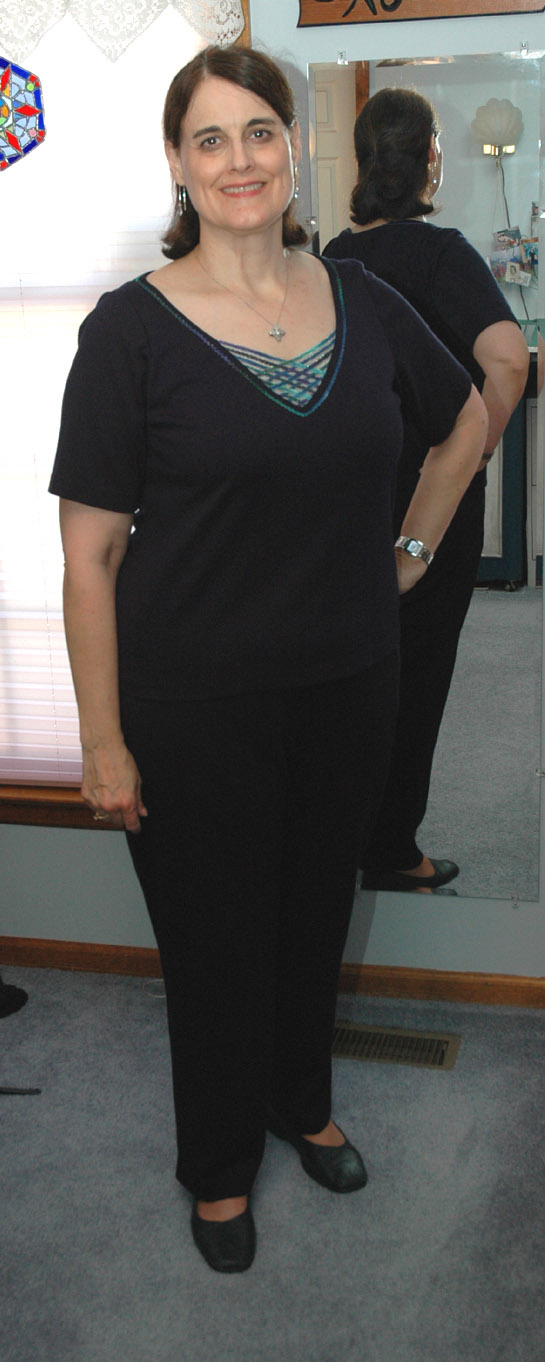


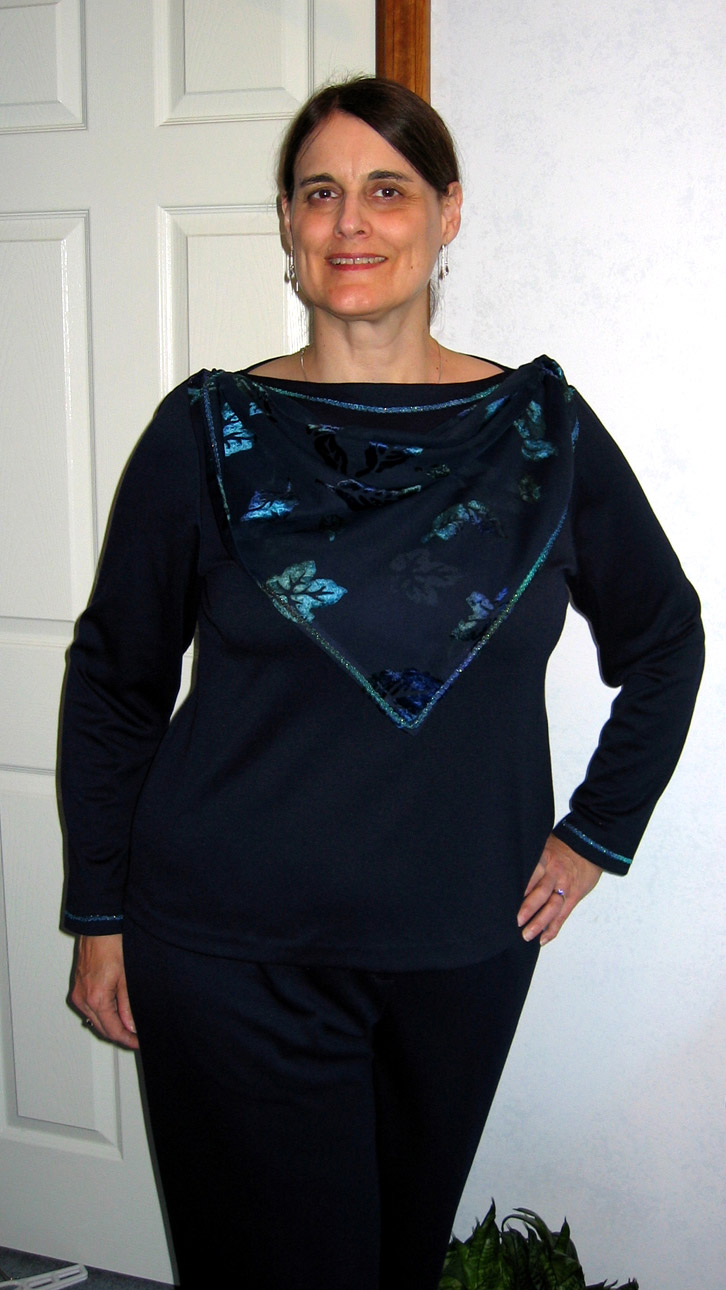

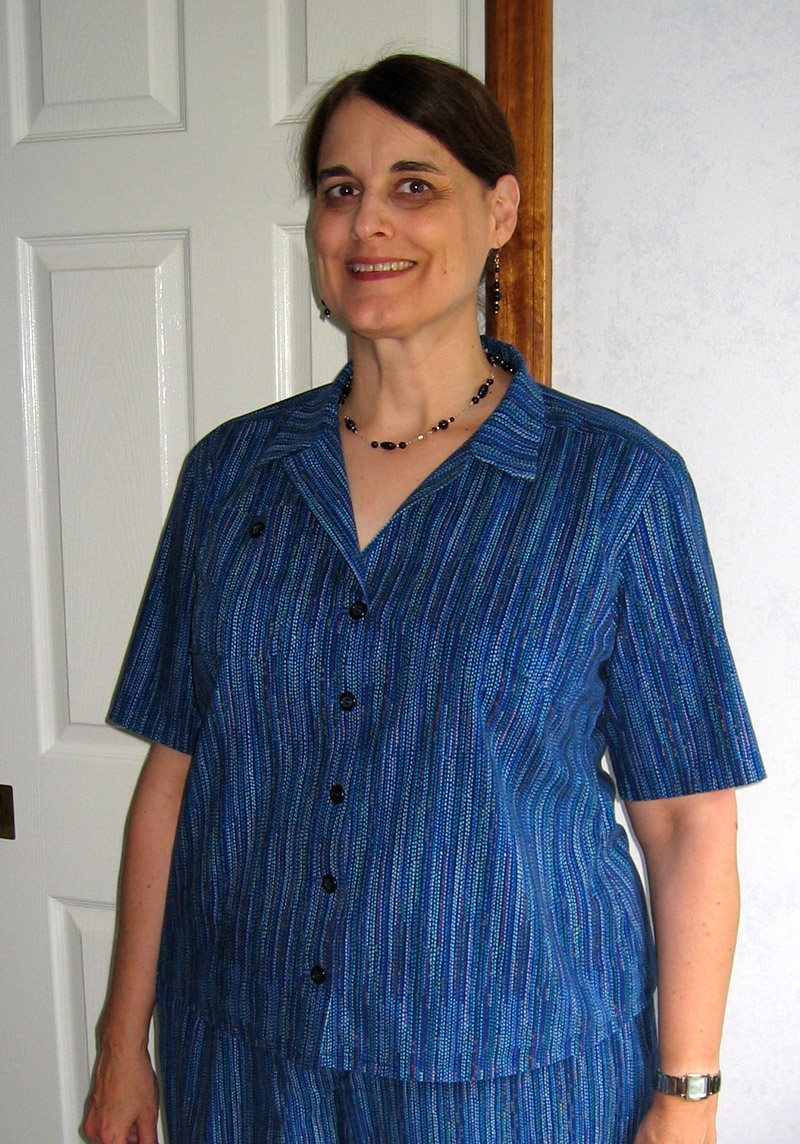
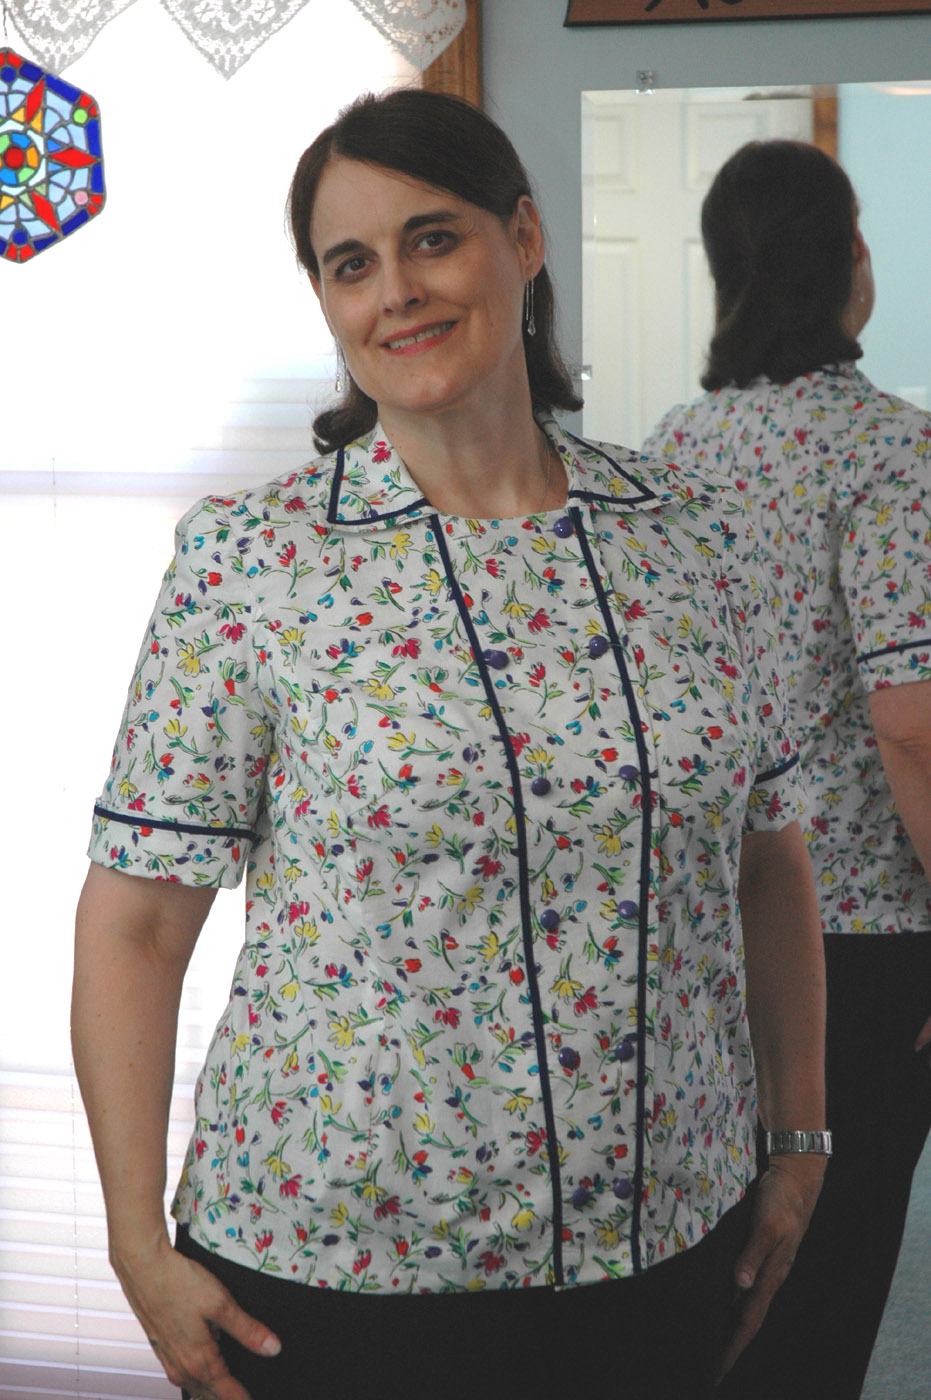

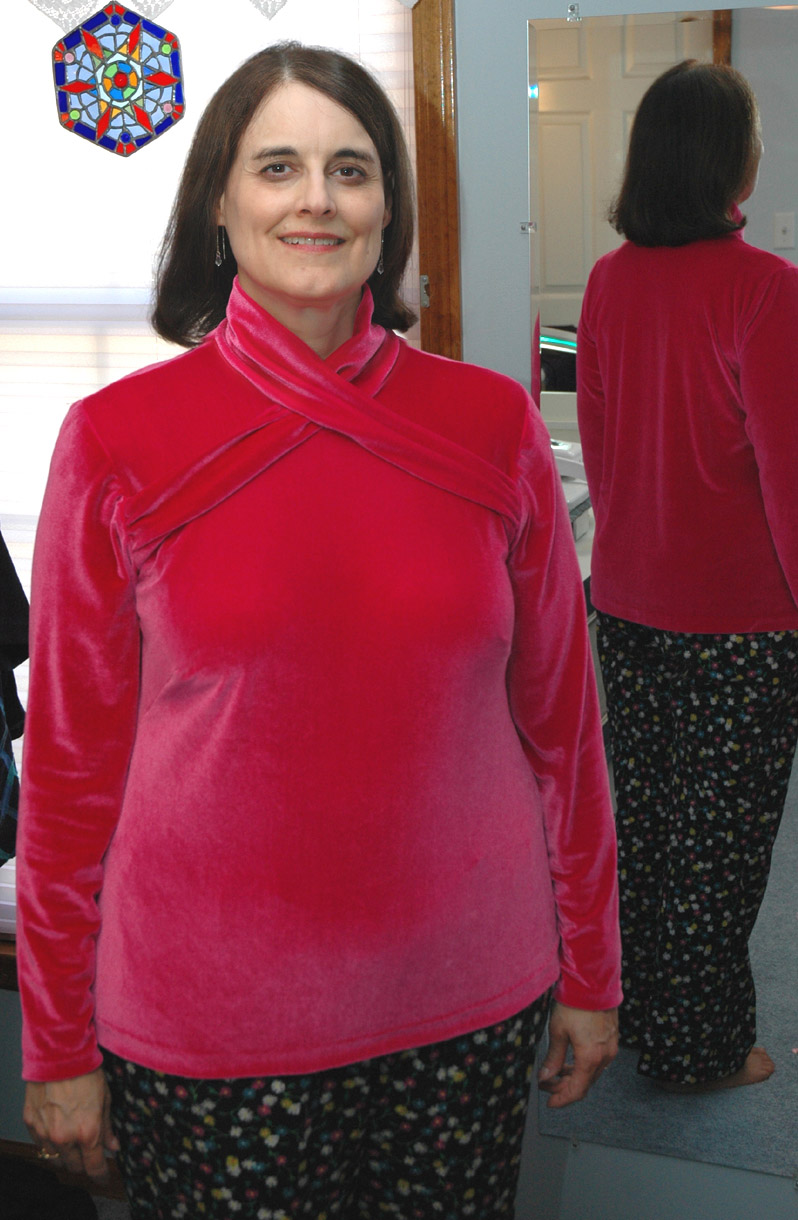


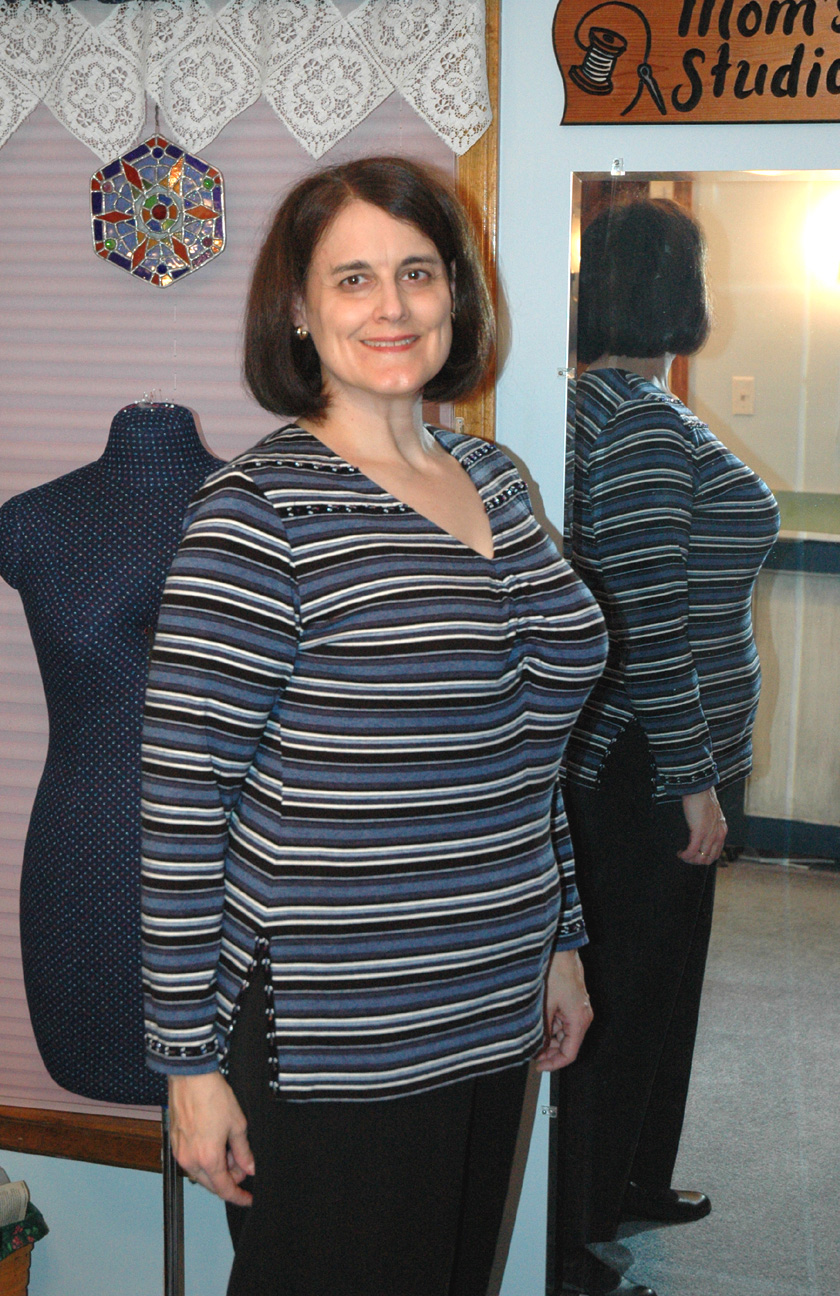
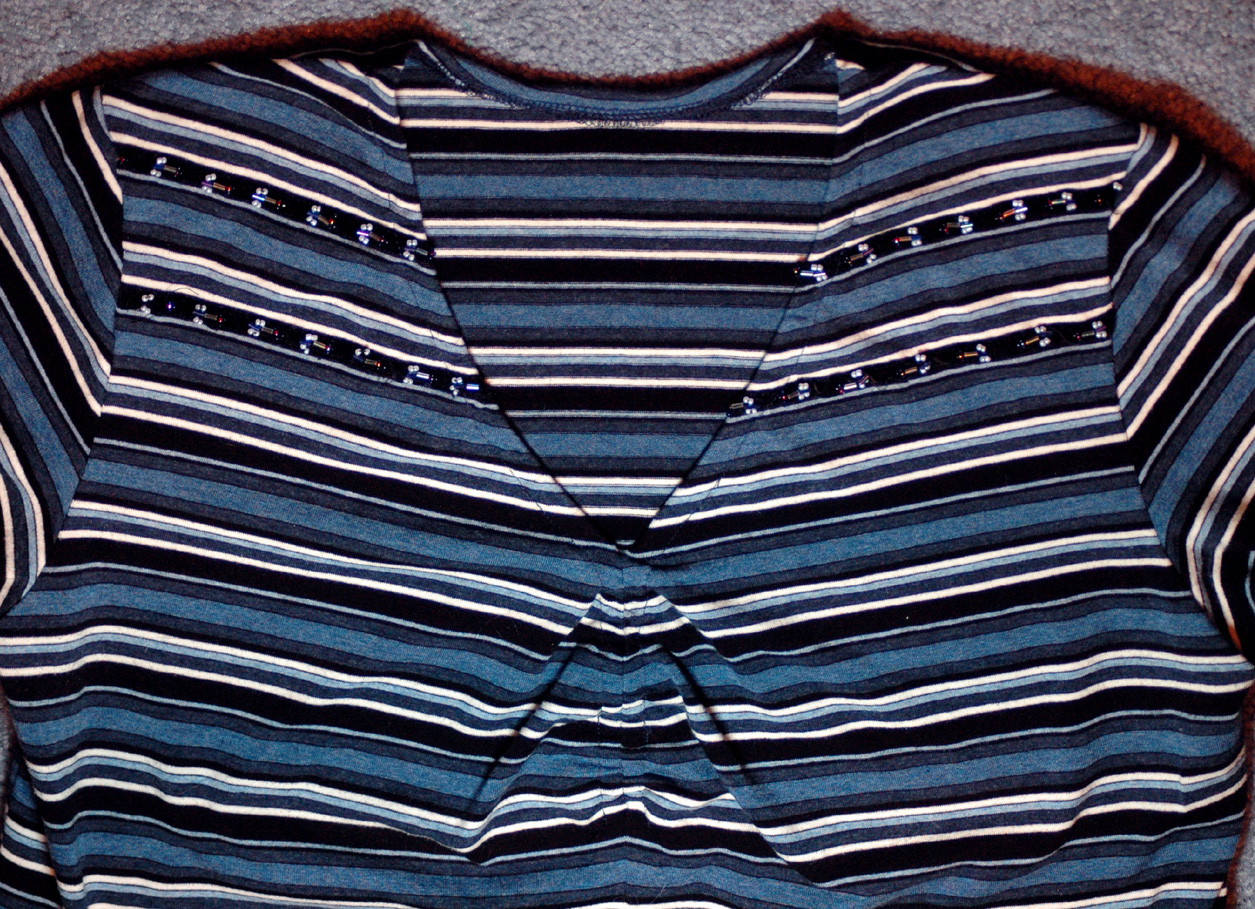
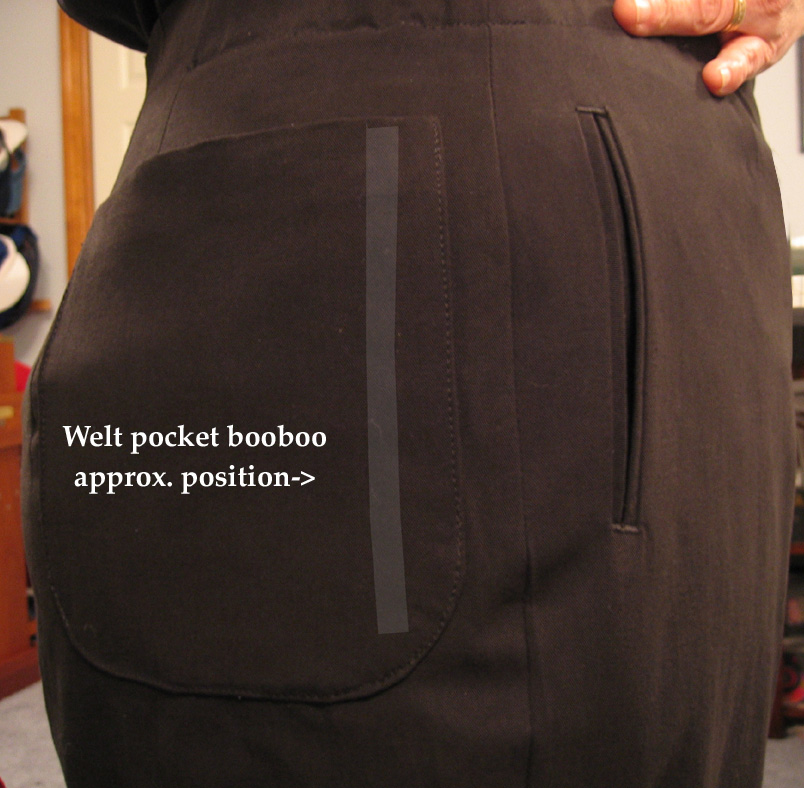


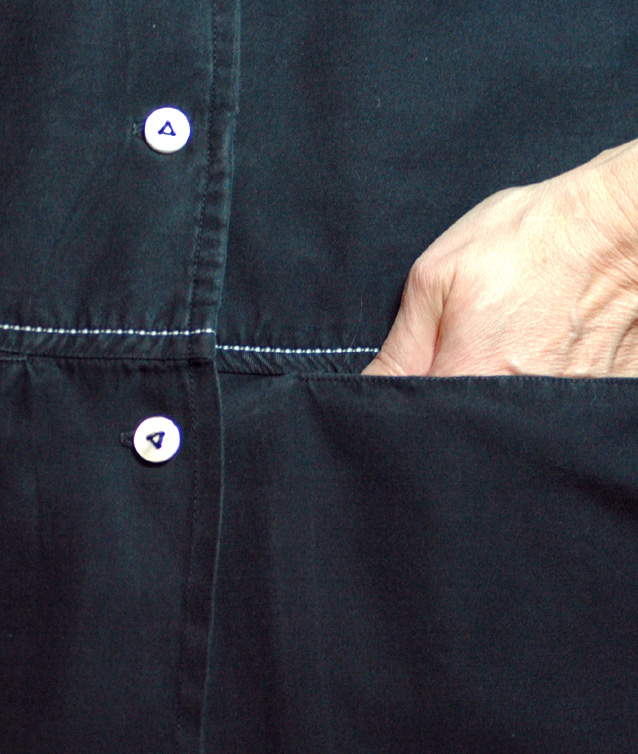
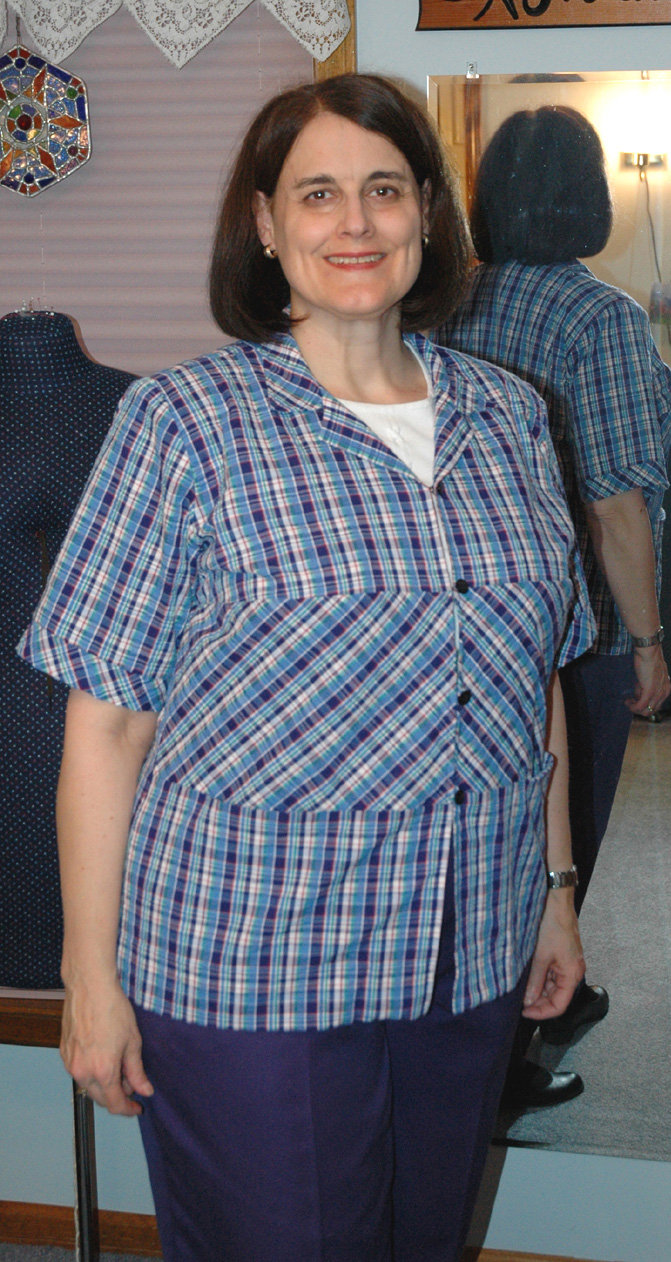

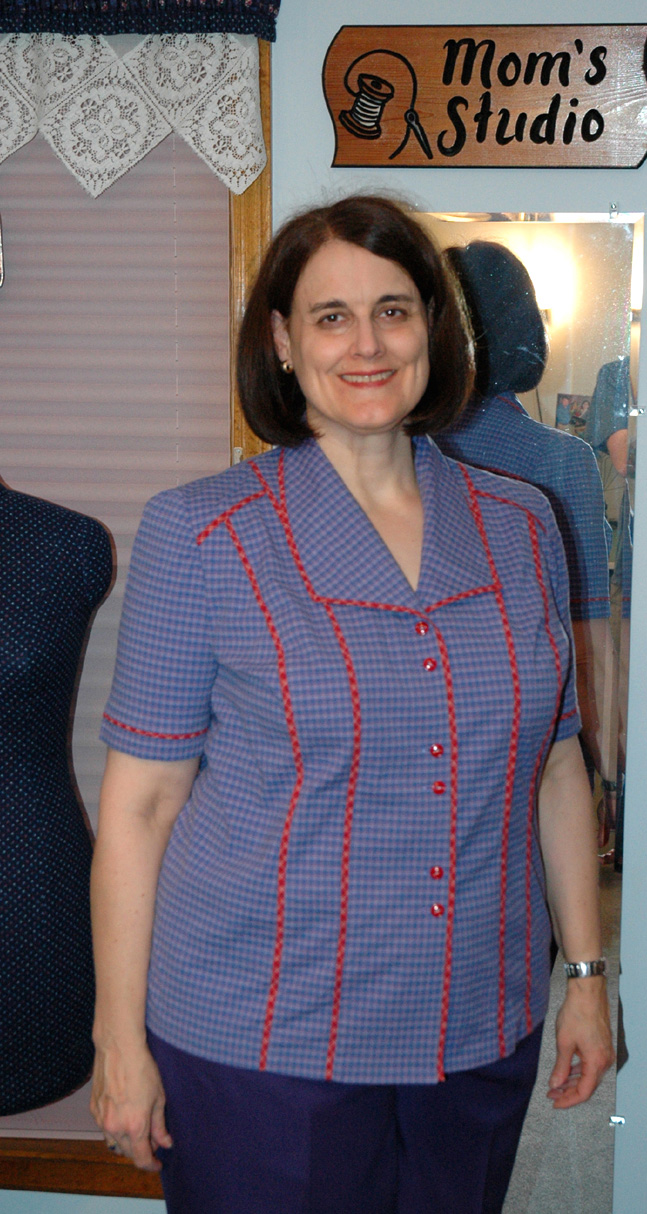

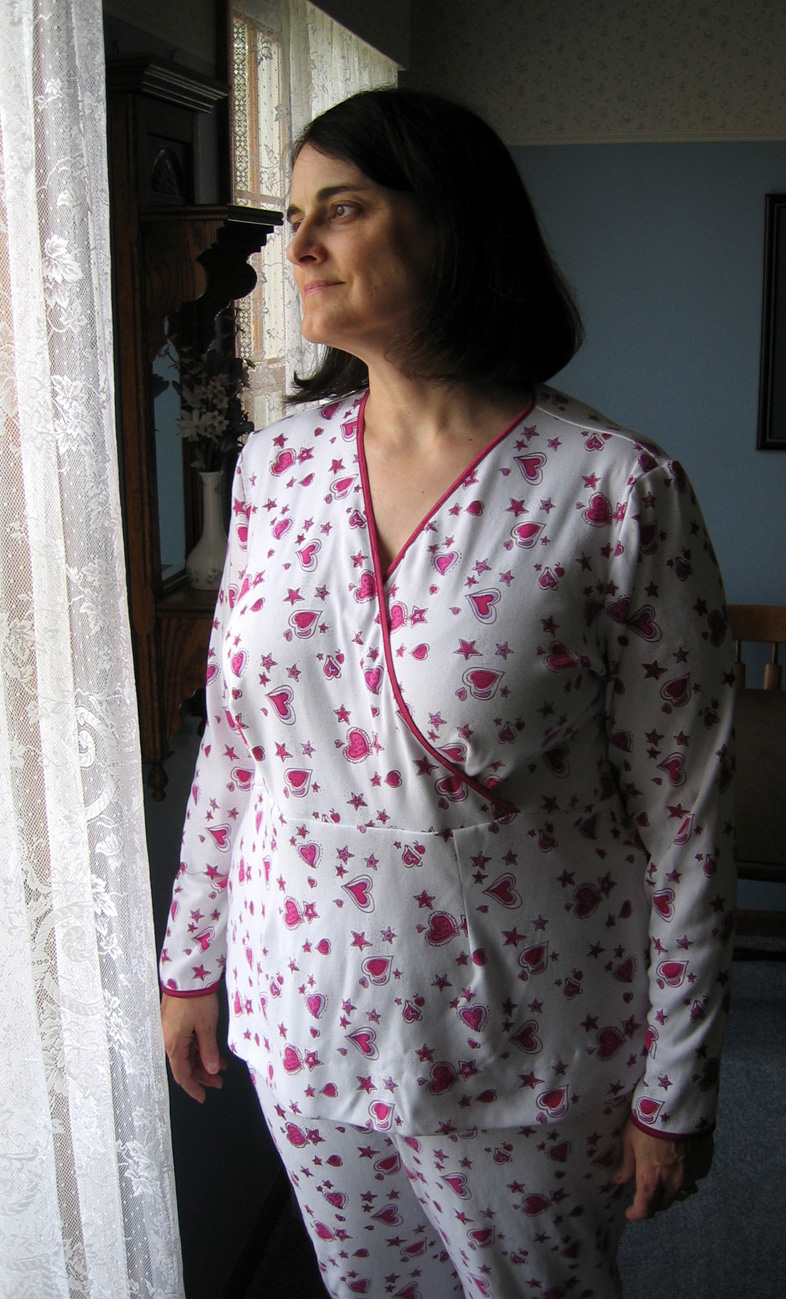
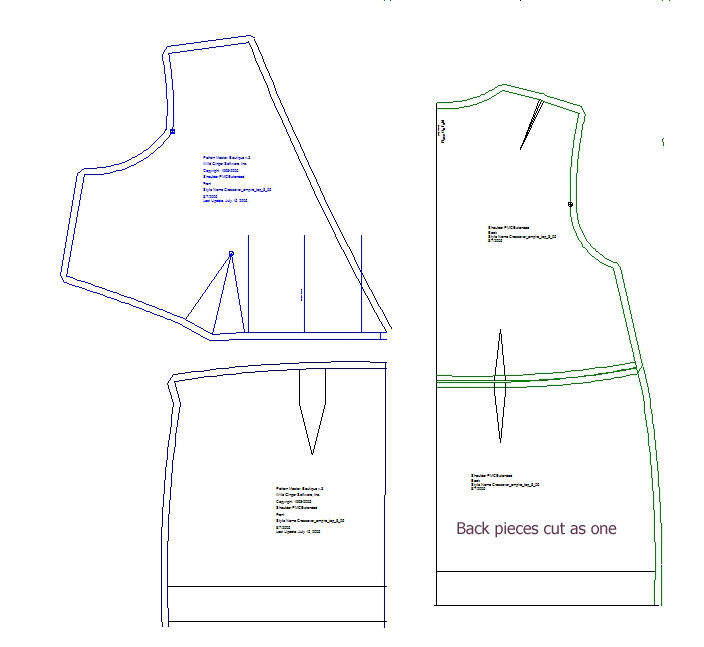
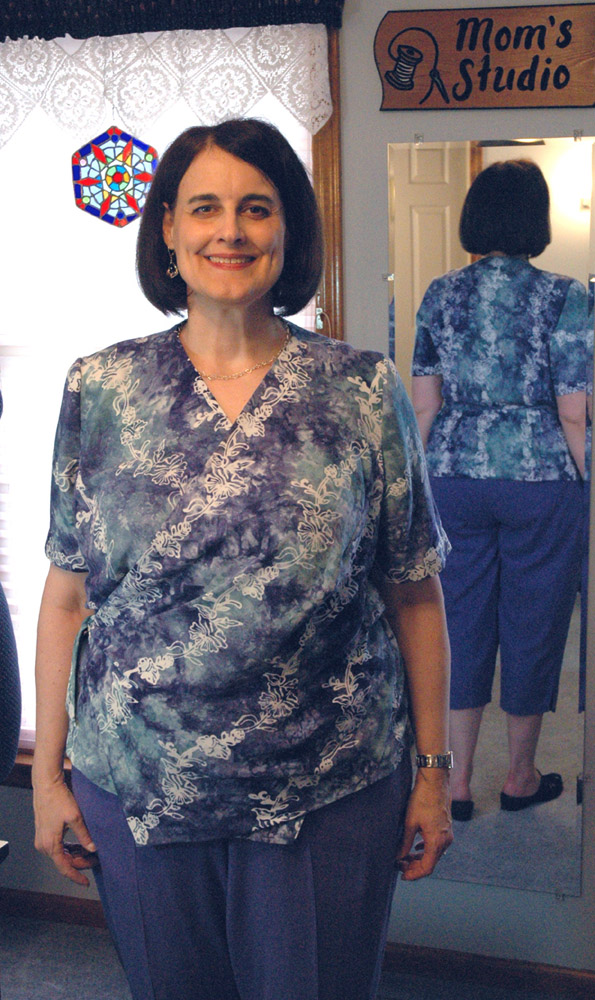
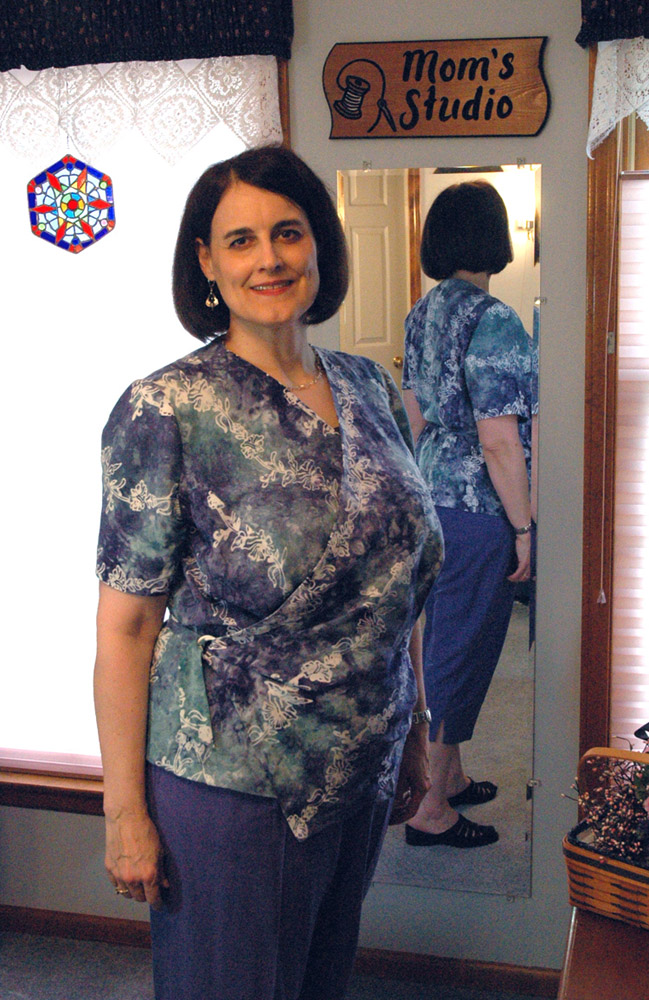
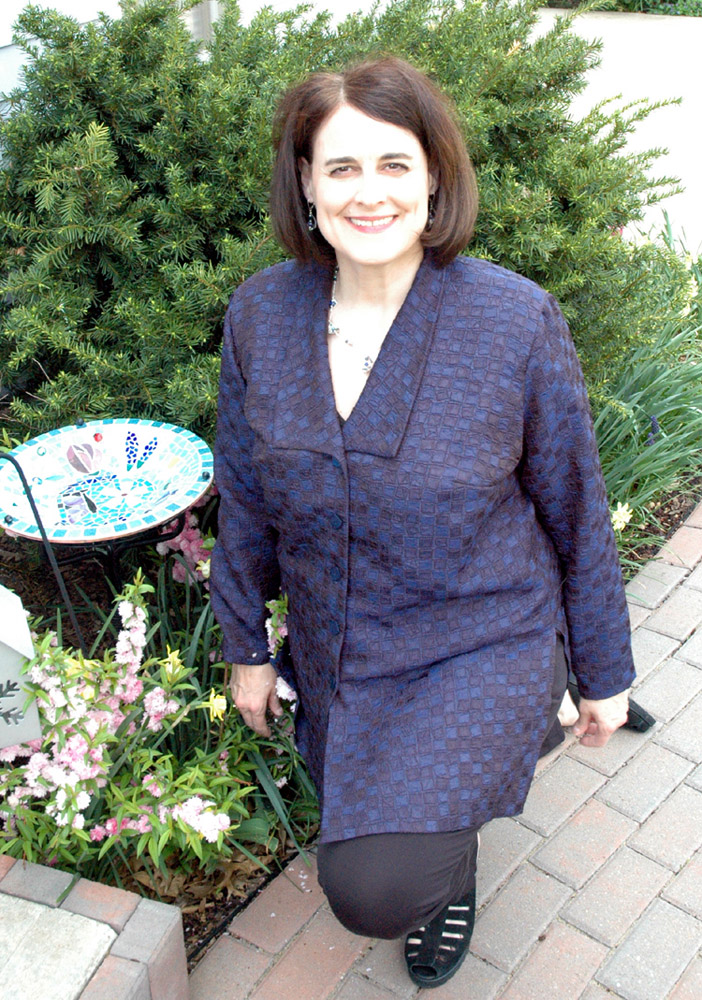
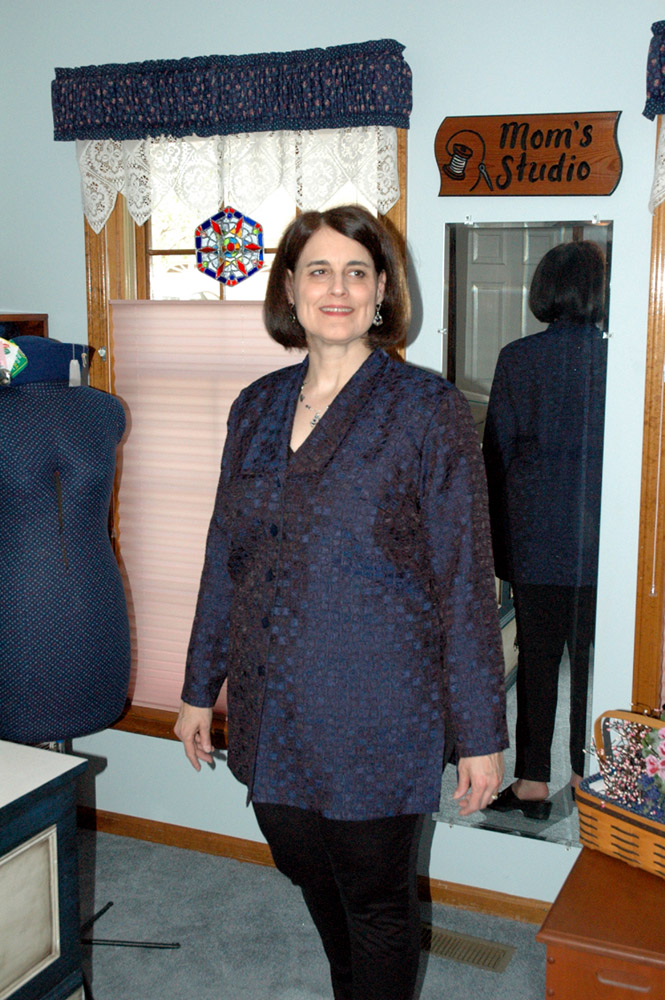

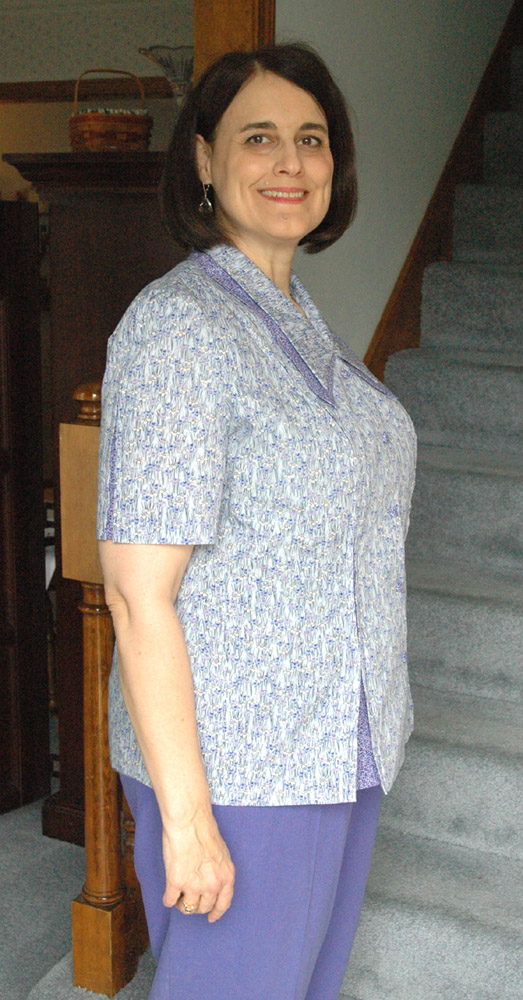


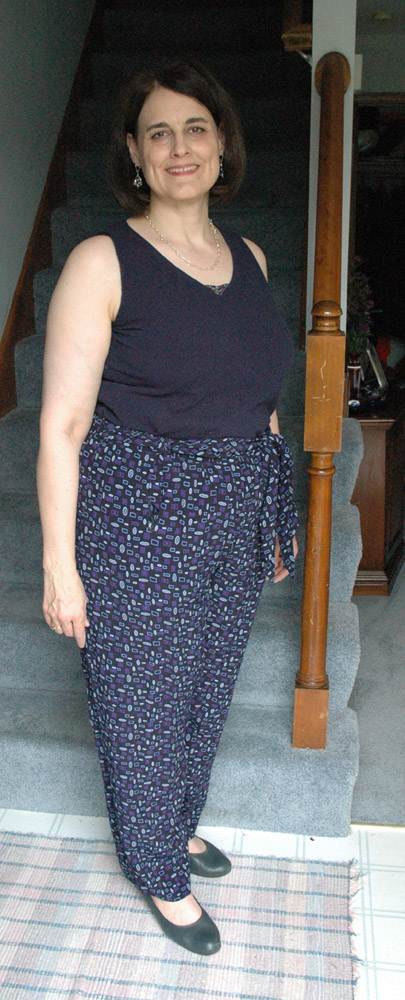
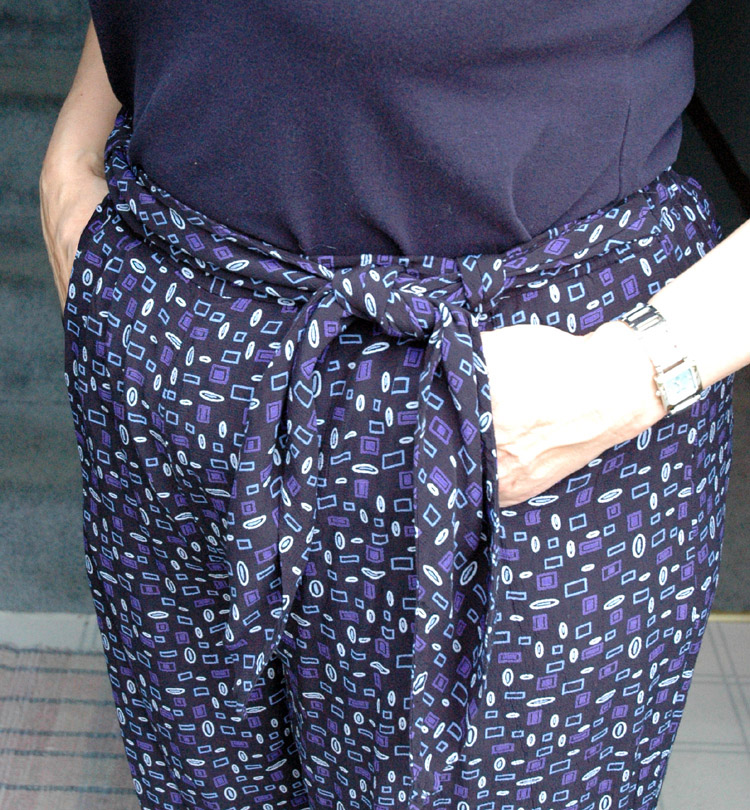

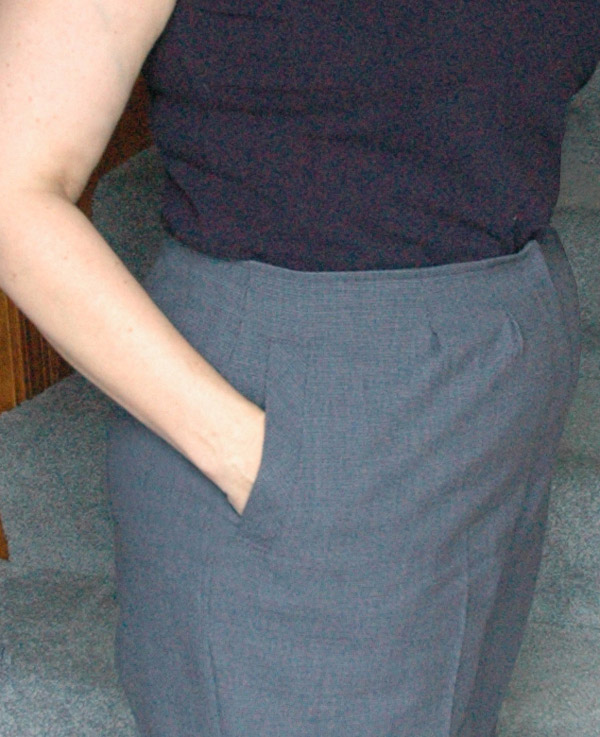


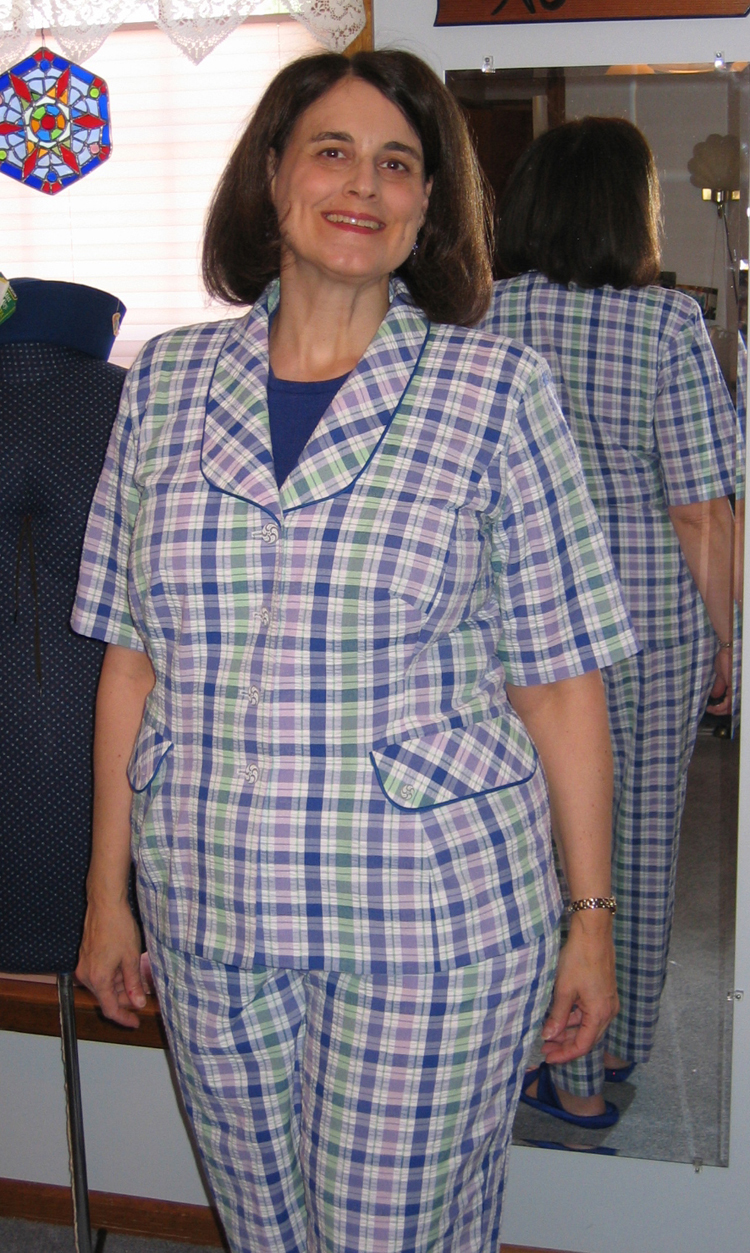
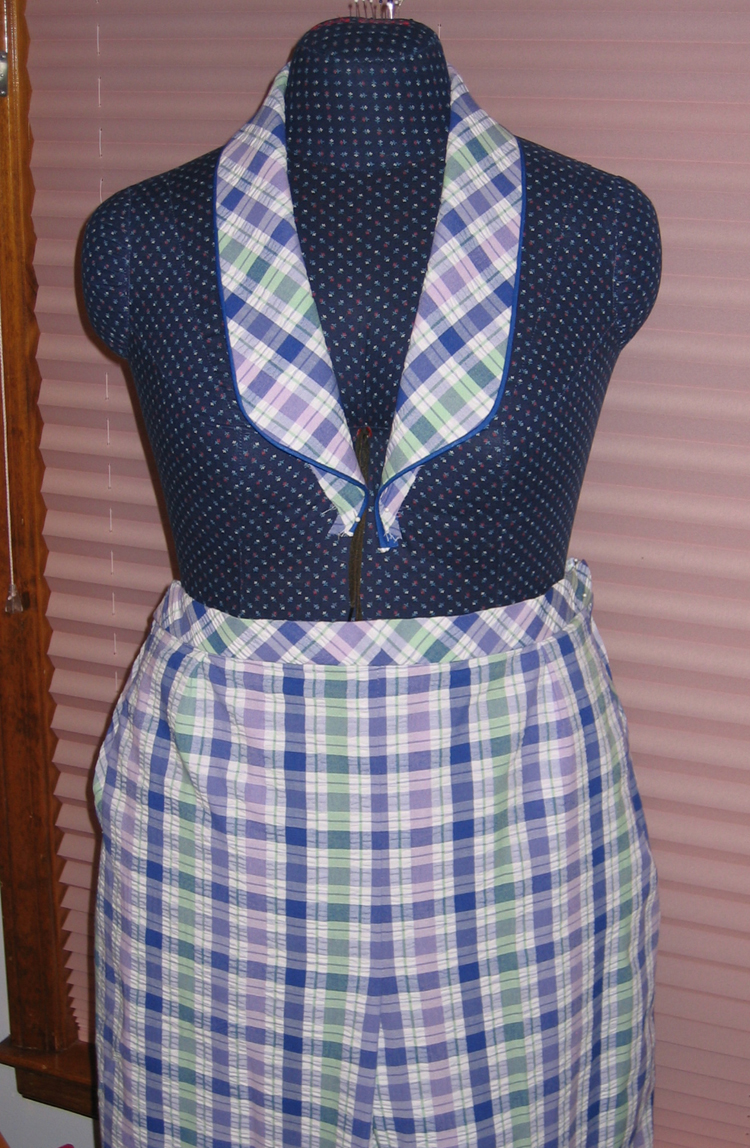
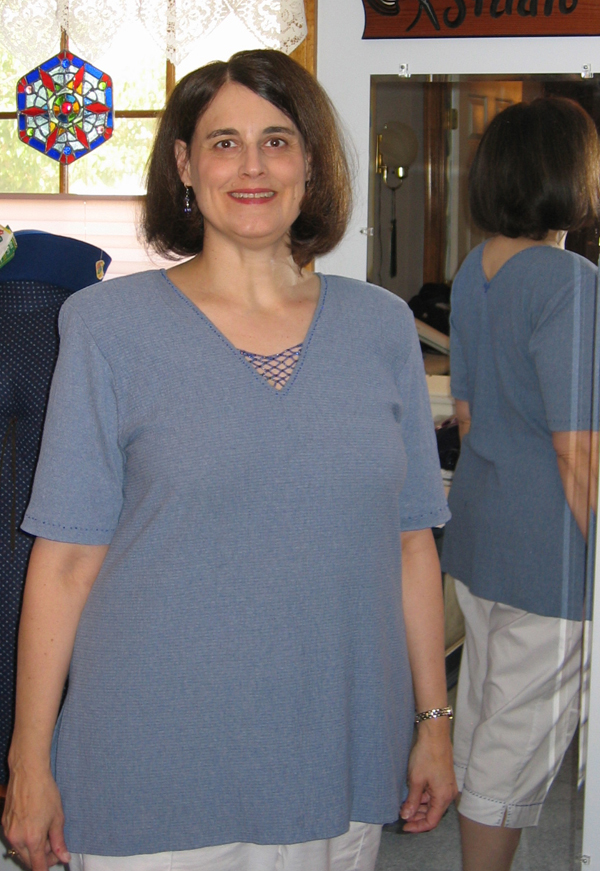


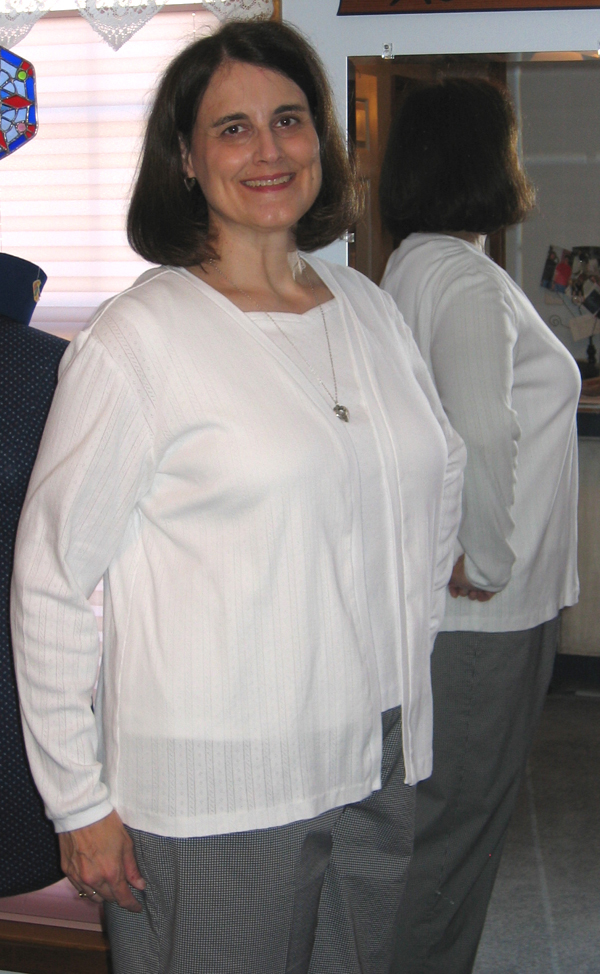

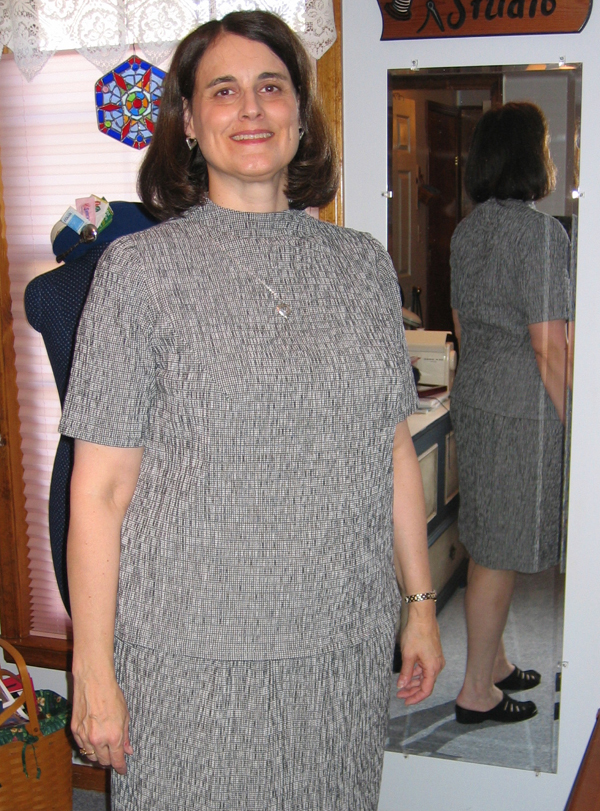
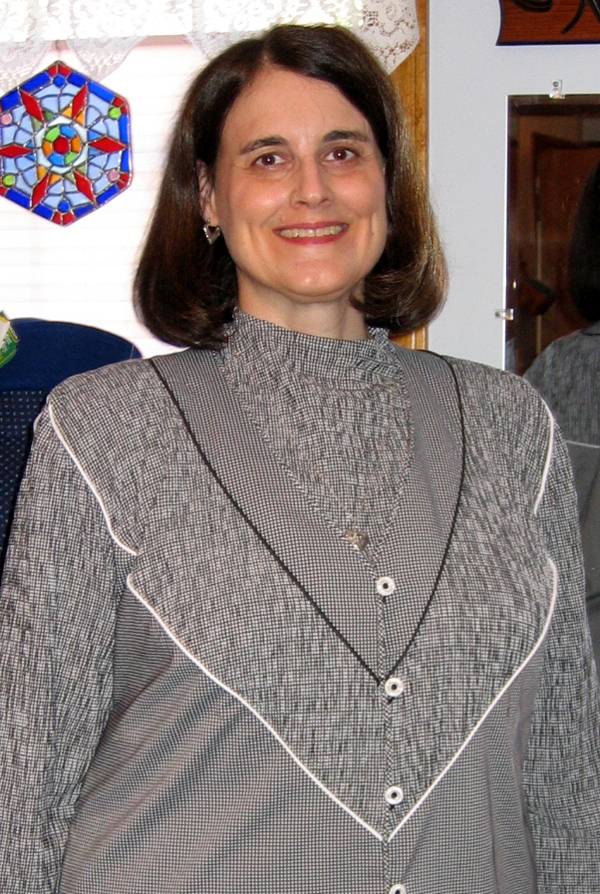

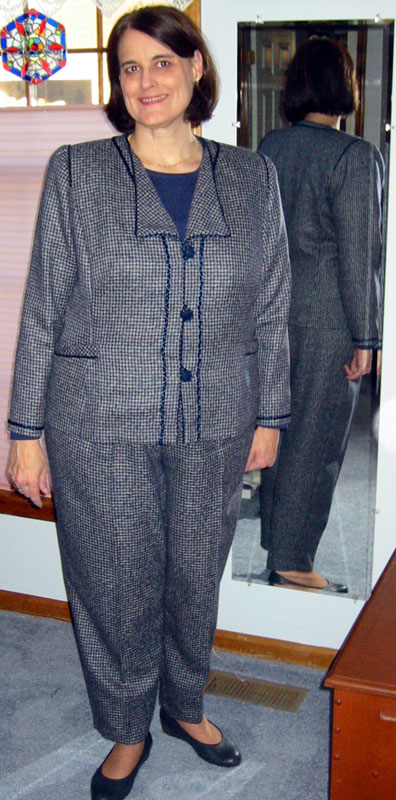

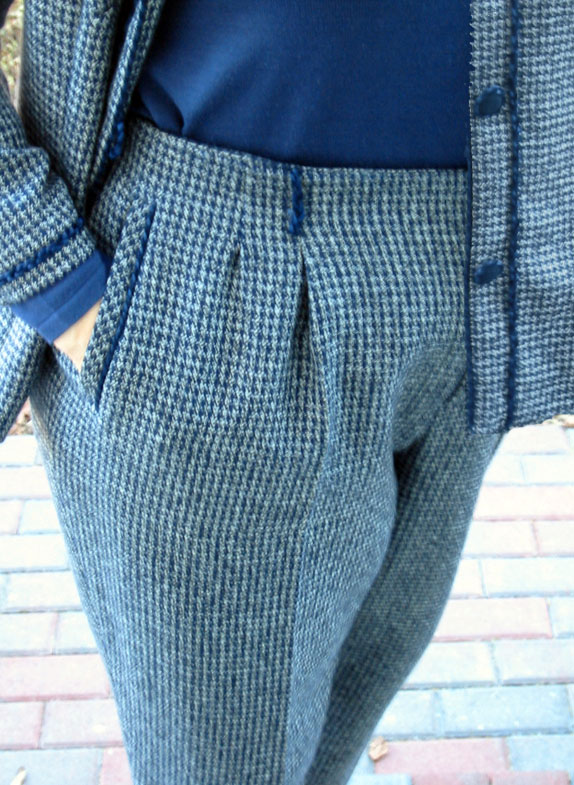


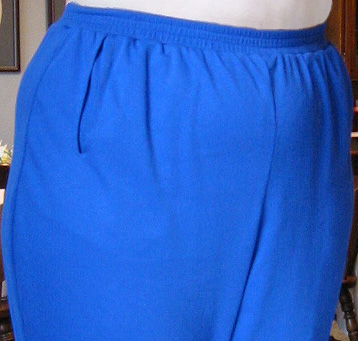
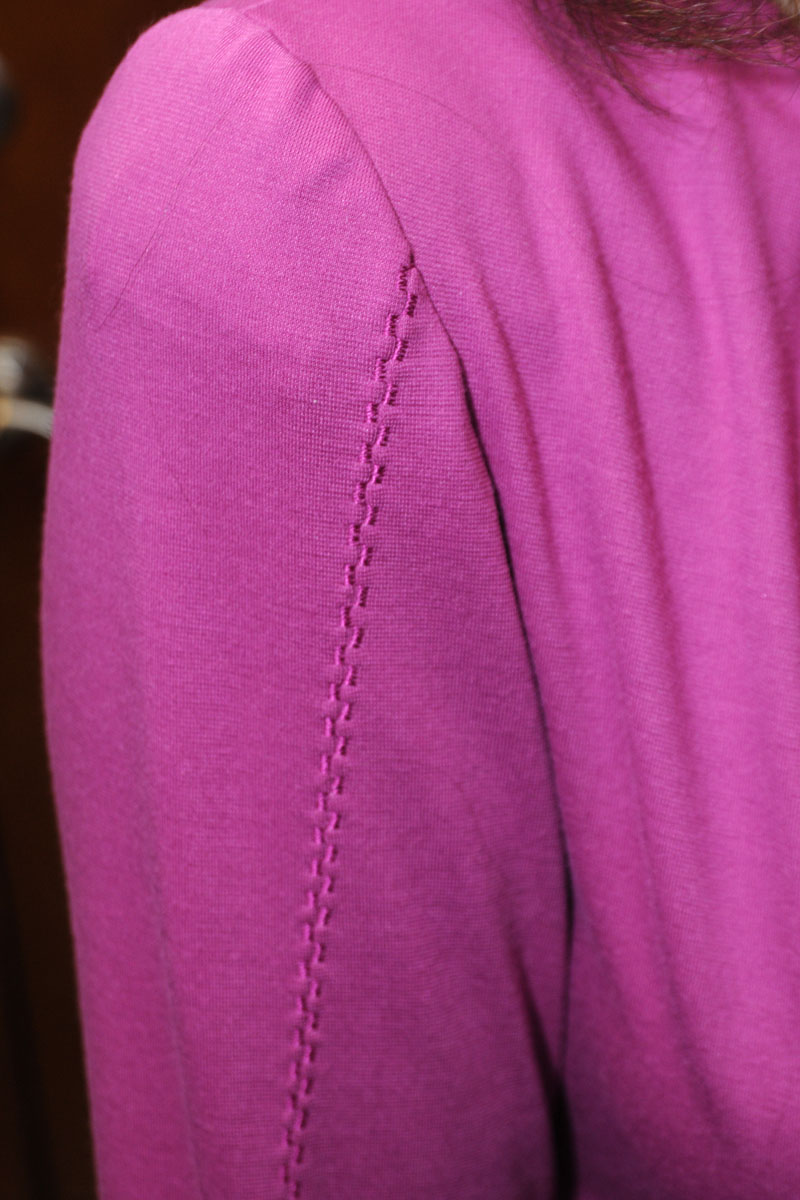
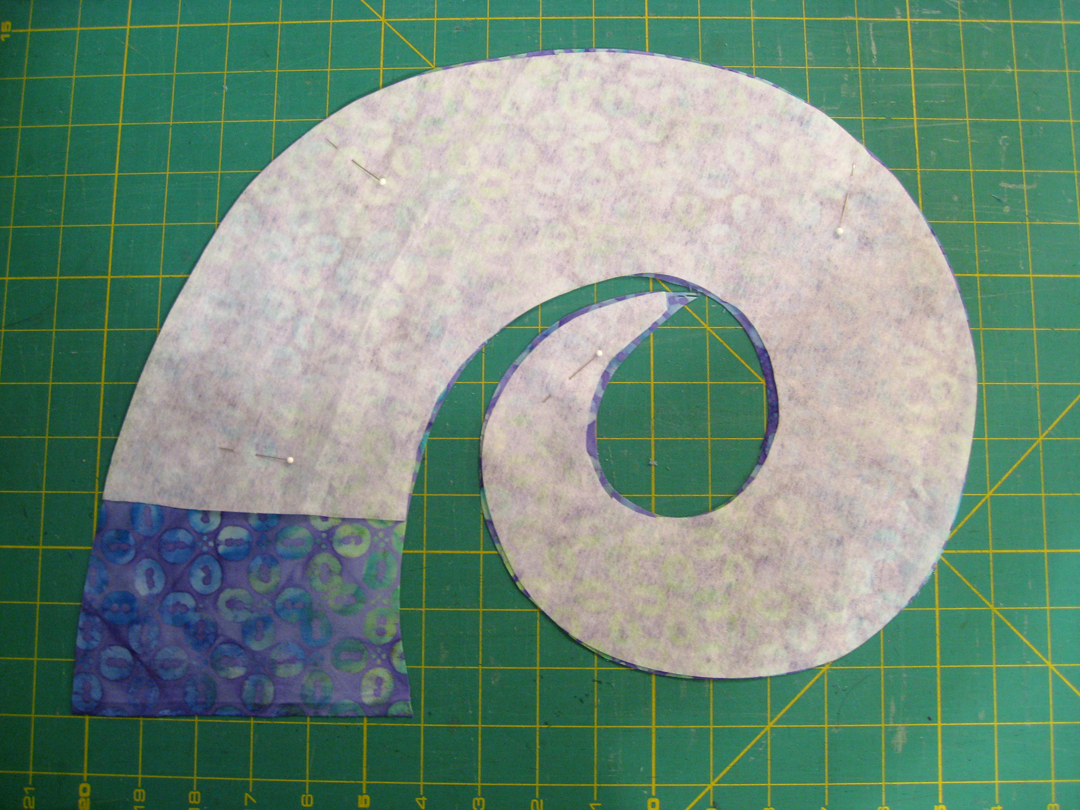
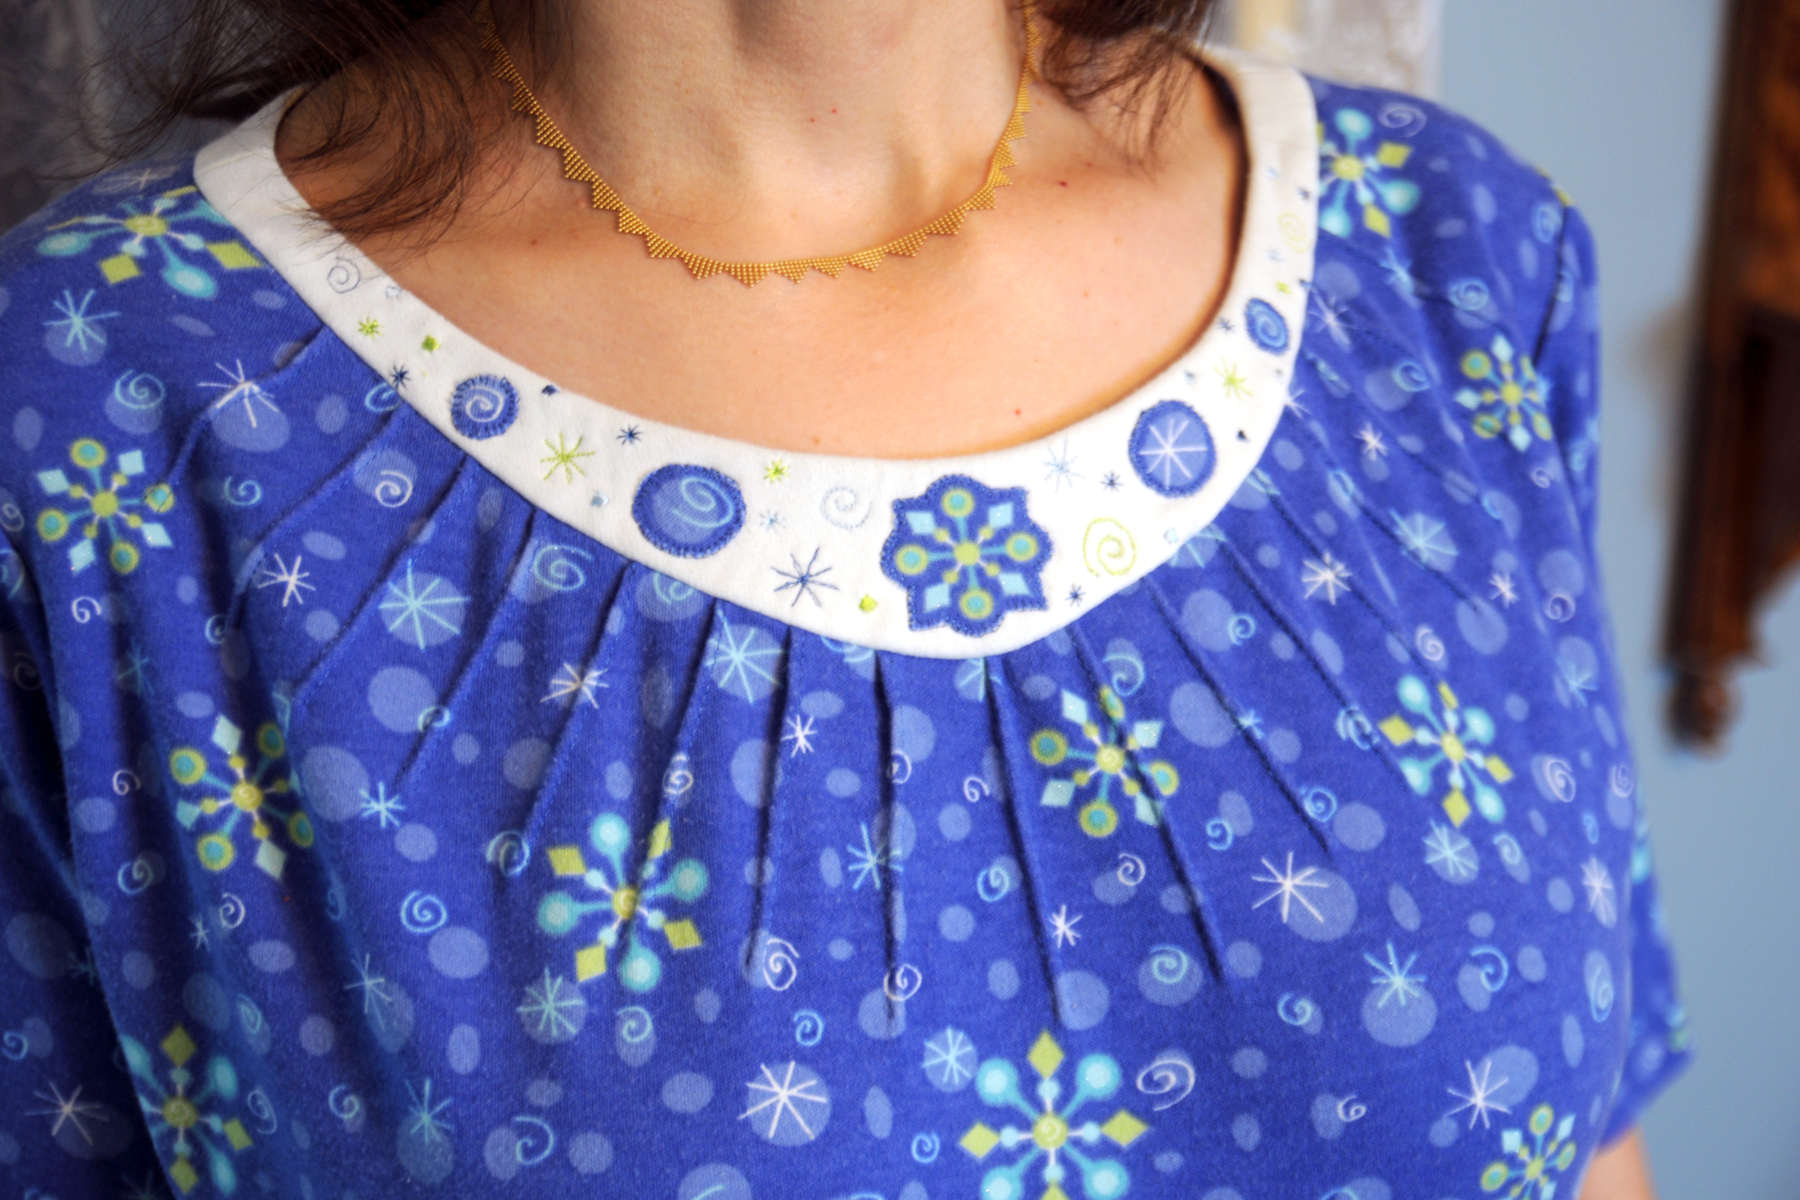
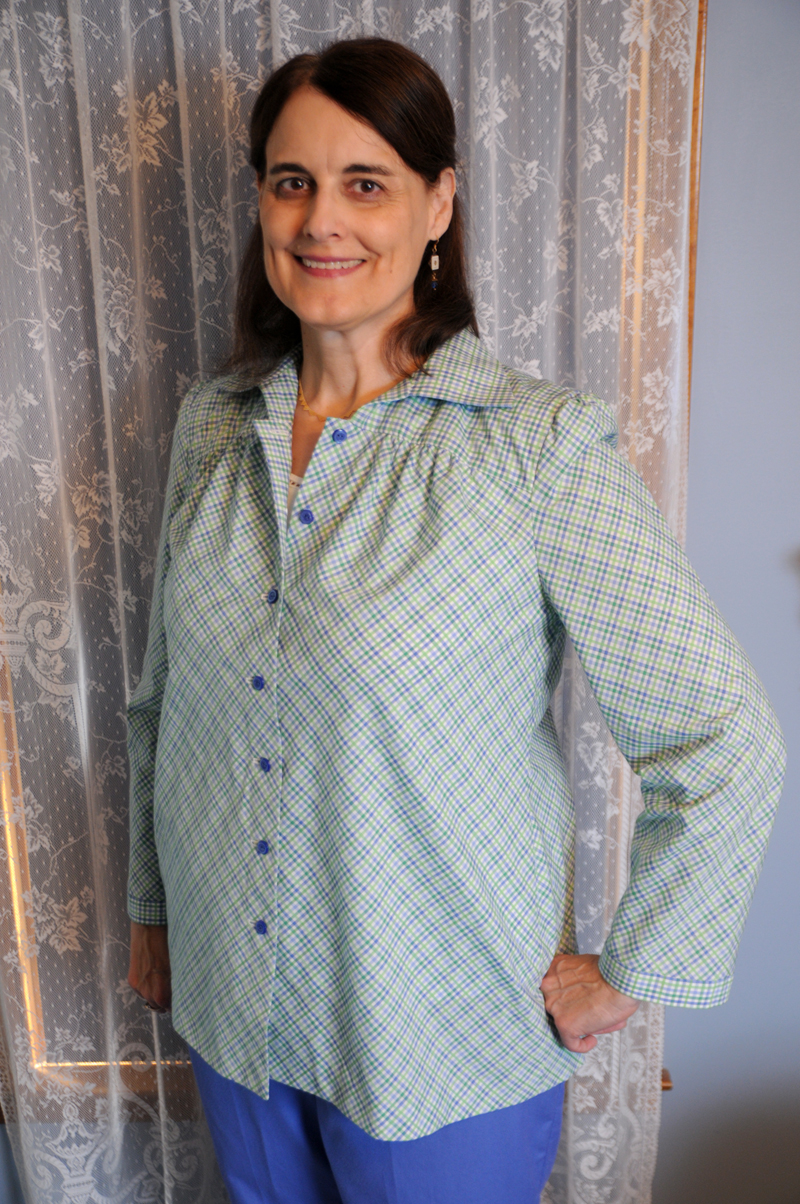
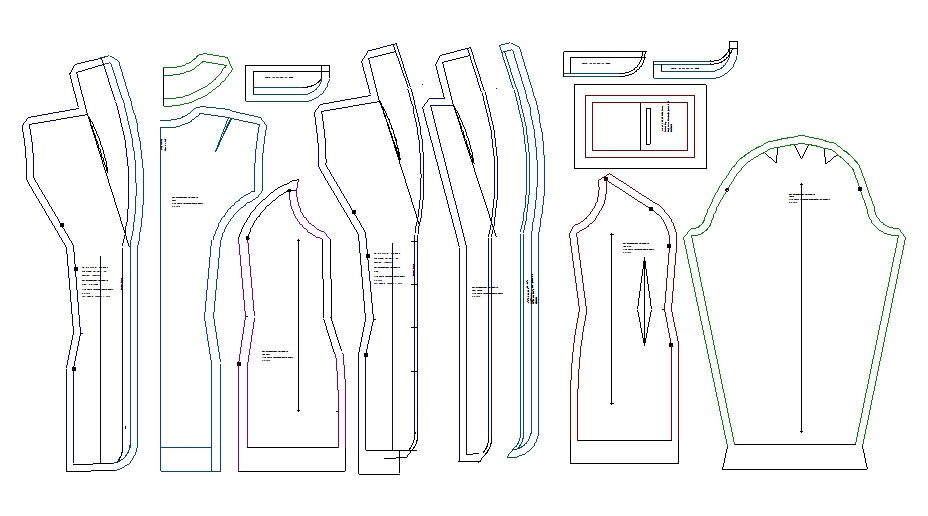
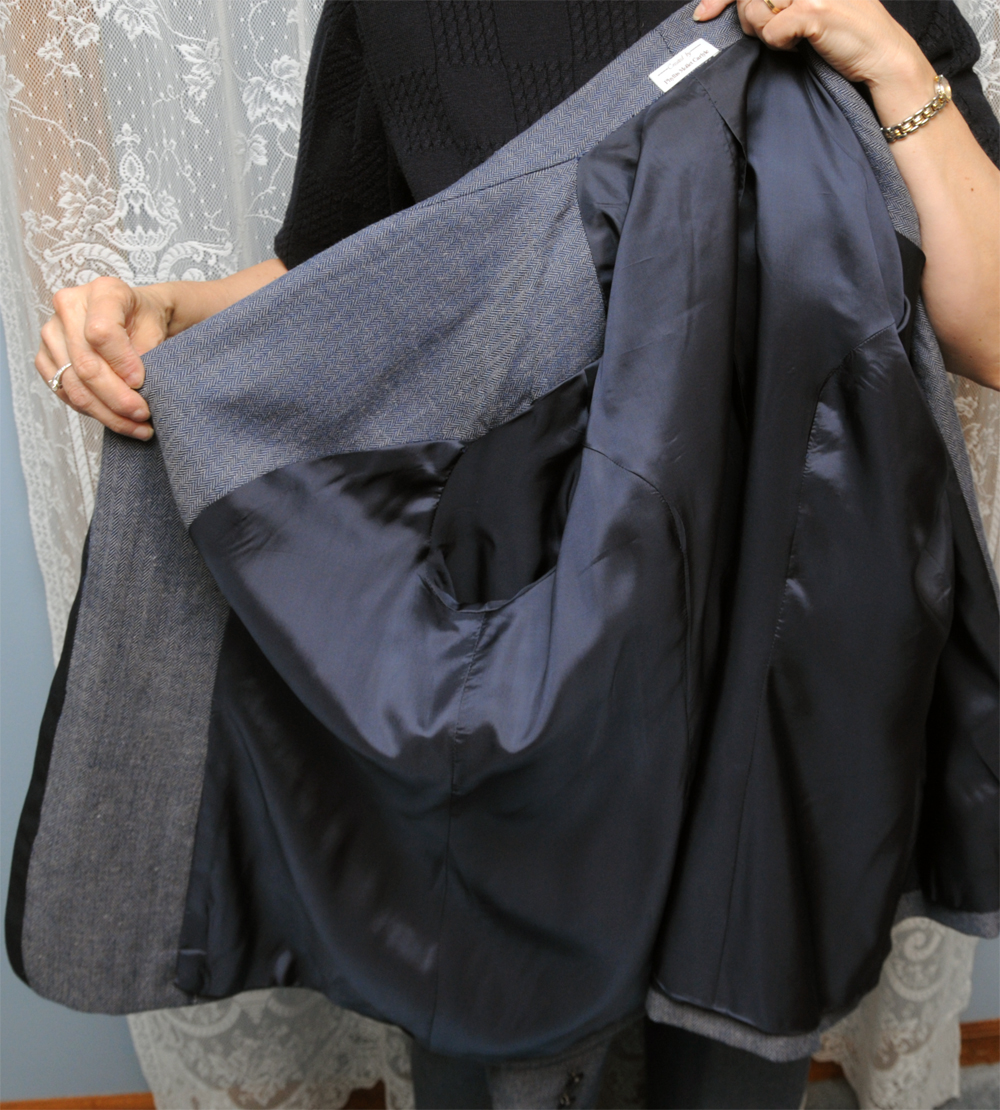
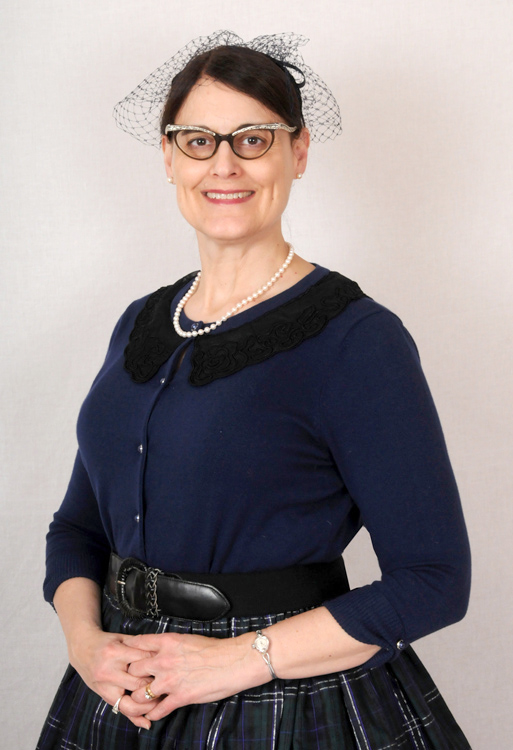
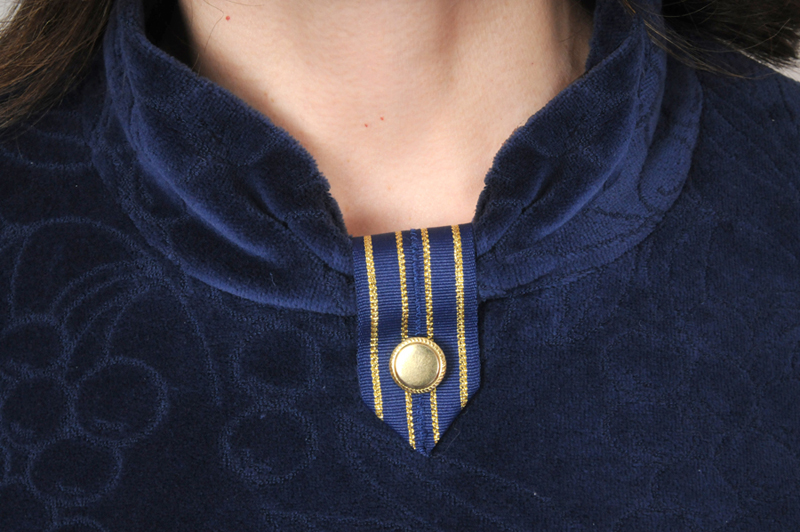
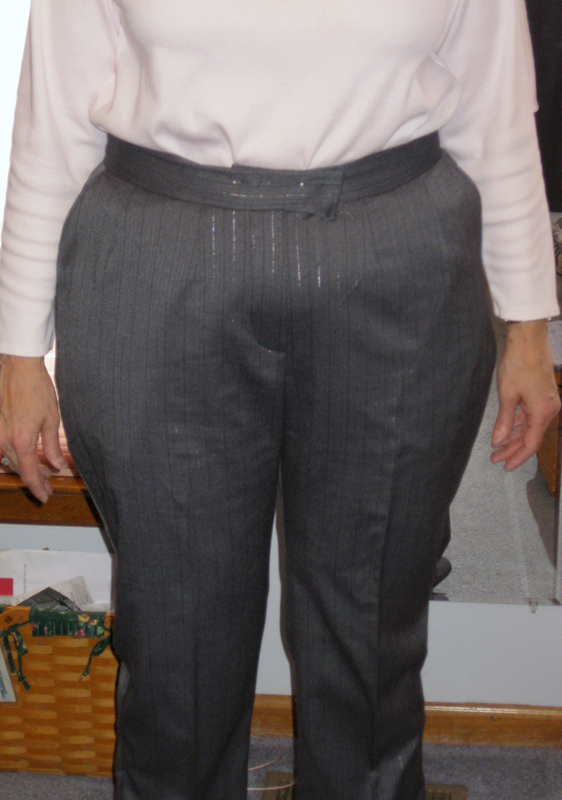
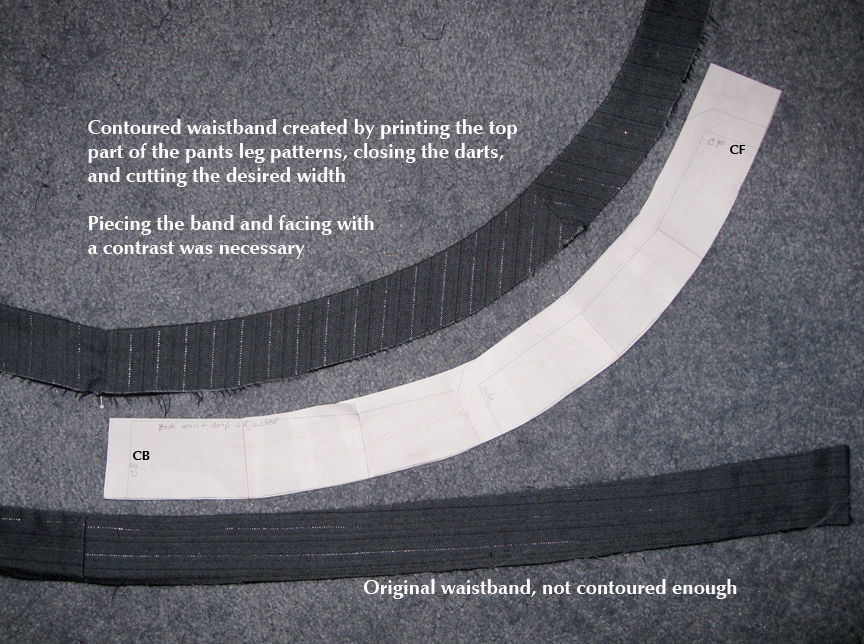
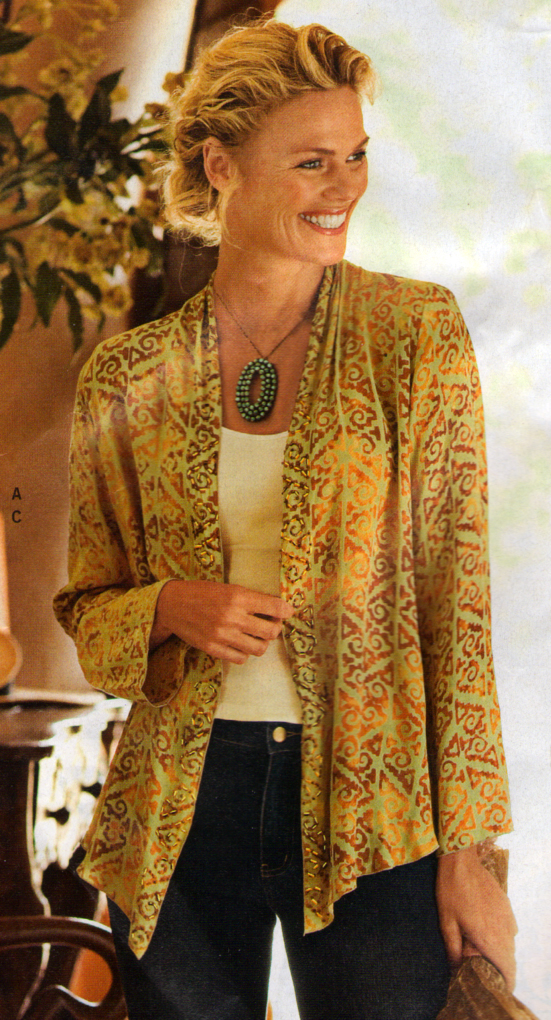
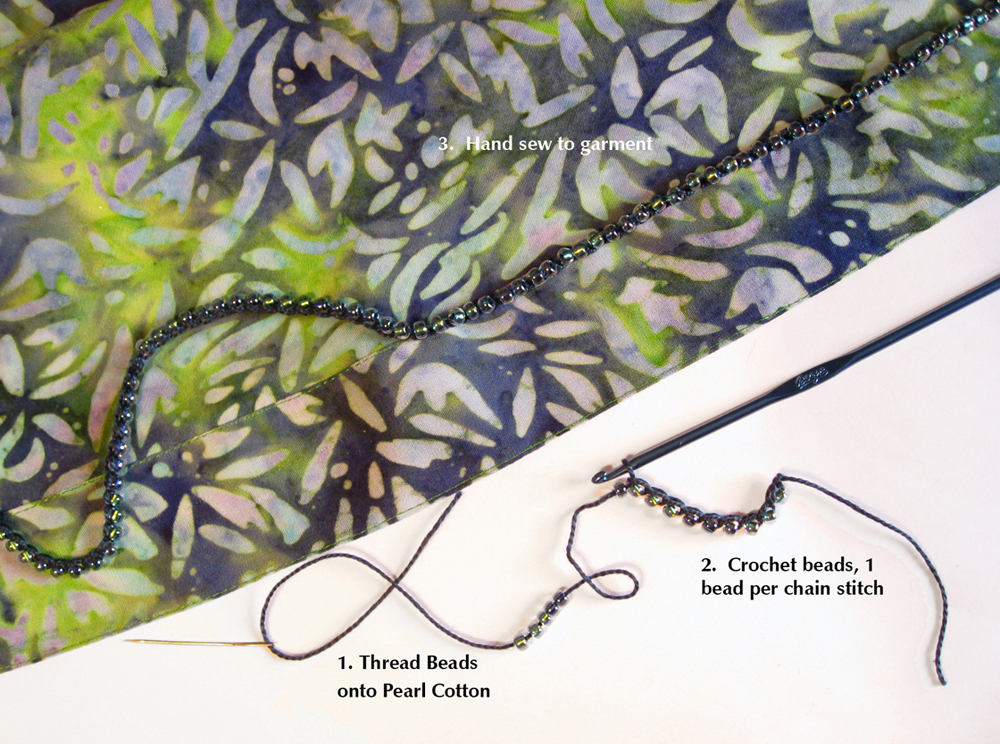
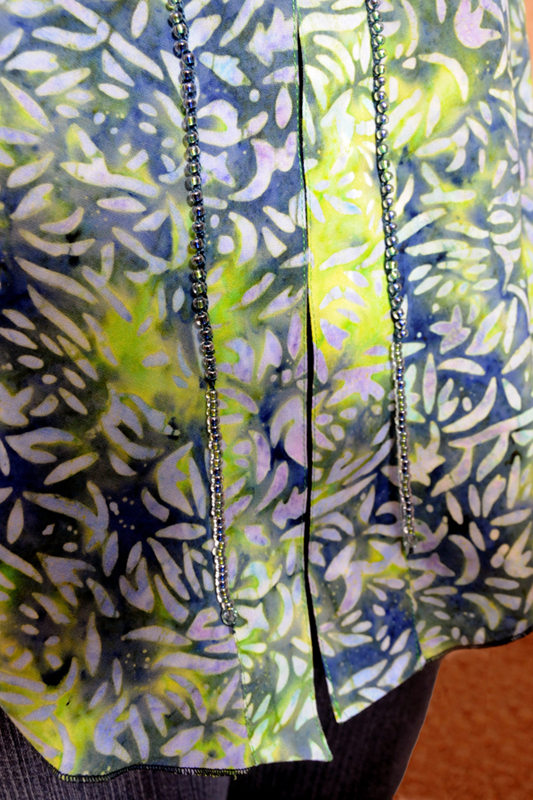
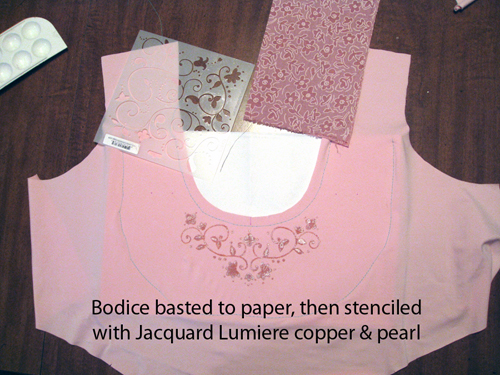
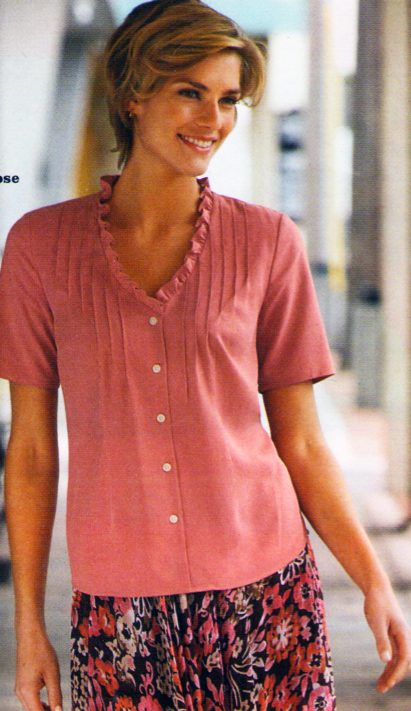
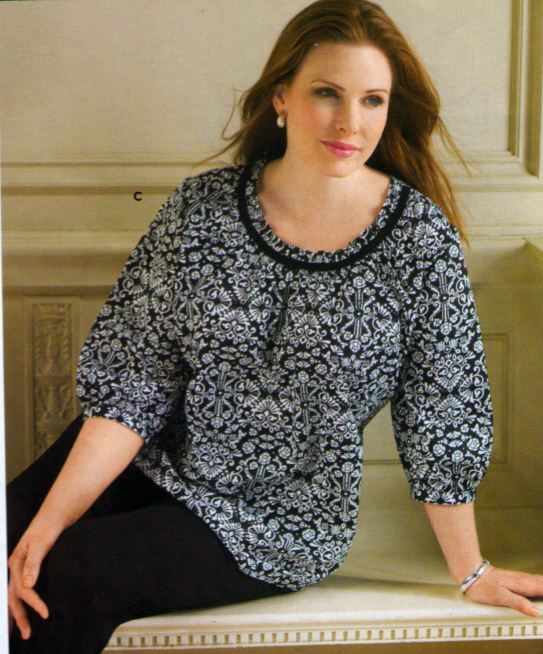
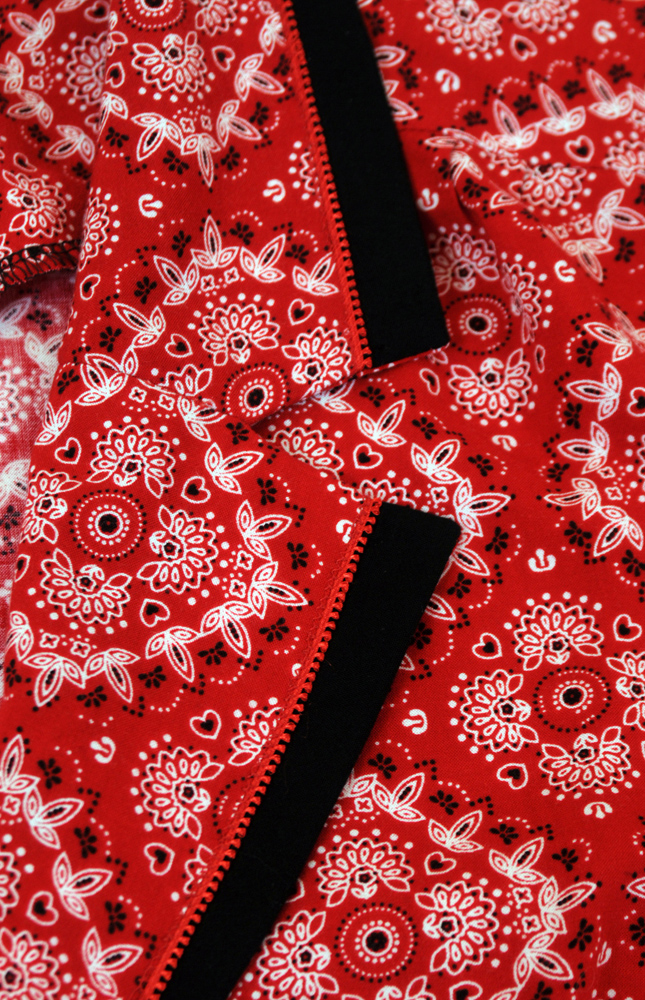
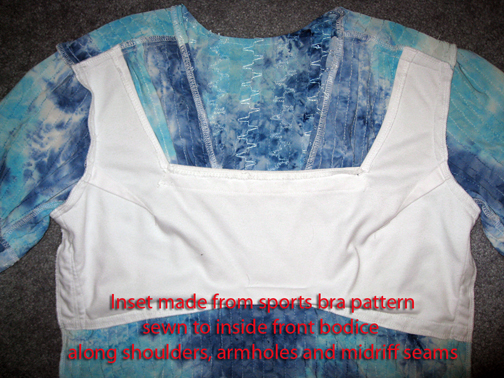
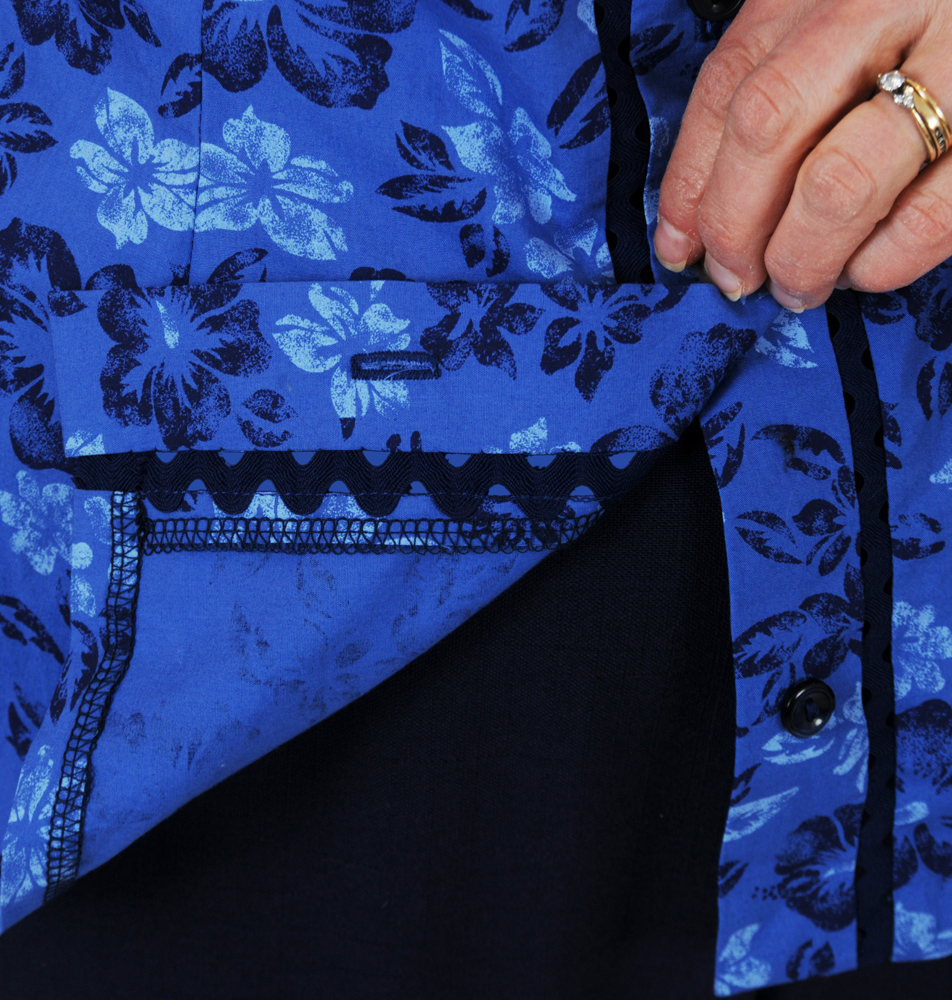
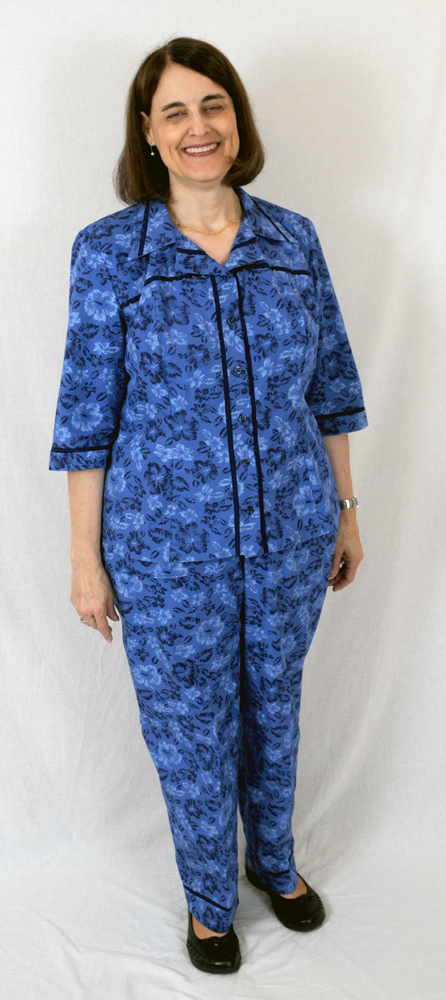
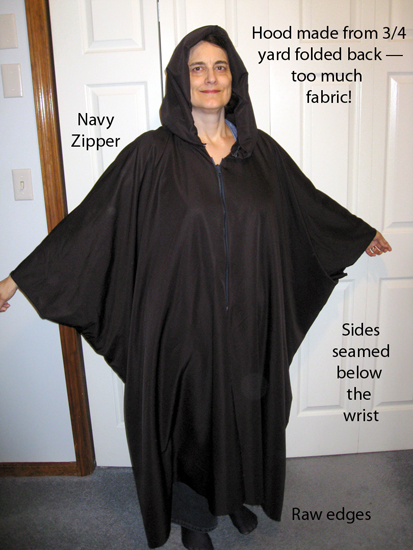
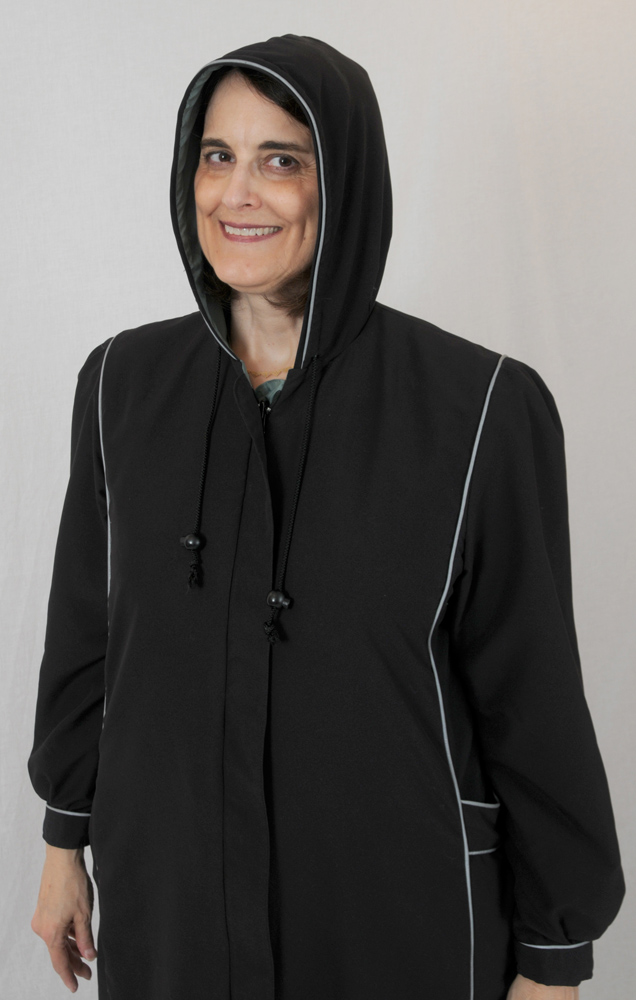
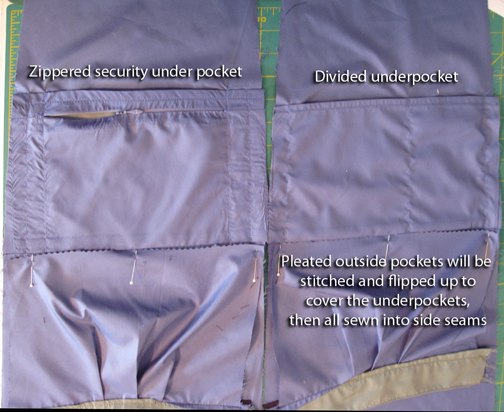
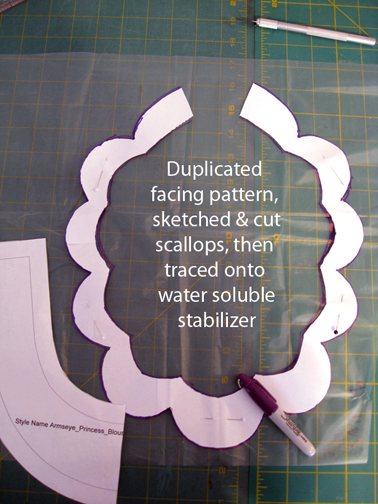
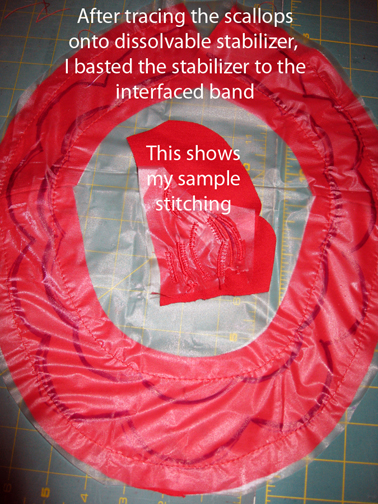
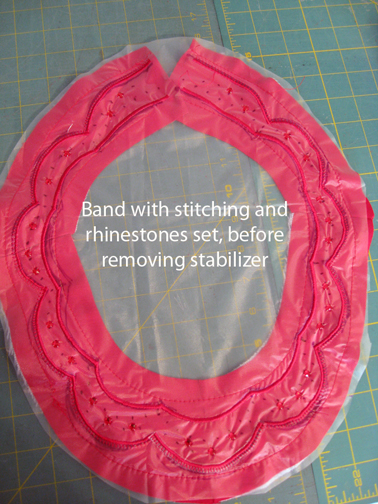
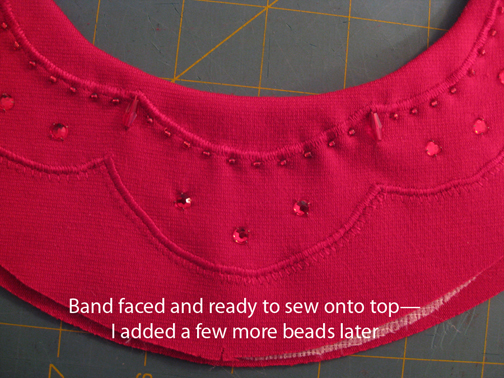
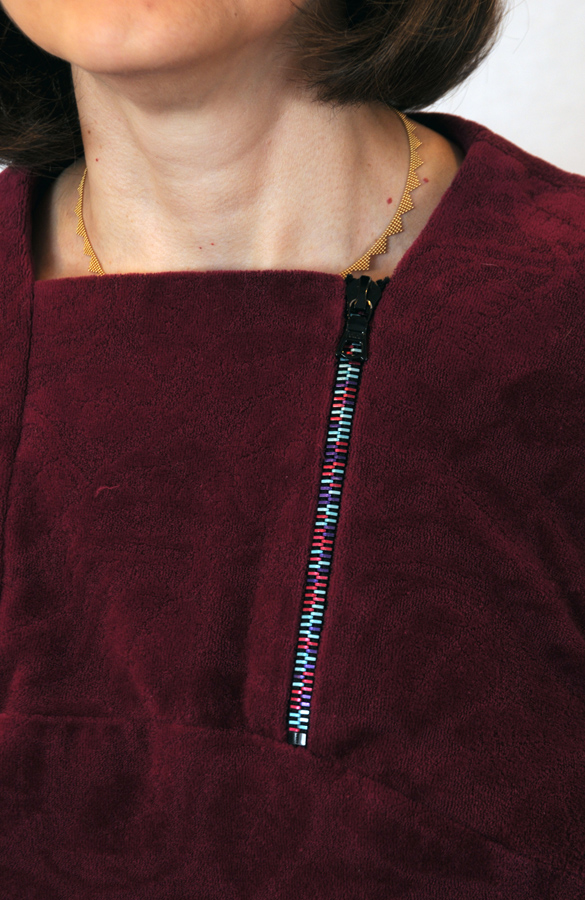
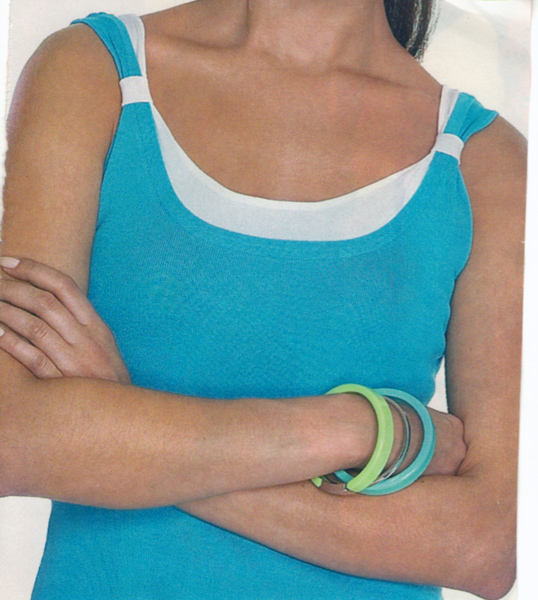
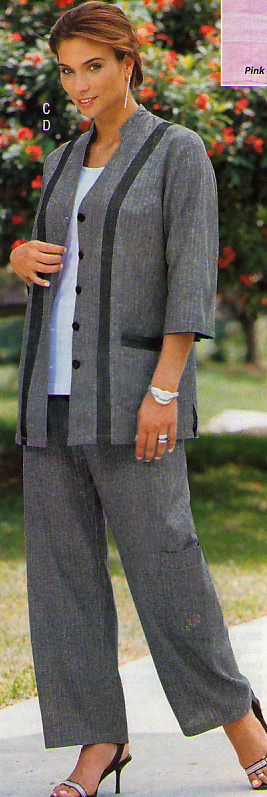
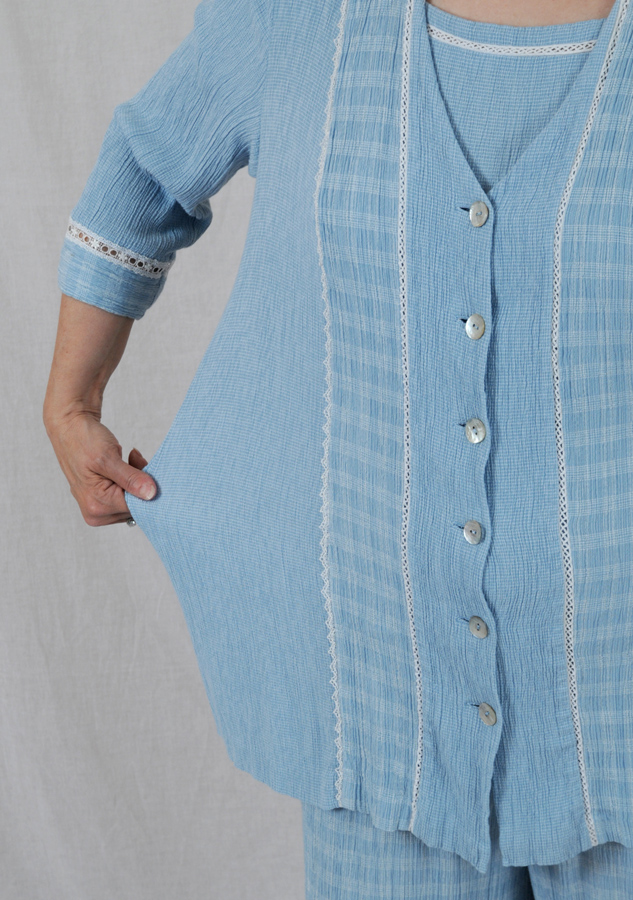
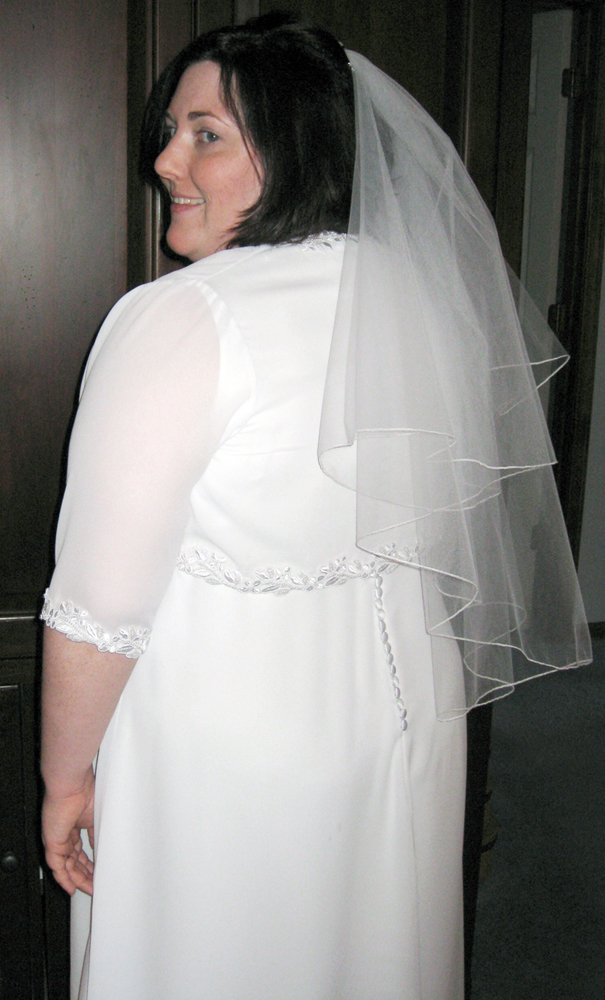
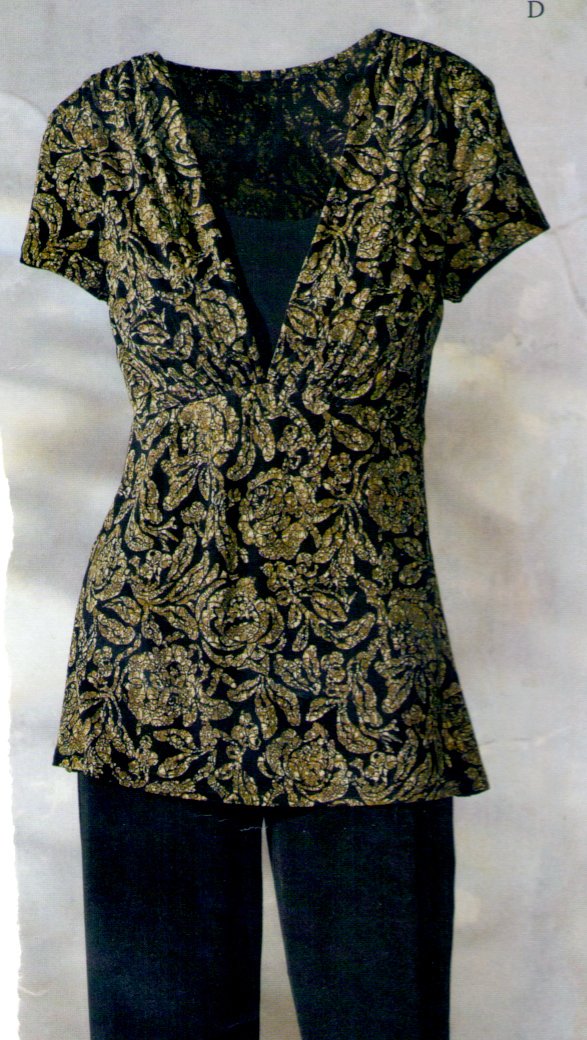
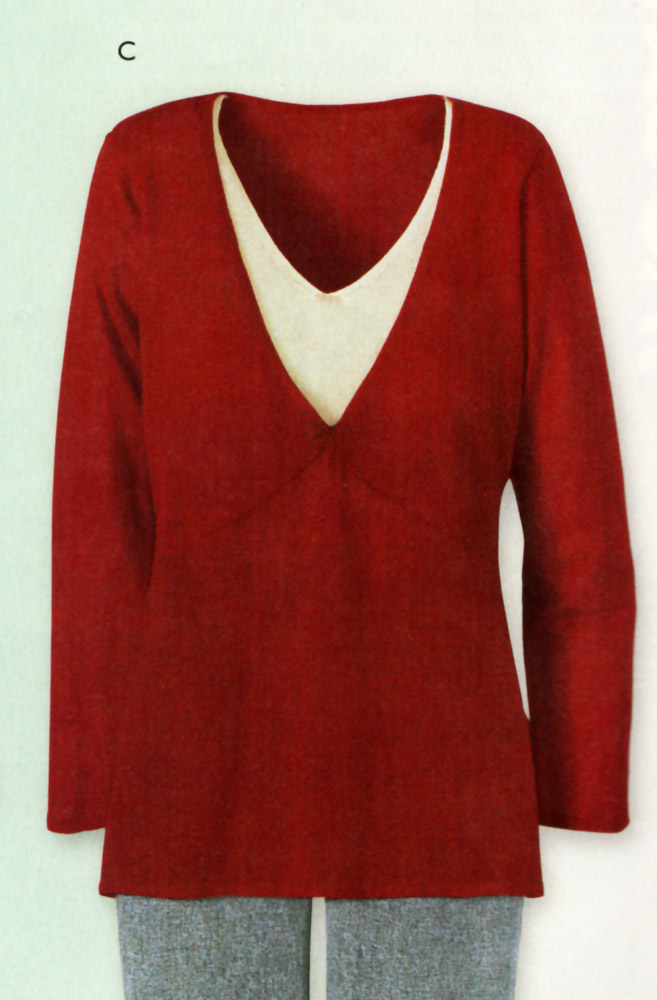
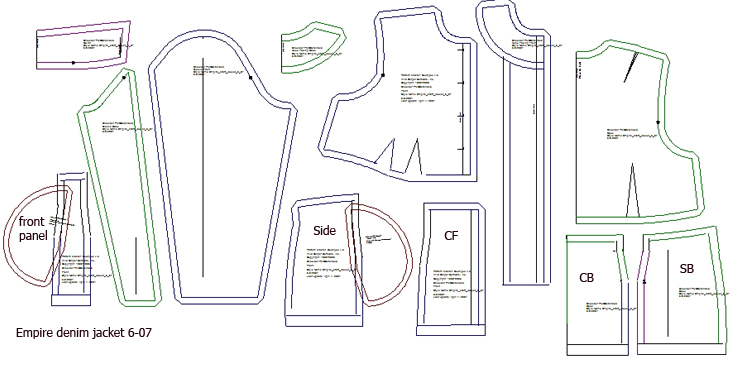
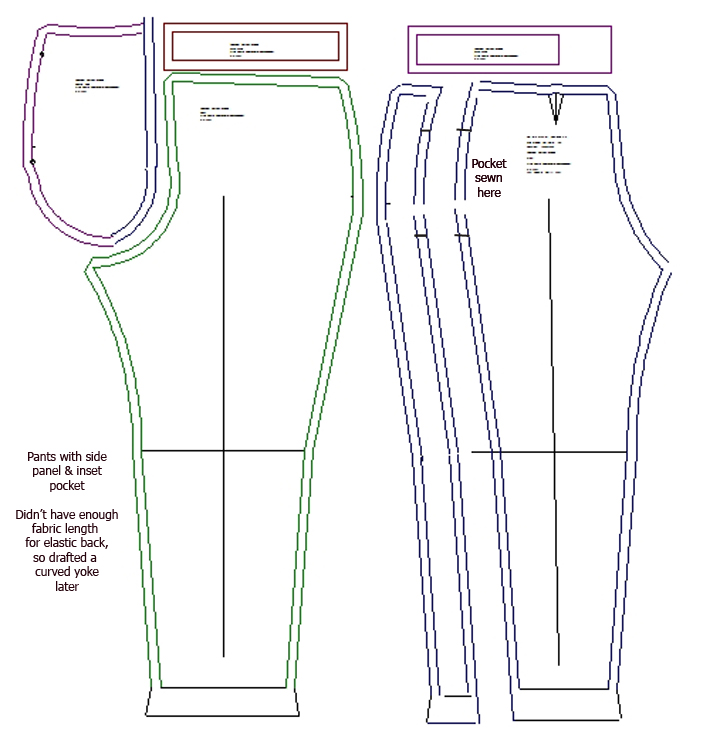
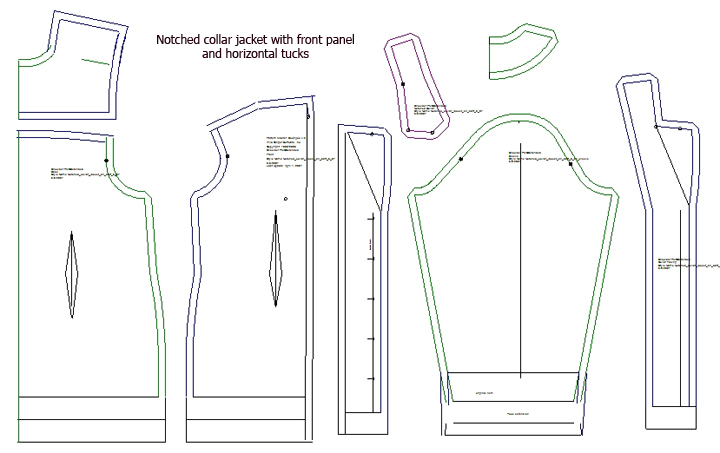
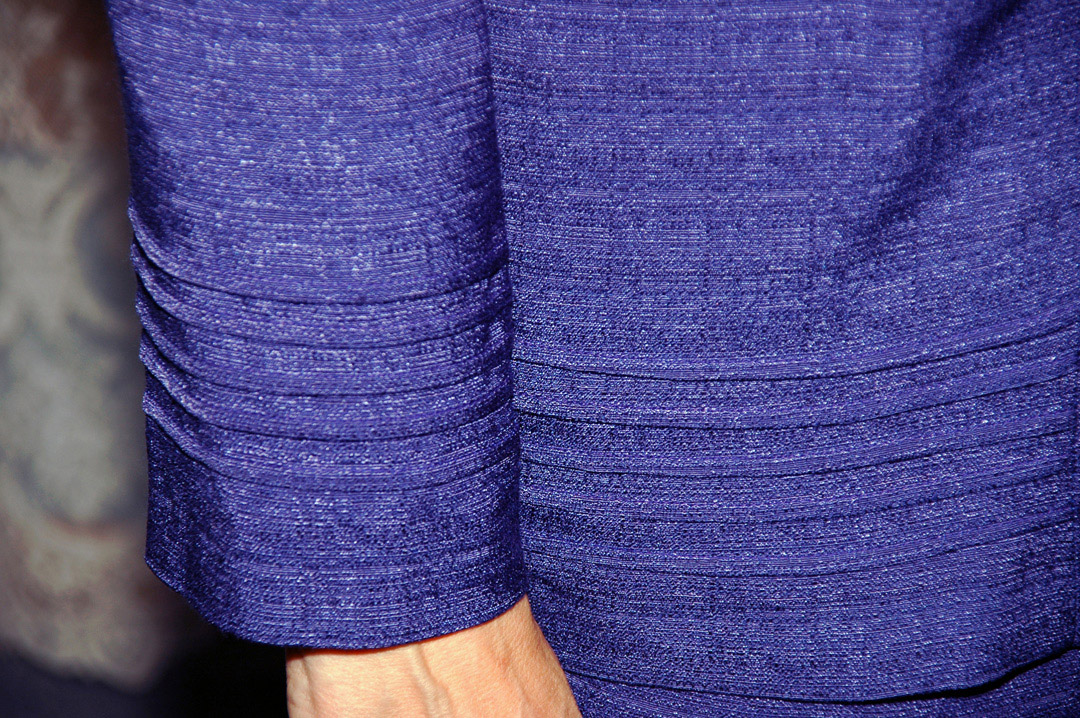
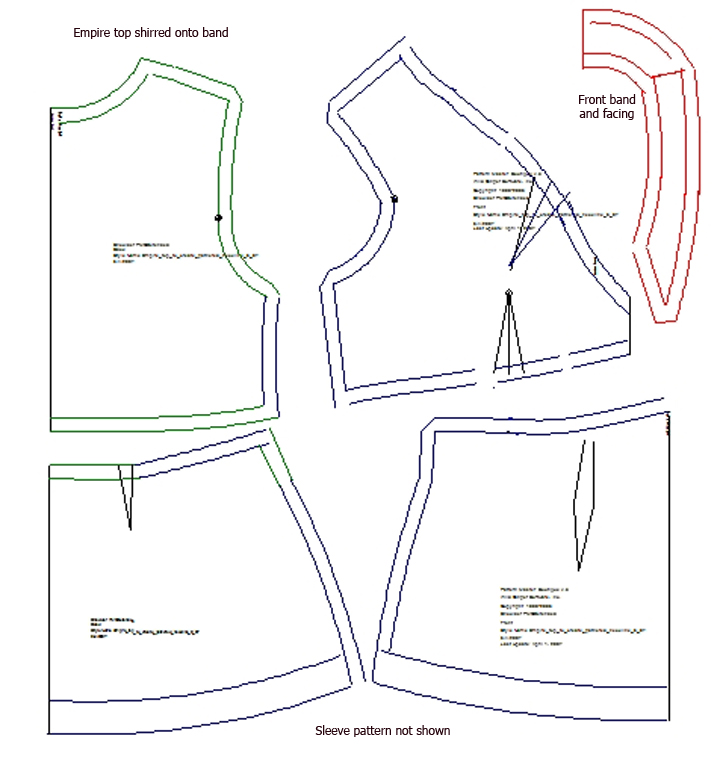
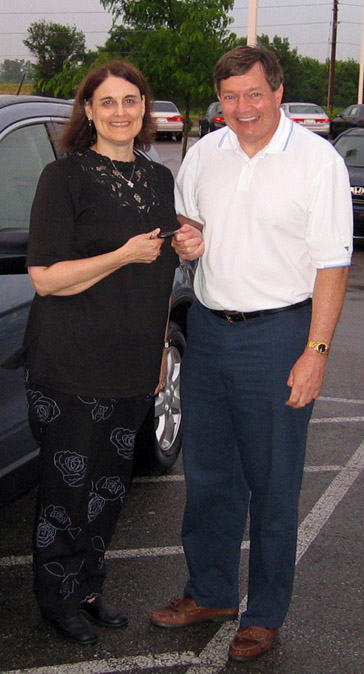
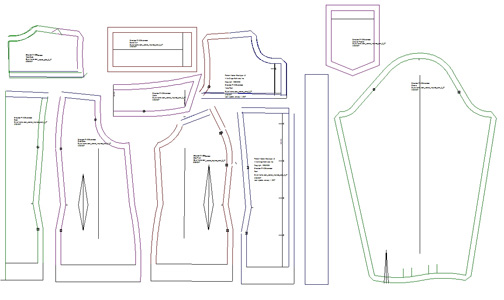
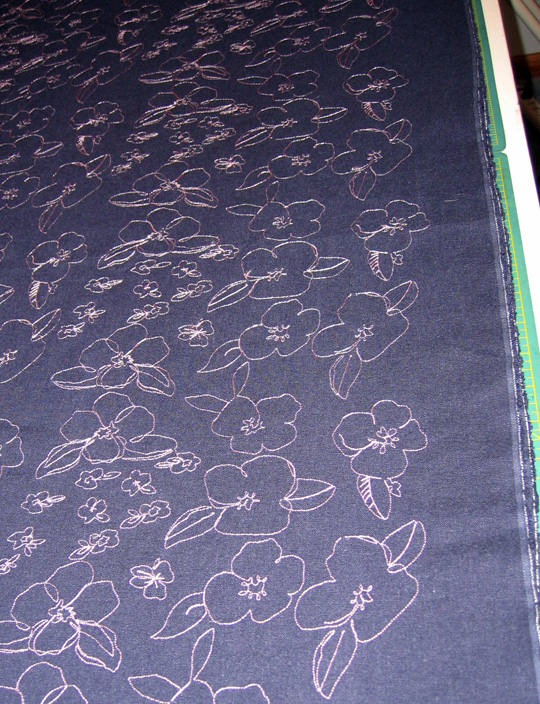
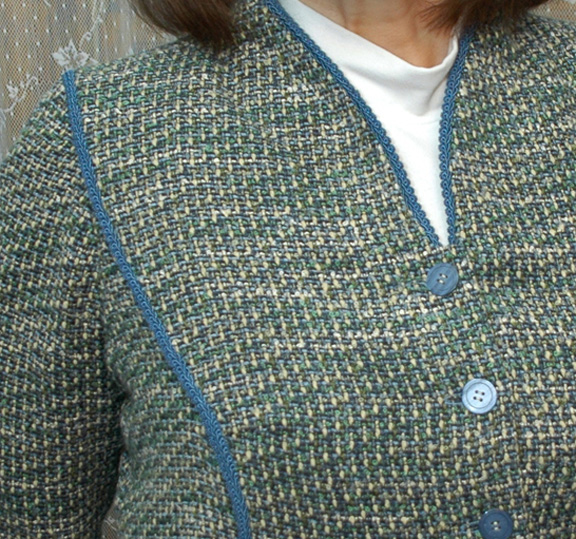
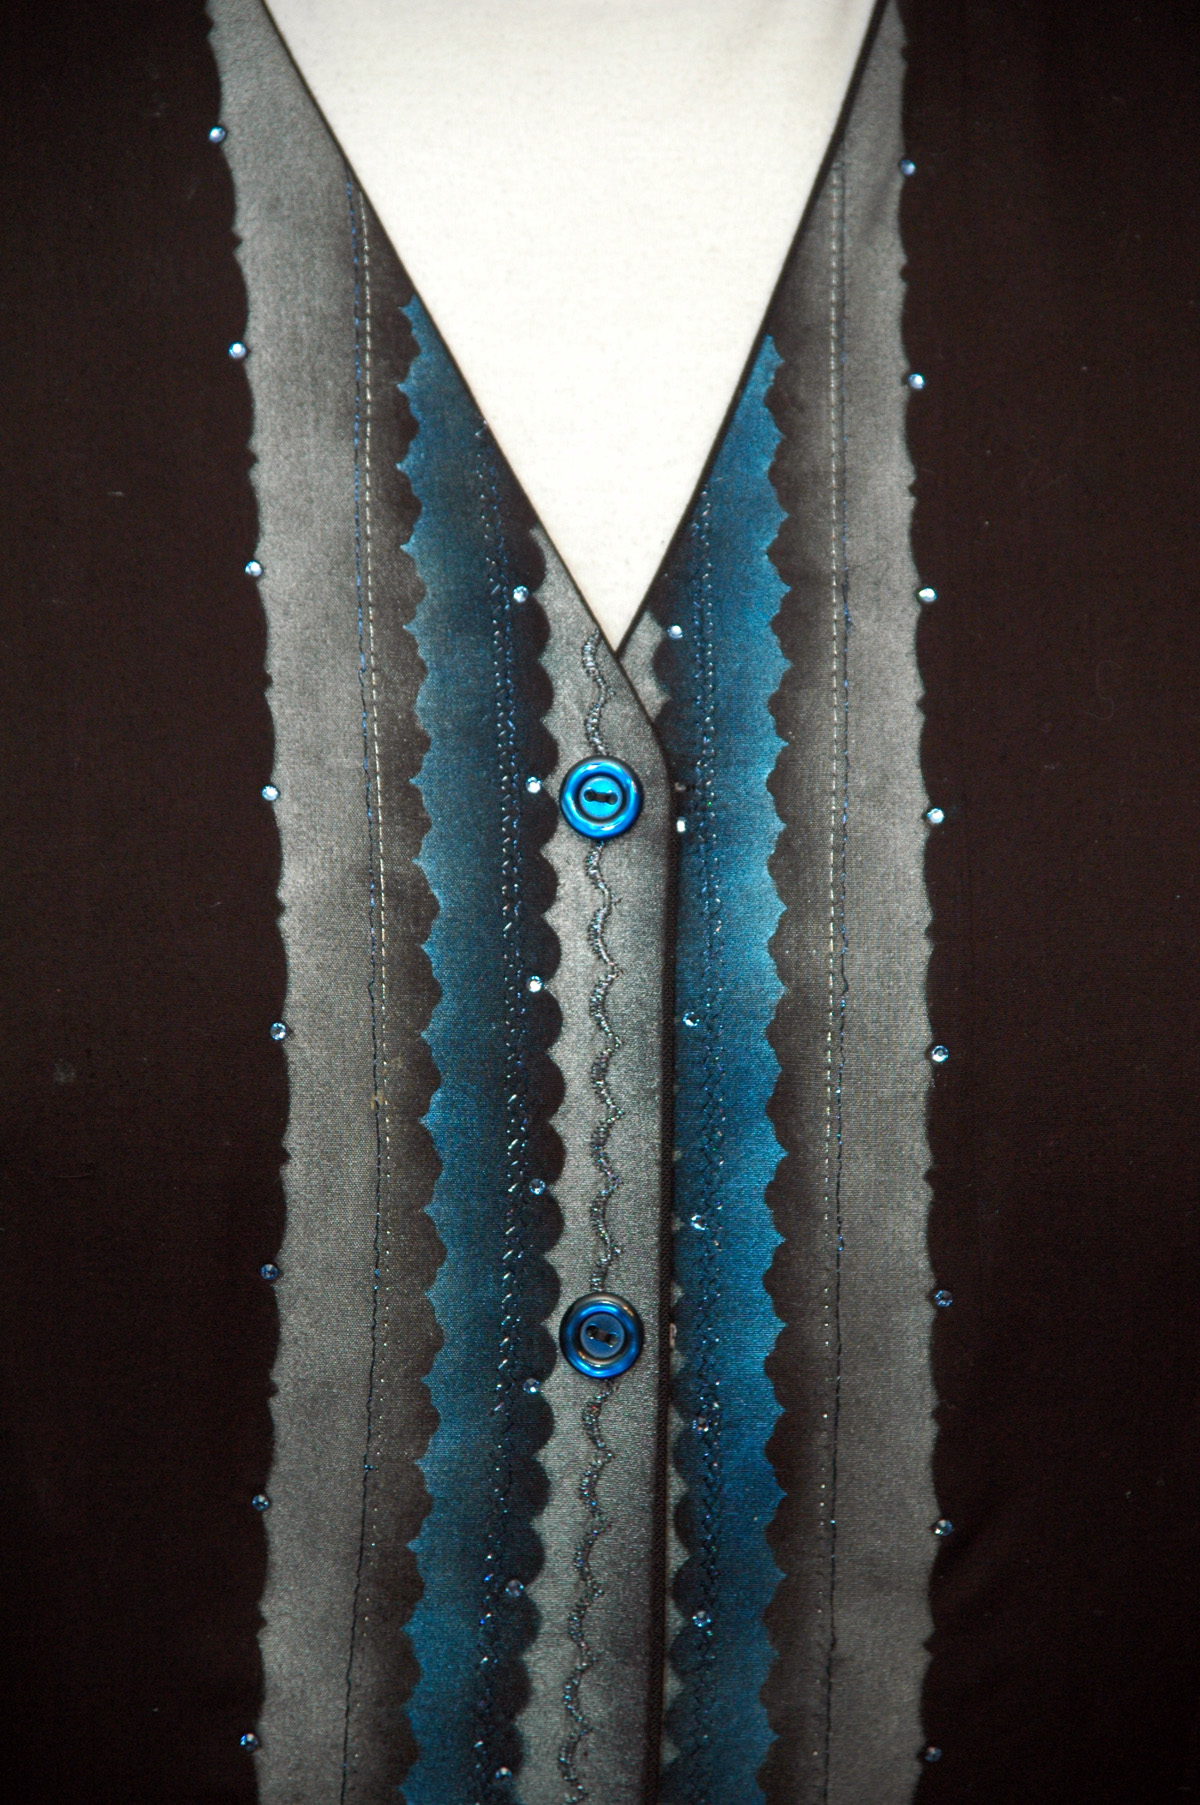
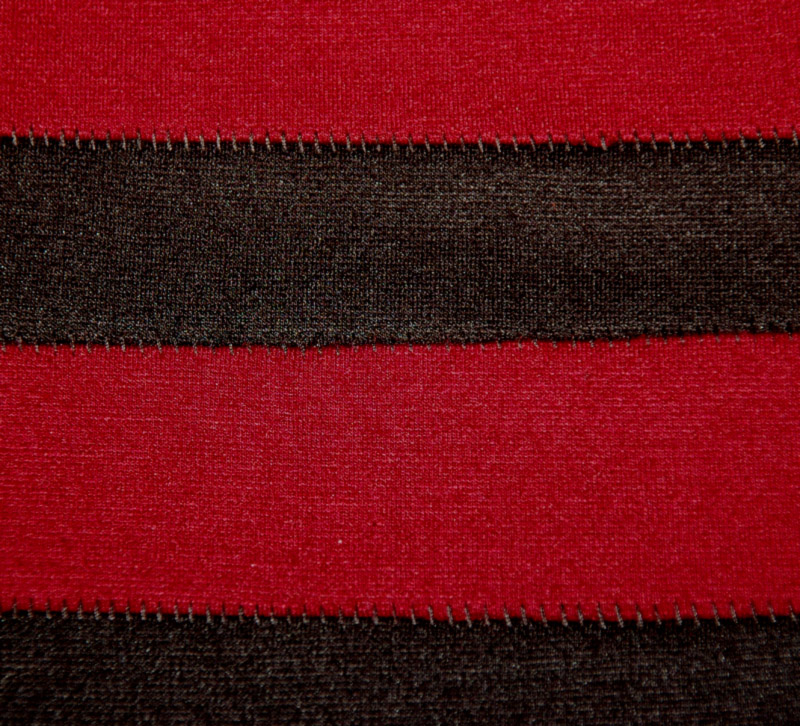
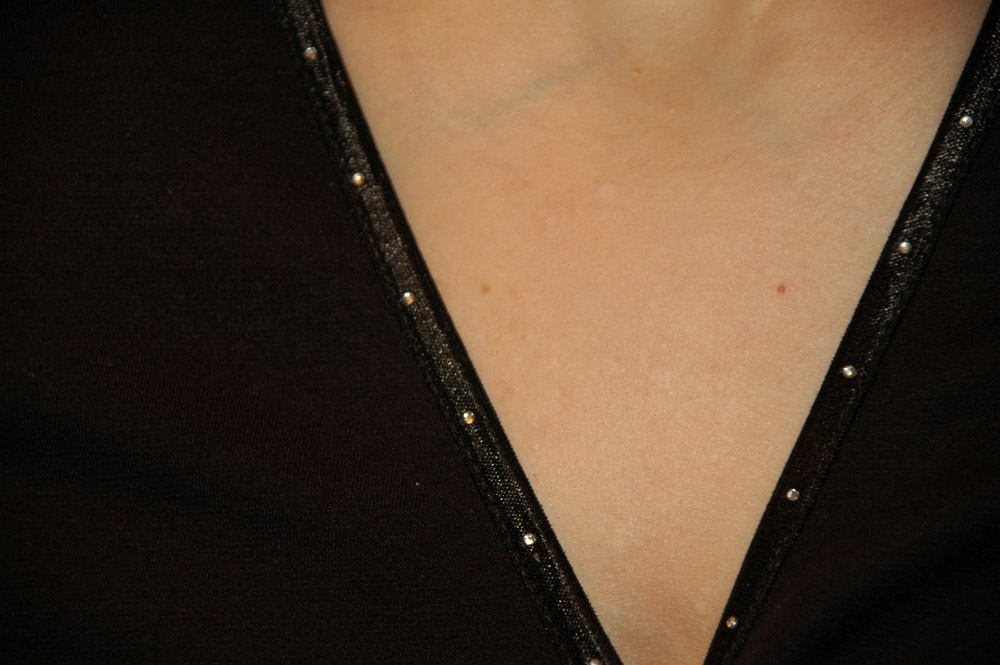
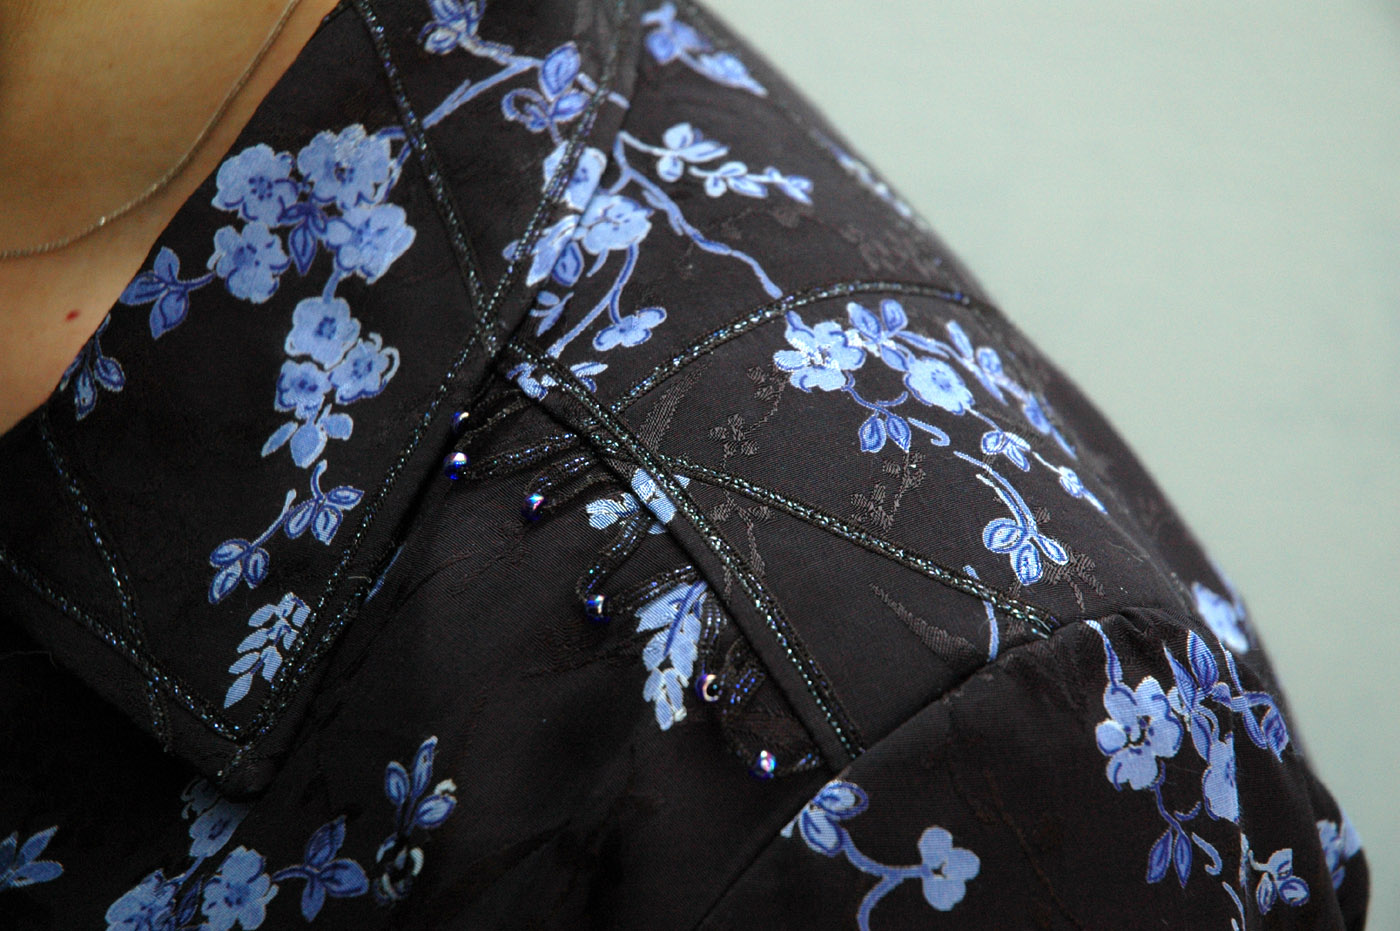
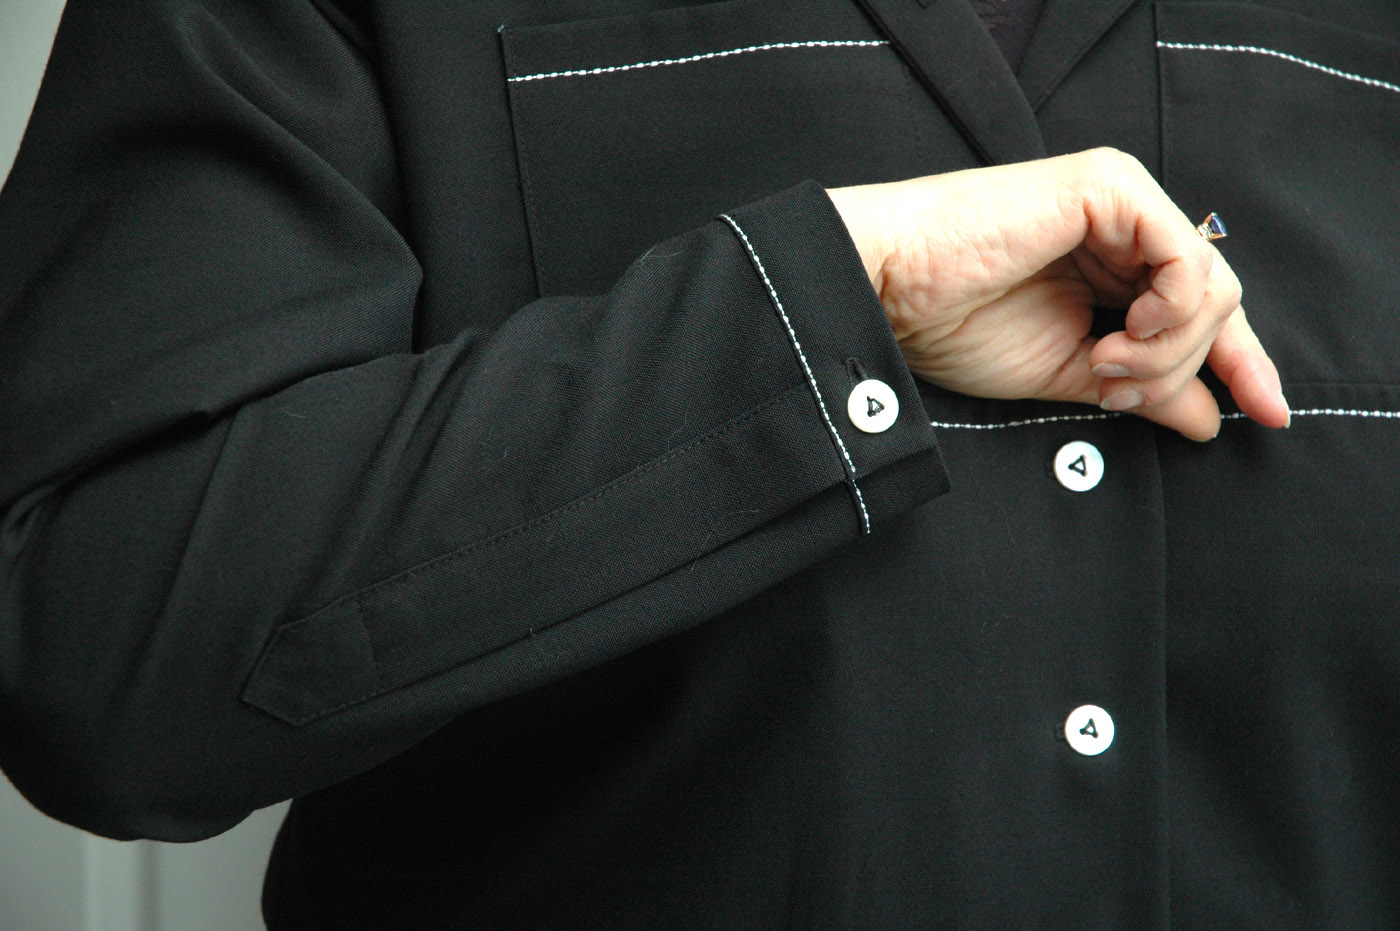
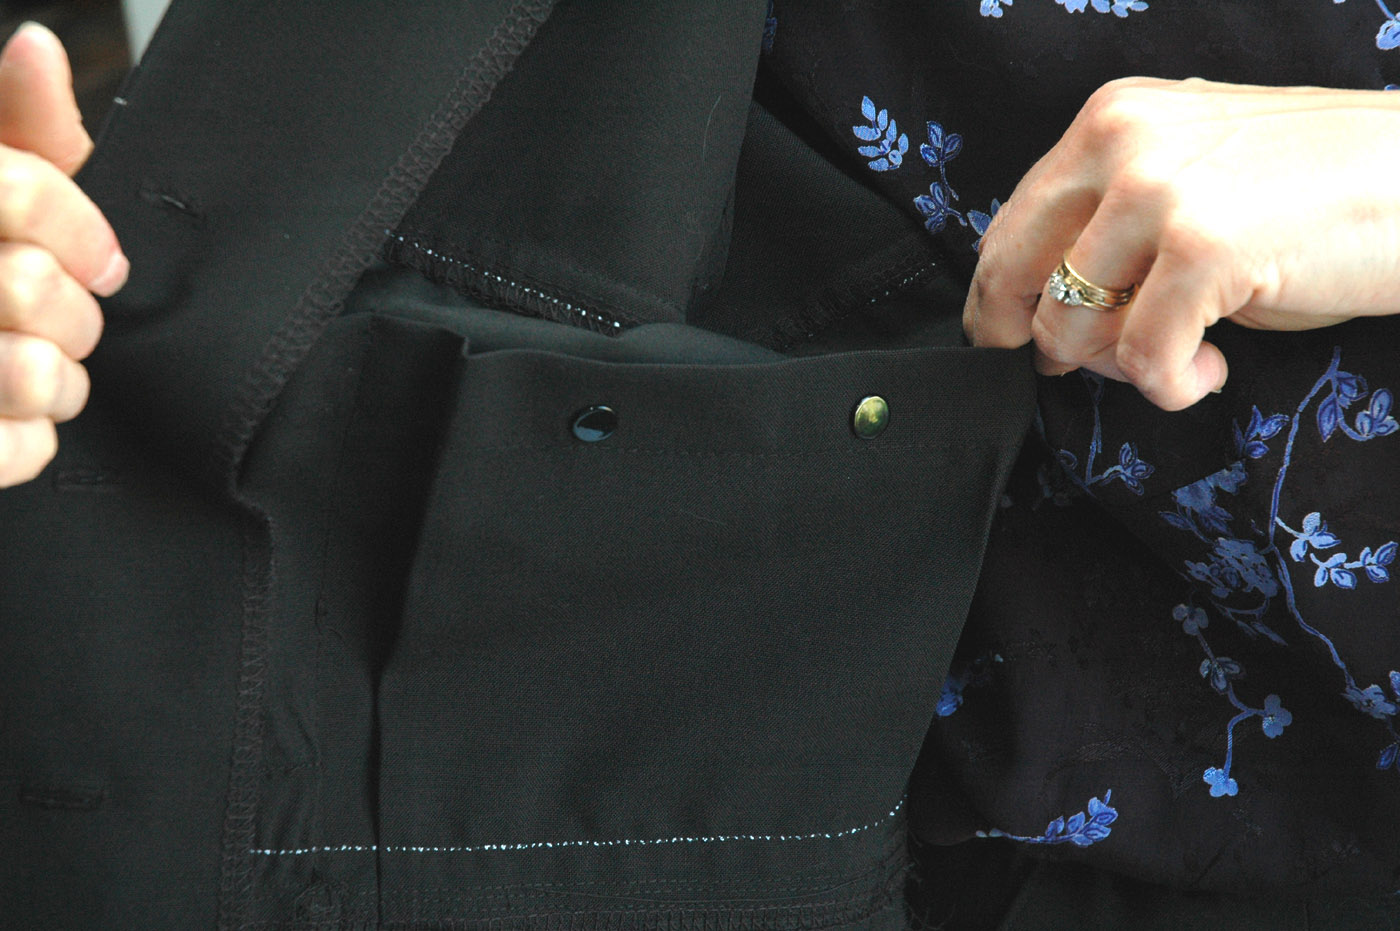
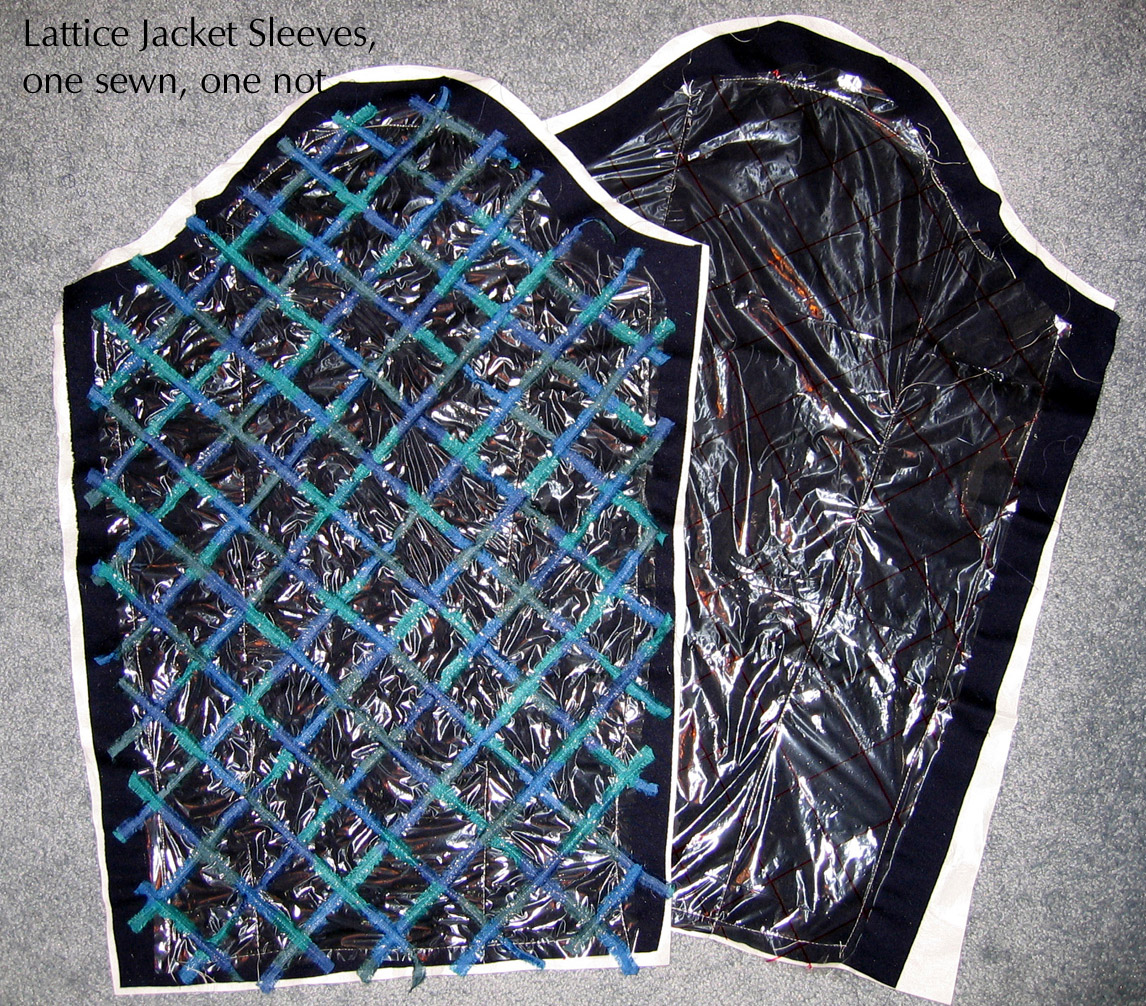
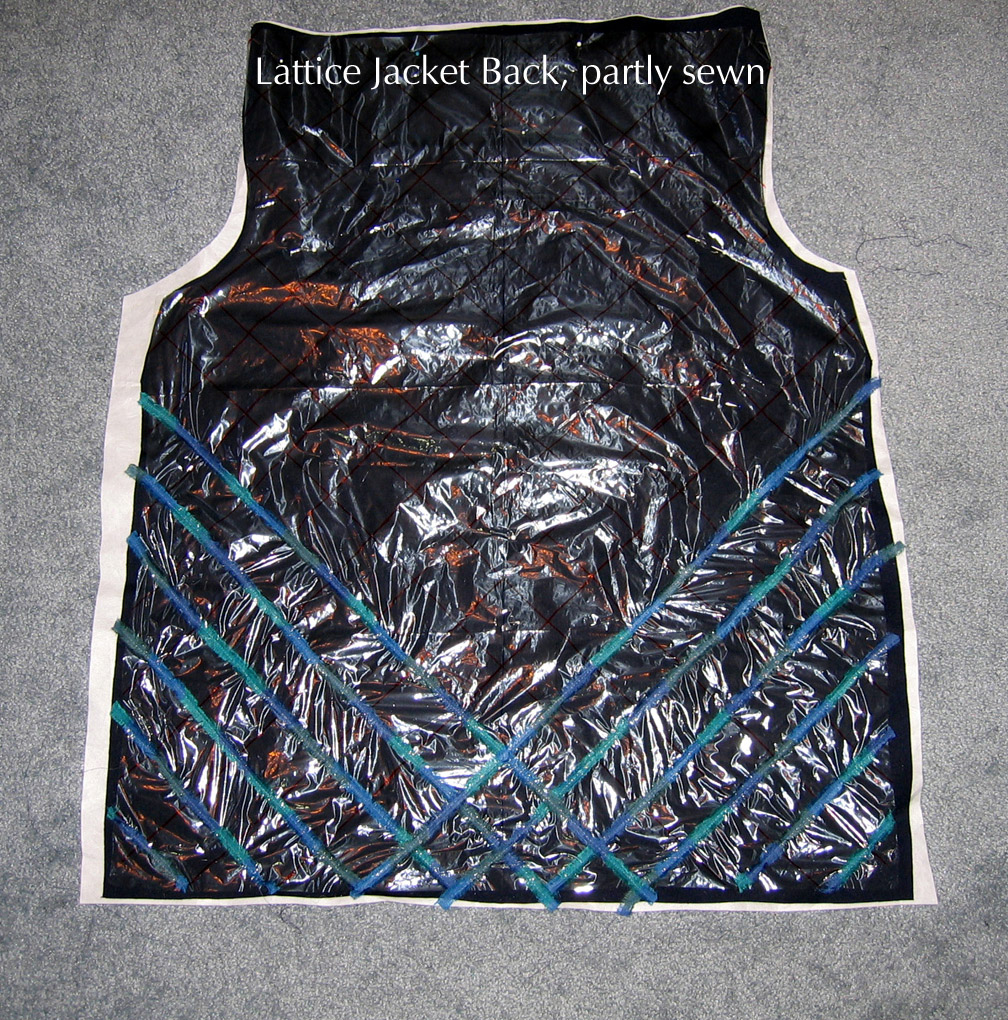
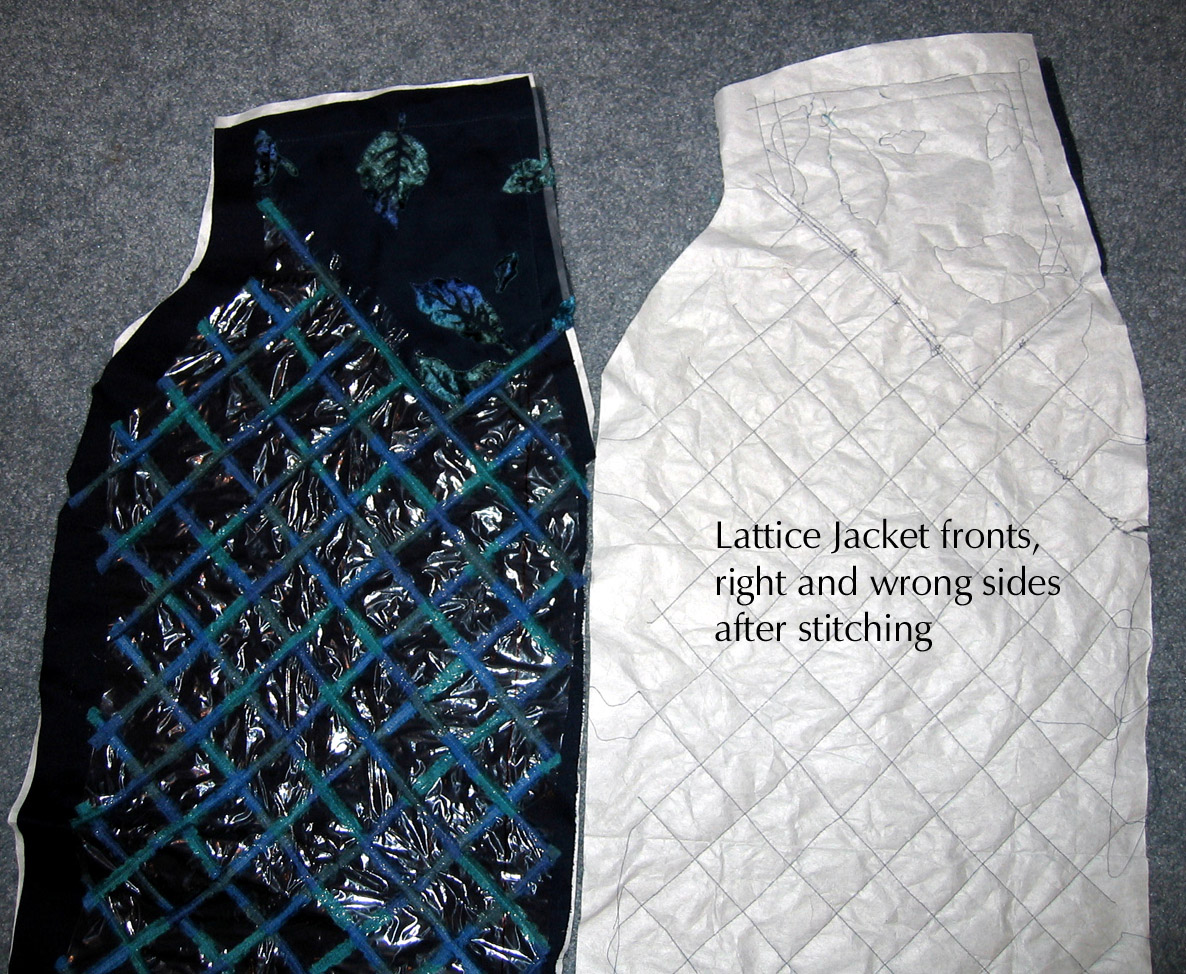
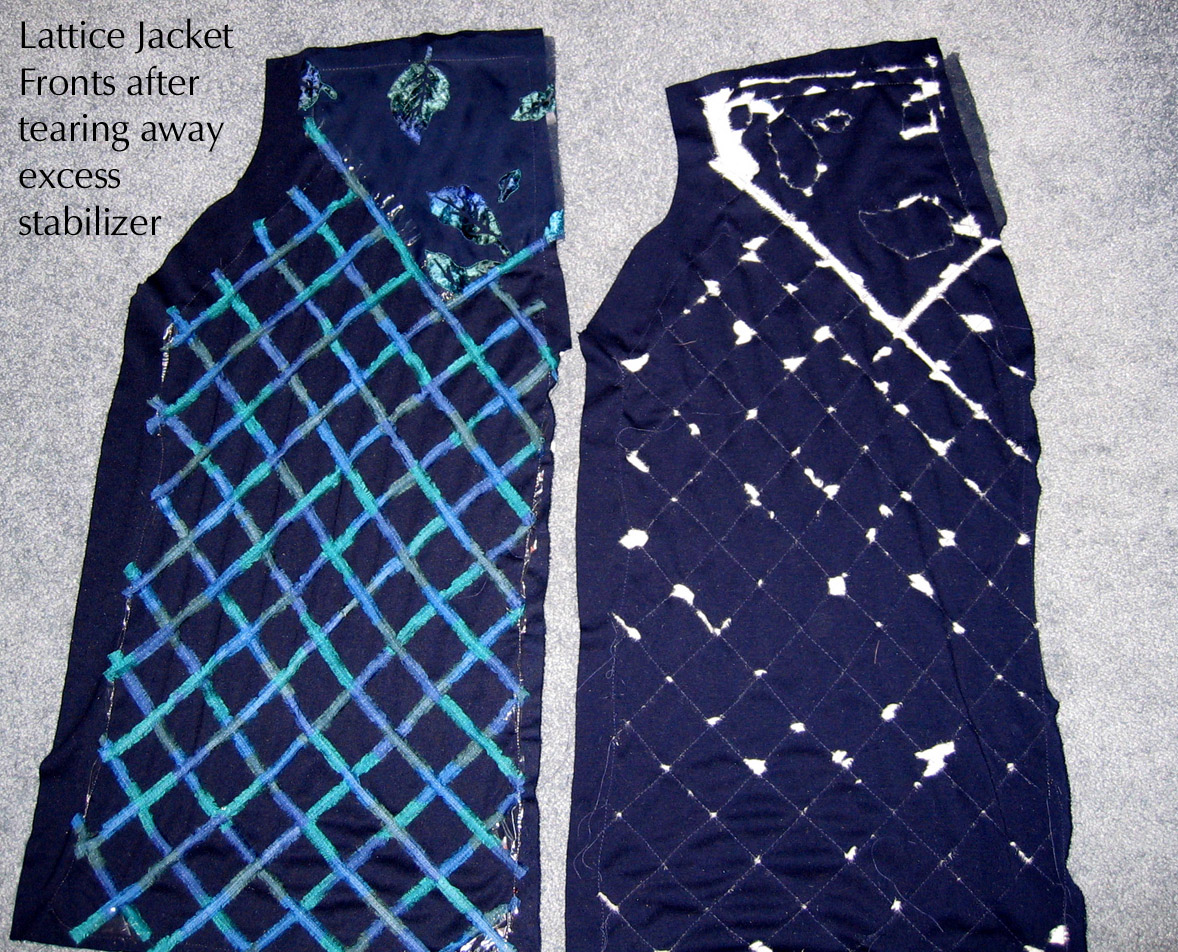
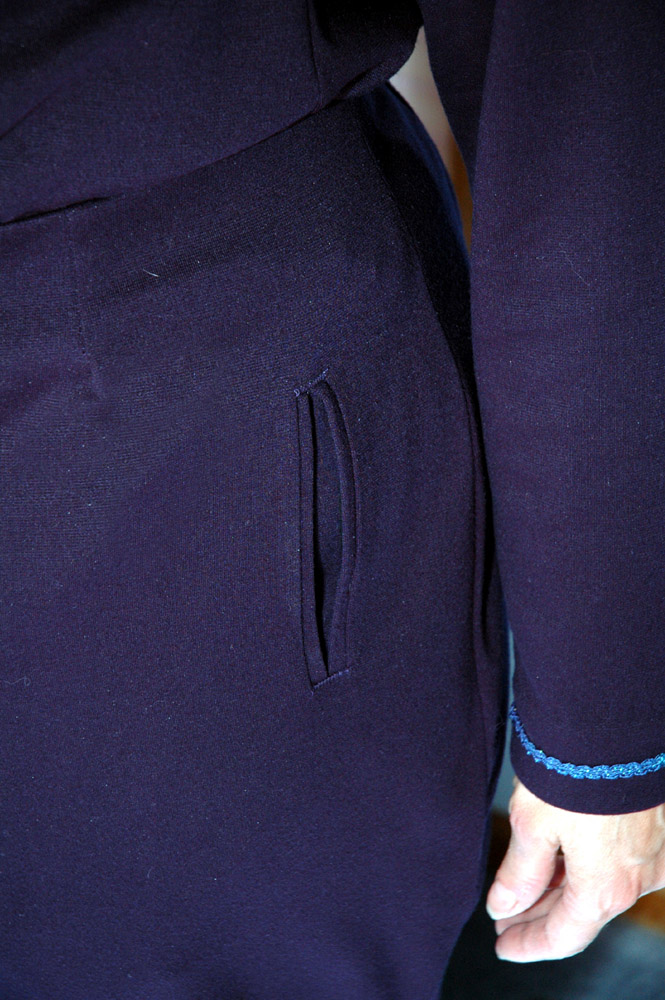
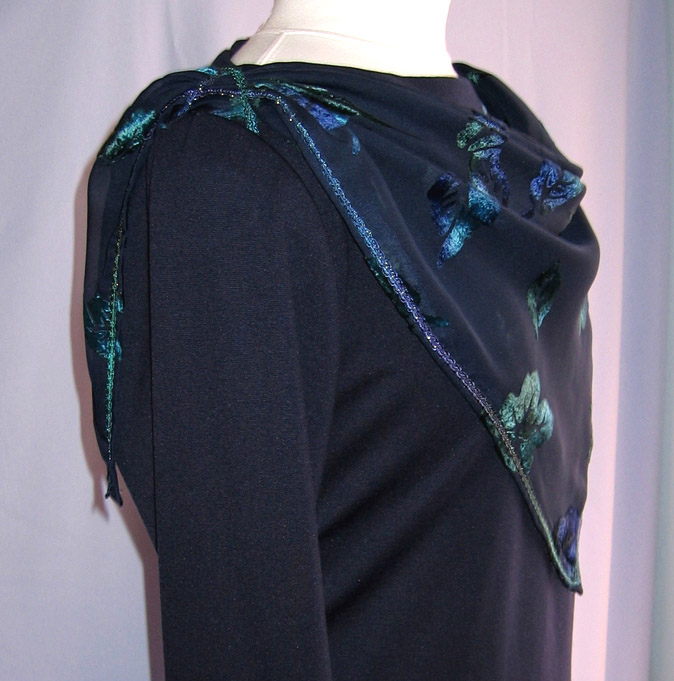