PMB Pattern for Karan Jacket after drafting and some modification
I had a feeling from experience that this jacket was too fitted to work for my shape. So I decided to copy the design details I liked and use PMB to get my fit. I started by drafting the shoulder princess jacket for the front, and the armhole princess jacket for the back. I used a 5 inch deep collarless V-neck and a 2-piece sleeve. I planned to use the original pattern for the welt pockets and collar.
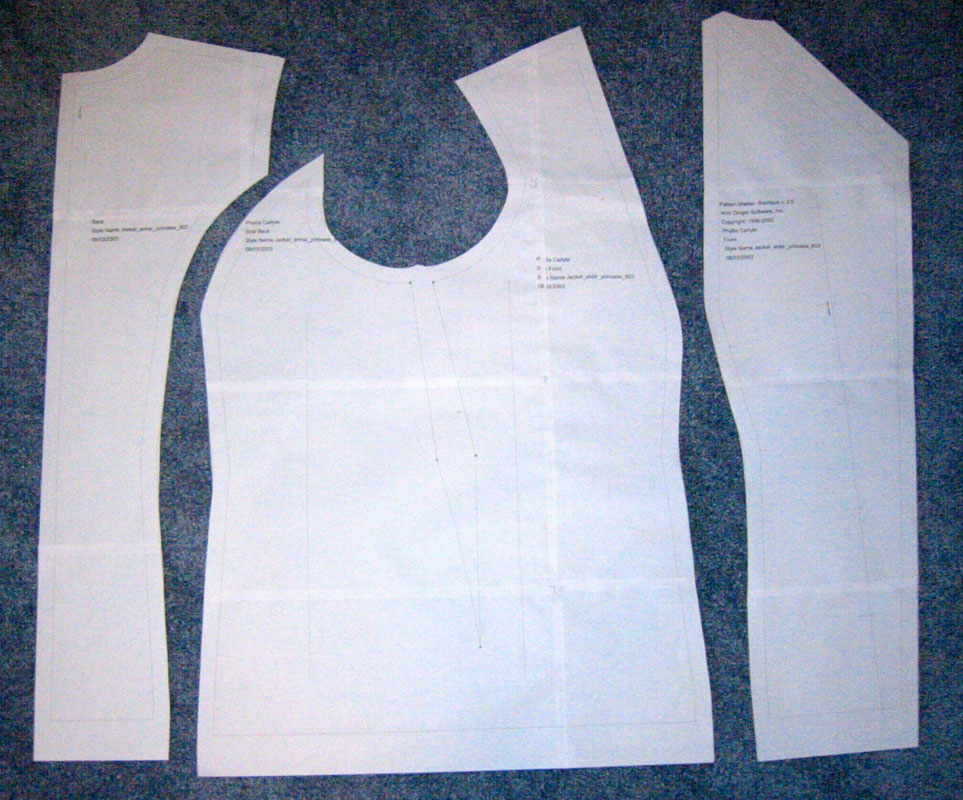
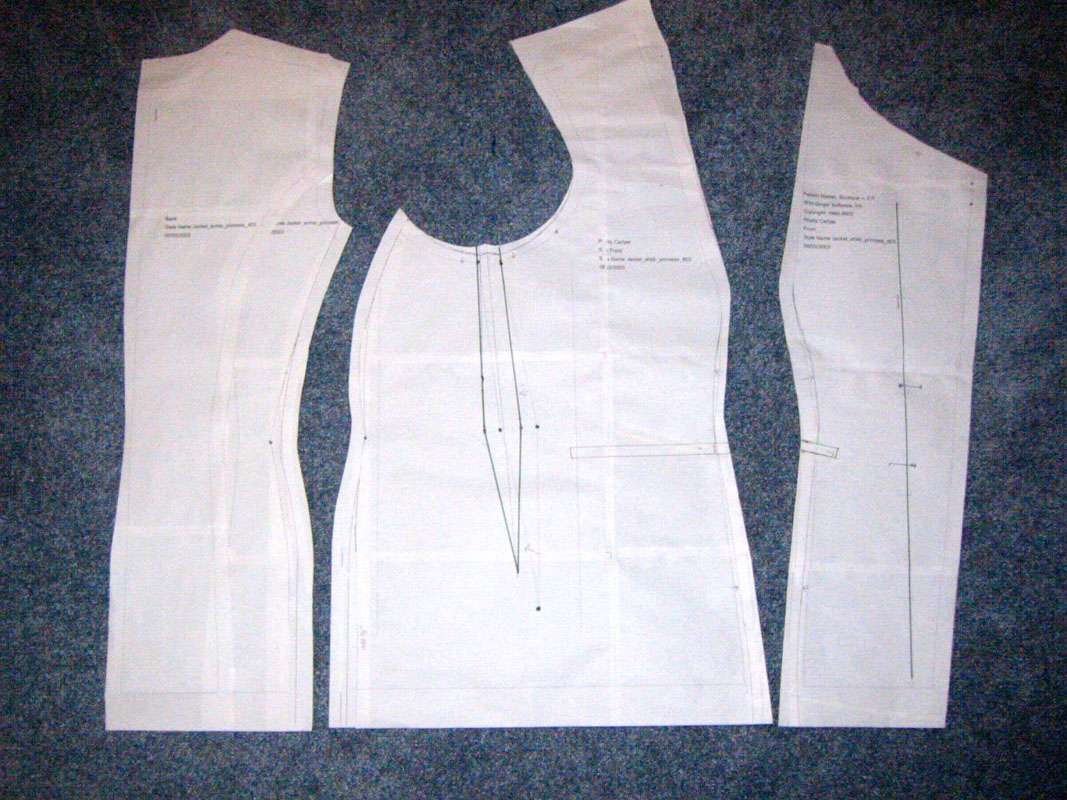
I used Pattern Editor to move the shoulder Princess seam towards the neck, and changed the lapel shape to match the pattern. Then I merged the side front to the side back. (In retrospect, I would leave the side seam in.) After I got overwhelmed deciding what to do next, I printed the pattern. This photo is the PMB pattern before further modifications.
Karan torso lined up on PMB pattern
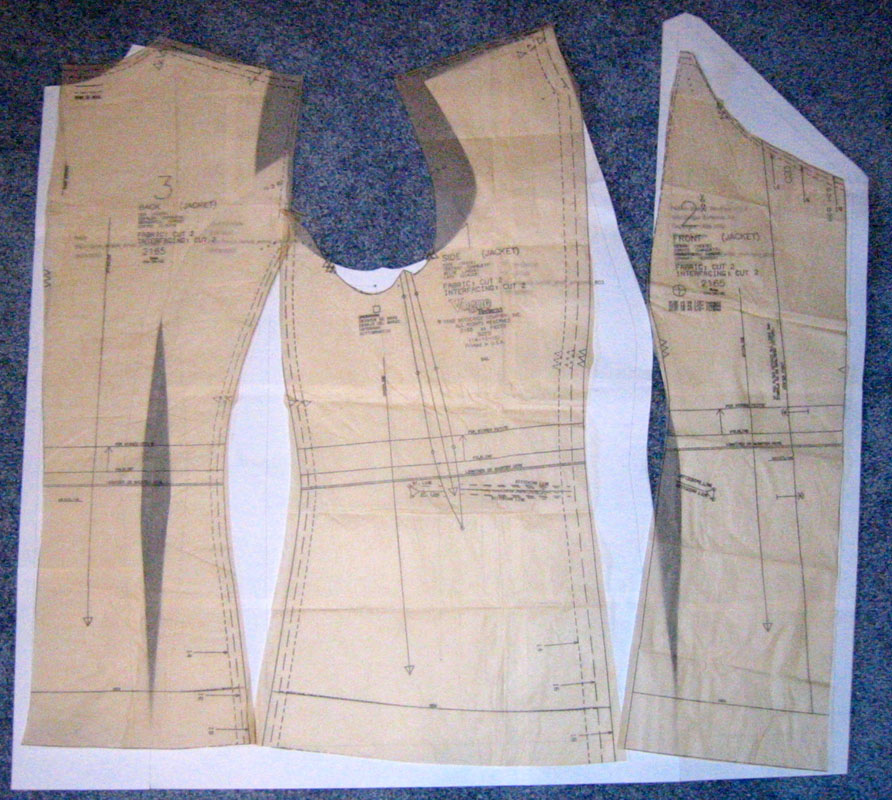
I laid the original pattern over the PMB pattern to see what I needed to do next. When you copy style lines to another pattern, you need to line up the center fronts and center backs and the waistline or other horizontal "landmark" to do a comparison. I could see that I needed more width, a different body shape, and a change in the armhole area.
Karan sleeve lined up on PMB pattern
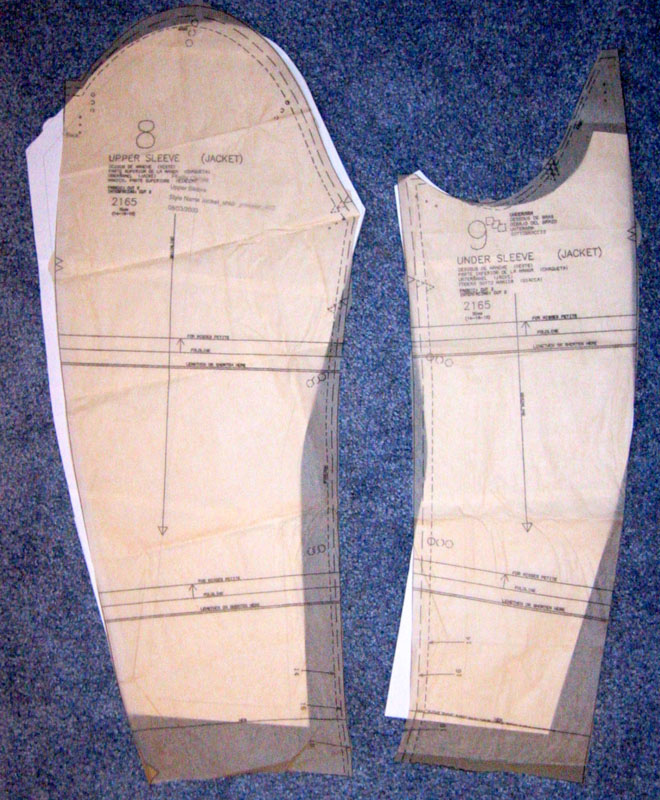
The sleeves also presented a challenge. There was more width in the upper arm and less width in the lower arm on my PMB pattern compared to the Karan. The armholes and armseye did not match very well, either. I decided to use the Karan sleeve shape, but with additional width added.
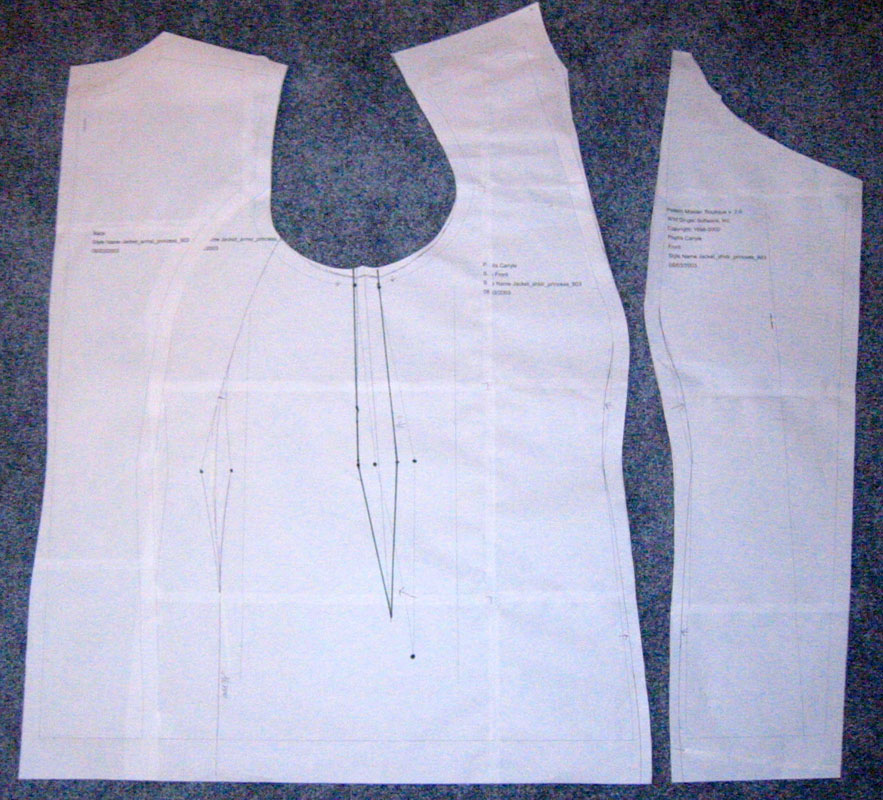
I also added width and length to the jacket body, but kept the armhole and neckline of the Karan.
Moving side back seam
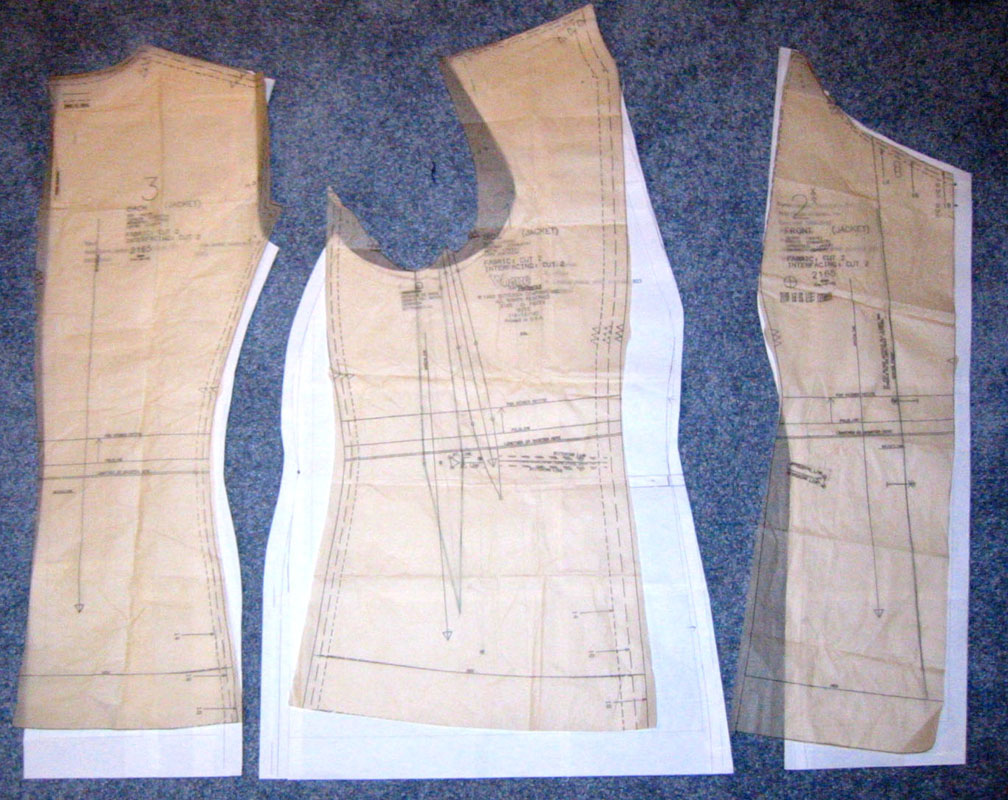
After working with the pattern for awhile, I made a muslin. I was very pleased with the fit. I needed to shape in the front princess seam, and deepen the armhole. I also decided to move the back princess seams away from the center back to match the Karan better. The photo at right shows the original princess seam taped shut, and the marking for cutting the new seamline with the waist dart transferred to it.
Final modified torso pattern
Here are the final torso pieces. You can see the original back princess seam has been taped shut and moved to the right, and that I moved the angled underarm side seam dart to be straighter. I transferred the pocket and buttonhole markings from the original pattern.
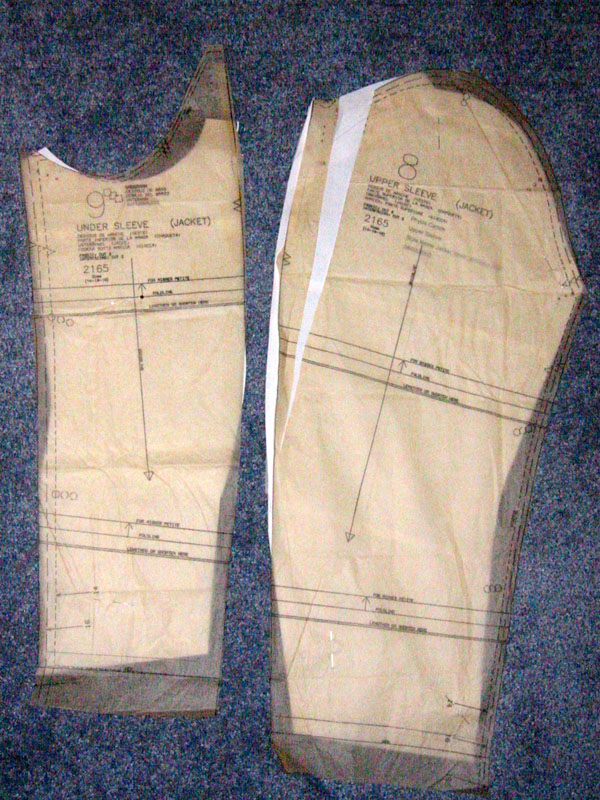
Final sleeve pattern
I cut the sleeve using these two pieces. The sleeve seem a bit full, but I'm sure I'll be glad to have the room when I wear this over a long-sleeved blouse.
For the lining, I cut the sleeve and jacket pieces like the outer pieces, except I excluded the hem allowance, and I adjusted for the front and back neckline facings. The collar and welt pockets were cut from the original tissue.
Final pattern with karen original laid on top
This photo shows the difference between the original pattern and the final custom-fitted pattern. I'm wondering how I was ever able to fit myself using a commercial pattern before! The fit only needed minor tweaking as I sewed it, except that I took two inches out of the side back seams after I got it all finished!